Перейти к основному содержанию

Google Pixel 3a Plastic Midframe Replacement

Абсолютно необходимое руководство
Это руководство предназначено только для использования в качестве обязательного условия для других руководств. Оно не полностью само по себе.

Выберете то, что вам нужно

  1. Google Pixel 3a Plastic Midframe Replacement, Plastic Midframe: шаг 1, изображение 1 из 1
    Инструмент, используемый на этом этапе:
    Magnetic Project Mat
    $19.95
    Купить
    • Remove the fourteen T3 screws of the following lengths securing the plastic midframe:

    • Twelve 4.3 mm silver T3 screws

    • Two 4.3 mm black T3 screws

    • Throughout this repair, keep track of each screw and make sure it goes back exactly where it came from.

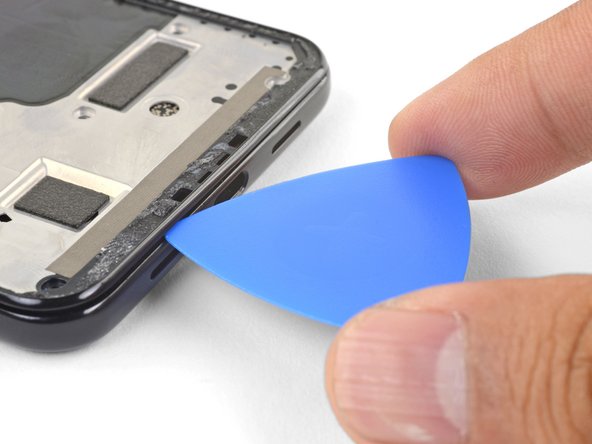
  2. Google Pixel 3a Plastic Midframe Replacement: шаг 2, изображение 1 из 3 Google Pixel 3a Plastic Midframe Replacement: шаг 2, изображение 2 из 3 Google Pixel 3a Plastic Midframe Replacement: шаг 2, изображение 3 из 3
    • The midframe is still held in place by plastic clips.

    • Insert an opening pick into frame seam at the bottom of the phone. This seam sits between the plastic midframe and the back cover.

    • Slide the pick along the seam to release the clips holding the plastic midframe.

  3. Google Pixel 3a Plastic Midframe Replacement: шаг 3, изображение 1 из 3 Google Pixel 3a Plastic Midframe Replacement: шаг 3, изображение 2 из 3 Google Pixel 3a Plastic Midframe Replacement: шаг 3, изображение 3 из 3
    • Slide the opening pick along the left and right edges of the phone to release the midframe clips.

    • Lift the bottom edge of the plastic midframe up but do not remove the midframe. The midframe is still tethered to the phone by the fragile proximity sensor cable at the top edge.

    • To reinstall the plastic midframe, align the midframe to the back cover, and squeeze the perimeter of the phone with your fingers to snap the clips back into position.

  4. Google Pixel 3a Plastic Midframe Replacement: шаг 4, изображение 1 из 3 Google Pixel 3a Plastic Midframe Replacement: шаг 4, изображение 2 из 3 Google Pixel 3a Plastic Midframe Replacement: шаг 4, изображение 3 из 3
    • Use the point of a spudger to carefully pry up and disconnect the proximity sensor connector from the motherboard.

    • Your proximity sensor connector may have automatically disconnected itself when you lifted the midframe.

    • Remove the plastic midframe.

  5. Google Pixel 3a Plastic Midframe Replacement: шаг 5, изображение 1 из 3 Google Pixel 3a Plastic Midframe Replacement: шаг 5, изображение 2 из 3 Google Pixel 3a Plastic Midframe Replacement: шаг 5, изображение 3 из 3
    • This step shows how to reconnect the proximity sensor during re-assembly.

    • Align the top edge of the plastic midframe with the phone.

    • Use the point of a spudger to carefully align and push the proximity sensor connector onto the motherboard socket.

    • This takes a bit of patience and finesse. Once you have the connector in place, you can also use a finger to gently press the connector onto the socket.

    • Alternatively, you can remove the proximity sensor from the midframe to reattach it to the motherboard first.

    • Use the point of a spudger to carefully pry the proximity sensor out of its recess on the midframe. The sensor is lightly adhered to the midframe.

    • Remove the sensor from the midframe. Attach the sensor connector onto its motherboard socket.

    • Thread the sensor cable through the midframe and reposition the sensor in the recess. Press down with your finger to adhere the sensor back onto the midframe.

Заключение

To reassemble your device, follow these instructions in reverse order.

Arthur Shi

Участник с: 01/03/18

252 678 Репутация

Автор 526 руководств

Команда

iFixit Участник iFixit

Staff

135 членов

Автор 16 767 руководств

0 Комментариев

Добавить комментарий

Просмотр статистики:

За последние 24часов: 0

За последние 7 дней: 0

За последние 30 дней: 0

За всё время: 100