Перейти к основному содержанию

Google Pixelbook Go Motherboard Replacement

Выберете то, что вам нужно

  1. Google Pixelbook Go Motherboard Replacement, Back Panel: шаг 1, изображение 1 из 2 Google Pixelbook Go Motherboard Replacement, Back Panel: шаг 1, изображение 2 из 2
    • Flip the device so that the back is facing up.

    • Peel the rubber stoppers off the top and bottom of the device.

  2. Google Pixelbook Go Motherboard Replacement: шаг 2, изображение 1 из 2 Google Pixelbook Go Motherboard Replacement: шаг 2, изображение 2 из 2
    • Remove ten 3 mm screws from around the edge of the back panel using a T5 Torx screwdriver.

  3. Google Pixelbook Go Motherboard Replacement: шаг 3, изображение 1 из 3 Google Pixelbook Go Motherboard Replacement: шаг 3, изображение 2 из 3 Google Pixelbook Go Motherboard Replacement: шаг 3, изображение 3 из 3
    • Use an iFixit opening tool to pry up the back panel cover.

    • There is an orange ribbon cable that connects the cover to the base, so don't separate the two pieces completely.

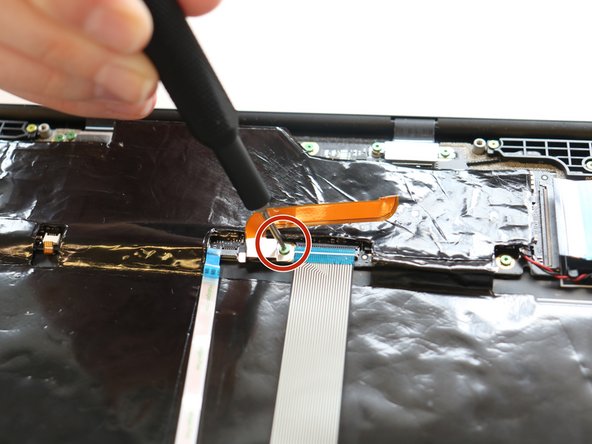
    • Remove the single 2 mm screw using a Torx T3 screwdriver.

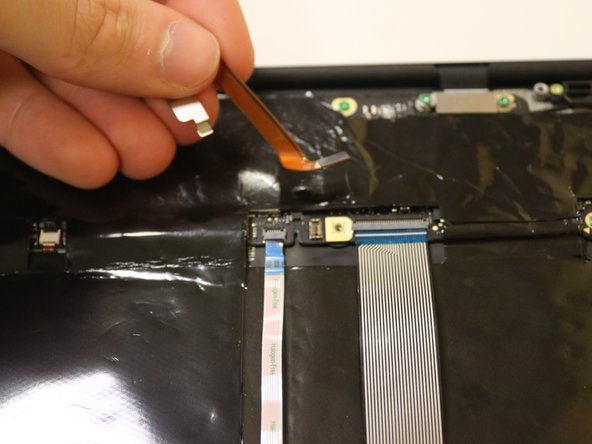
    • Disconnect the orange cable from the base of the device.

  4. Google Pixelbook Go Motherboard Replacement: шаг 4, изображение 1 из 1
    • Insert wisdom here.

  5. Google Pixelbook Go Motherboard Replacement, Motherboard: шаг 5, изображение 1 из 1
    • Remove the seven 2.0 mm screws using a T3 Torx screwdriver.

  6. Google Pixelbook Go Motherboard Replacement: шаг 6, изображение 1 из 3 Google Pixelbook Go Motherboard Replacement: шаг 6, изображение 2 из 3 Google Pixelbook Go Motherboard Replacement: шаг 6, изображение 3 из 3
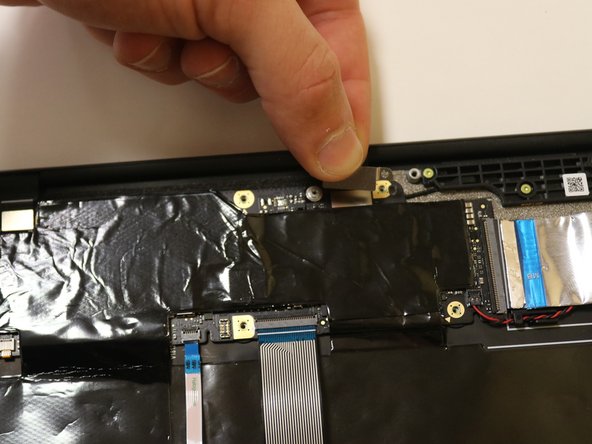
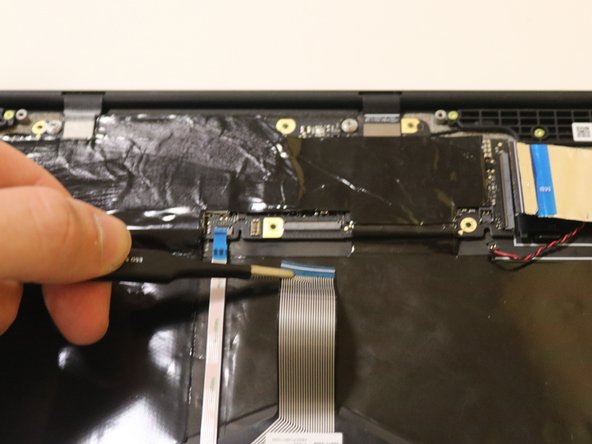
    • If they didn't fall off already, remove the small, metal casings at the top of your Pixelbook Go.

    • Both pieces are different. Be mindful of which piece goes to which side, or refer back to this step.

  7. Google Pixelbook Go Motherboard Replacement: шаг 7, изображение 1 из 3 Google Pixelbook Go Motherboard Replacement: шаг 7, изображение 2 из 3 Google Pixelbook Go Motherboard Replacement: шаг 7, изображение 3 из 3
    Инструмент, используемый на этом этапе:
    Tweezers
    $4.99
    Купить
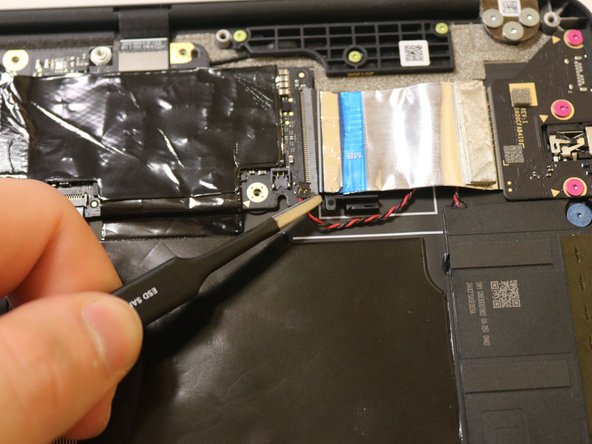
    • Disconnect the blue and red wiring cable using the needle nose tweezers. Grab as close to the connection as you can, and tug in an upwards motion.

    • Do this to both sides.

  8. Google Pixelbook Go Motherboard Replacement: шаг 8, изображение 1 из 3 Google Pixelbook Go Motherboard Replacement: шаг 8, изображение 2 из 3 Google Pixelbook Go Motherboard Replacement: шаг 8, изображение 3 из 3
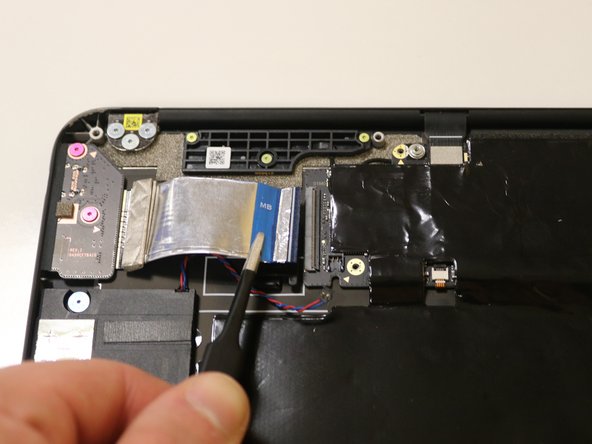
    • Detach the left-hand side, wide ribbon by pulling away from the connection itself. Grab as close as you can to the connection using your spudger.

    • This part may require additional force, but be mindful not to snap it.

  9. Google Pixelbook Go Motherboard Replacement: шаг 9, изображение 1 из 2 Google Pixelbook Go Motherboard Replacement: шаг 9, изображение 2 из 2
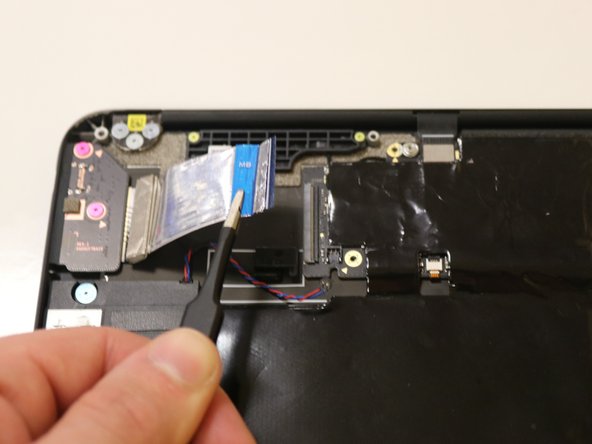
    • Similarly, detach the right-hand side, flat ribbon by pulling away from the connection.

  10. Google Pixelbook Go Motherboard Replacement: шаг 10, изображение 1 из 2 Google Pixelbook Go Motherboard Replacement: шаг 10, изображение 2 из 2
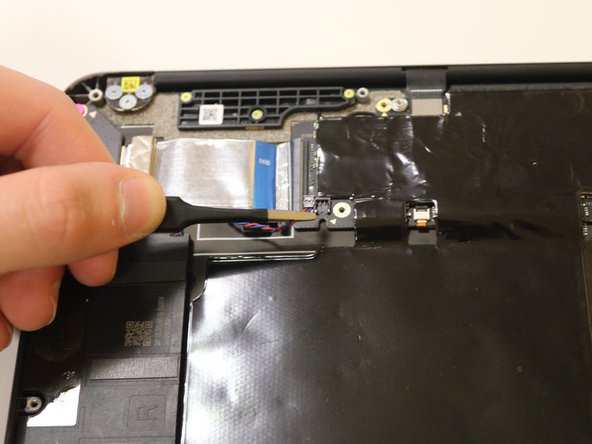
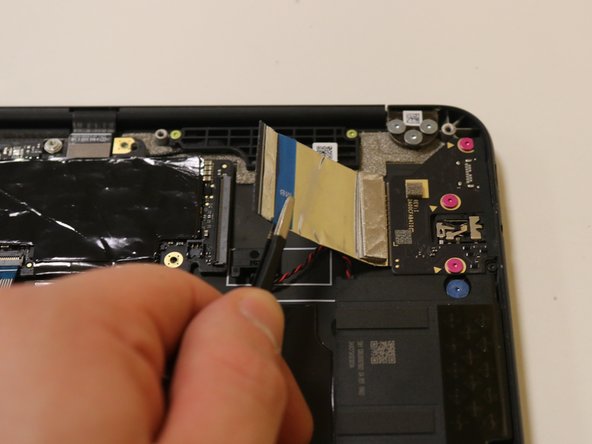
    • Detach the thin, flat cable in the middle using your spudger or by gently pulling with your hand near the connection itself.

  11. Google Pixelbook Go Motherboard Replacement: шаг 11, изображение 1 из 2 Google Pixelbook Go Motherboard Replacement: шаг 11, изображение 2 из 2
    • Detach the wider, middle cable using the same steps as before. Pull away from the connection, grabbing as close to the connection as you can.

  12. Google Pixelbook Go Motherboard Replacement: шаг 12, изображение 1 из 2 Google Pixelbook Go Motherboard Replacement: шаг 12, изображение 2 из 2
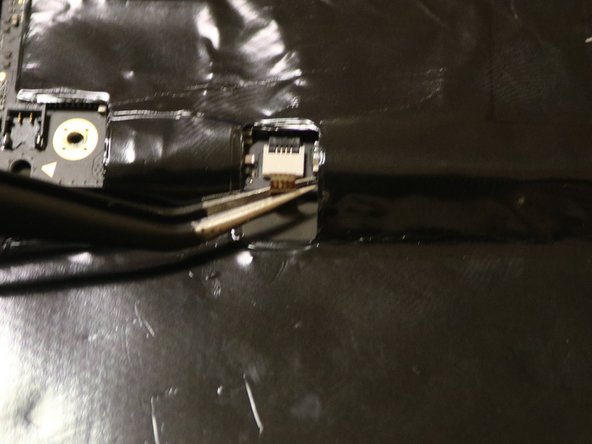
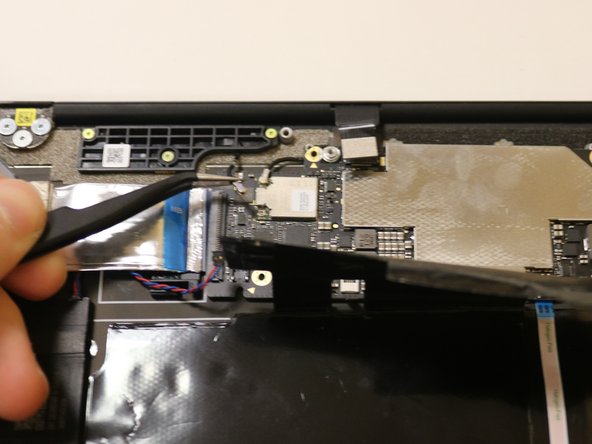
    • Detach the small, copper colored cable from the motherboard. Since this cable is so small, it will require needle-nose tweezers.

  13. Google Pixelbook Go Motherboard Replacement: шаг 13, изображение 1 из 3 Google Pixelbook Go Motherboard Replacement: шаг 13, изображение 2 из 3 Google Pixelbook Go Motherboard Replacement: шаг 13, изображение 3 из 3
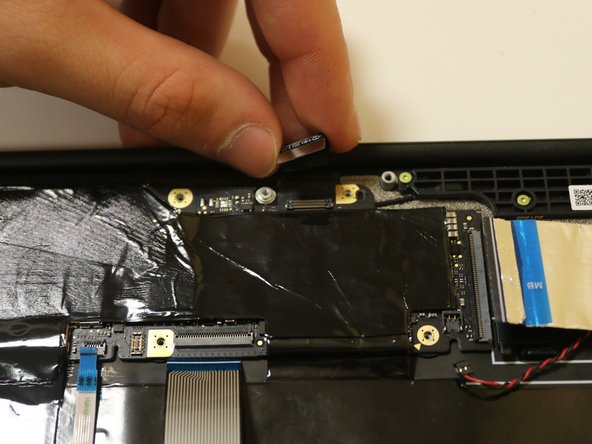
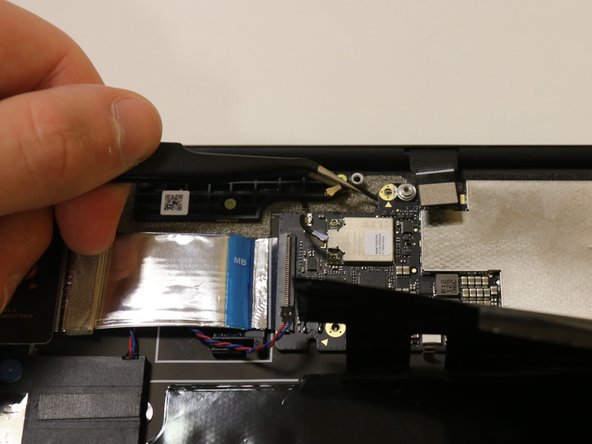
    • By hand, disconnect the top two clips gently. Although you want to detach these clips from the motherboard, these clips will remain attached on the reverse end to the base.

  14. Google Pixelbook Go Motherboard Replacement: шаг 14, изображение 1 из 3 Google Pixelbook Go Motherboard Replacement: шаг 14, изображение 2 из 3 Google Pixelbook Go Motherboard Replacement: шаг 14, изображение 3 из 3
    • Gently peel back the adhesive plastic covering towards the main body.

    • Avoid ripping the plastic covering as this is easy to do.

  15. Google Pixelbook Go Motherboard Replacement: шаг 15, изображение 1 из 3 Google Pixelbook Go Motherboard Replacement: шаг 15, изображение 2 из 3 Google Pixelbook Go Motherboard Replacement: шаг 15, изображение 3 из 3
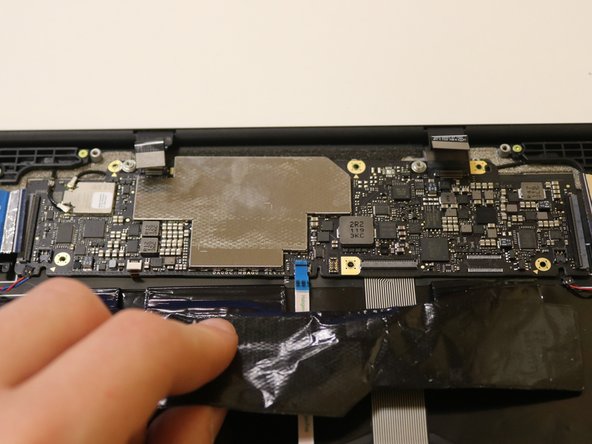
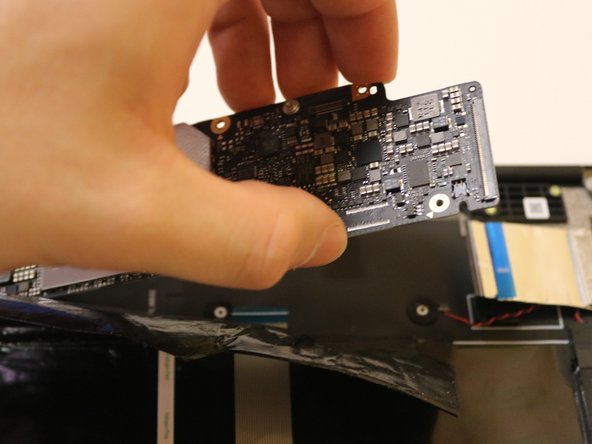
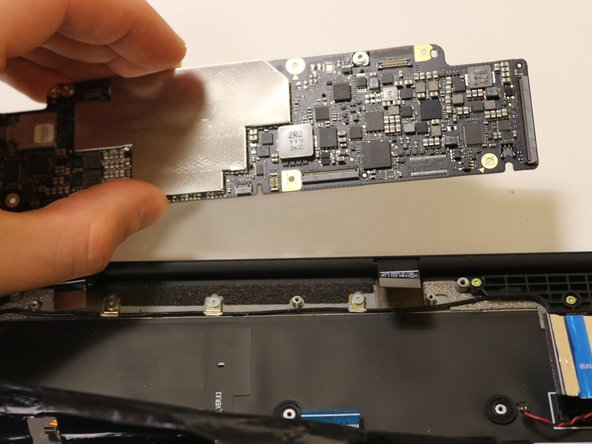
    • Detach the final two clips attached to the motherboard using the needle nose tweezers, located at the top left of the motherboard.

  16. Google Pixelbook Go Motherboard Replacement: шаг 16, изображение 1 из 3 Google Pixelbook Go Motherboard Replacement: шаг 16, изображение 2 из 3 Google Pixelbook Go Motherboard Replacement: шаг 16, изображение 3 из 3
    • Remove the motherboard by gently lifting with your hands.

Заключение

To reassemble your device, follow these instructions in reverse order.

Еще один человек закончил это руководство.

Hayden McGrory

Участник с: 03/01/23

305 Репутация

1 руководство автора

Команда

University of Delaware, Team 11-1, McGuire Spring 2023 Участник University of Delaware, Team 11-1, McGuire Spring 2023

UD-MCGUIRE-S23S11G1

5 членов

Автор 4 руководств

0 Комментариев

Добавить комментарий

Просмотр статистики:

За последние 24часов: 0

За последние 7 дней: 6

За последние 30 дней: 20

За всё время: 487