Введение
If your HP 15-ac121dx laptop is not showing available networks, dropping connections, or if internet speeds are slow, use this guide to replace the Wifi card.
The Wifi card is a device that allows access to a wireless network to establish internet or file transfers. A faulty Wifi card will have problems connecting to a wireless network.
Before using this guide, be sure to take the necessary troubleshooting steps for connecting to the wireless network, and to verify that the lack of connection is due to hardware failure. Also, be sure that the laptop is within range of the wireless network by connecting a different device to it if possible.
After using this guide, you should be able to establish a connection to a wireless network.
Выберете то, что вам нужно
-
-
Remove all external devices from the computer.
-
Remove the charging cord from the computer.
-
-
-
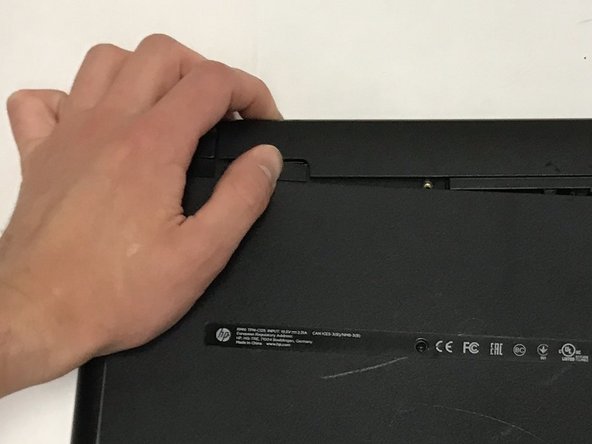
To remove the battery, slide the left slider on the back to the unlocked position.
-
-
-
-
Push the right slider inwards.
-
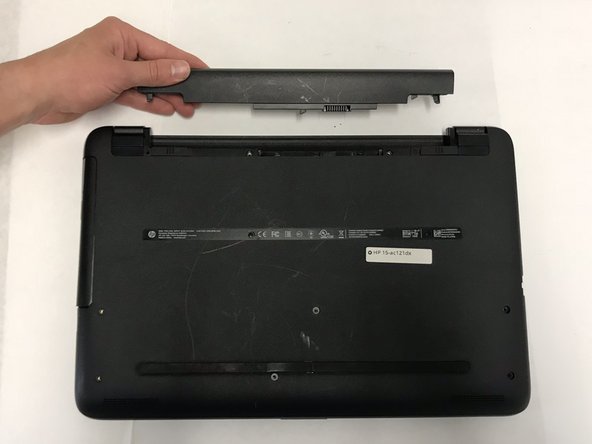
Remove the battery out by pulling straight out and to the right.
-
-
-
Place the laptop with the back panel facing up and the battery compartment facing away from you.
-
Using a spudger, carefully remove the rubber feet on both sides of the battery compartment.
-
-
-
Using a Phillips #000 screwdriver, remover the ten 7mm screws on the back panel.
-
Using the same screwdriver, remove the two 5mm Phillips #000 screws on both sides of the battery compartment.
-
-
-
With the same orientation as the previous step, locate the bottom left corner.
-
Using a plastic opening tool, carefully pry off and remove the back panel.
-
-
-
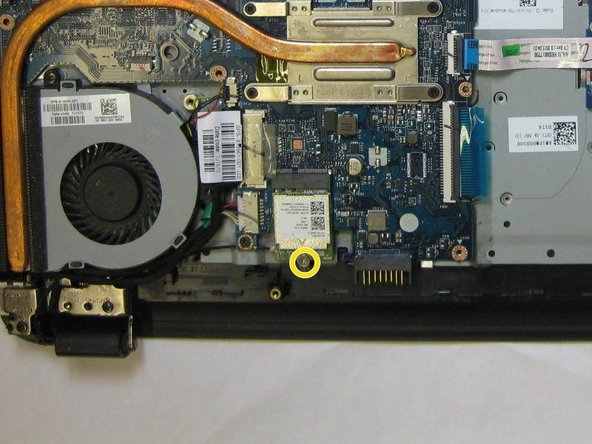
With the back panel removed, orient the laptop with the fan located in the bottom left corner.
-
Locate the Wifi card.
-
Using a Phillips #000 screwdriver, remove the 2mm screw securing the Wifi card in place.
-
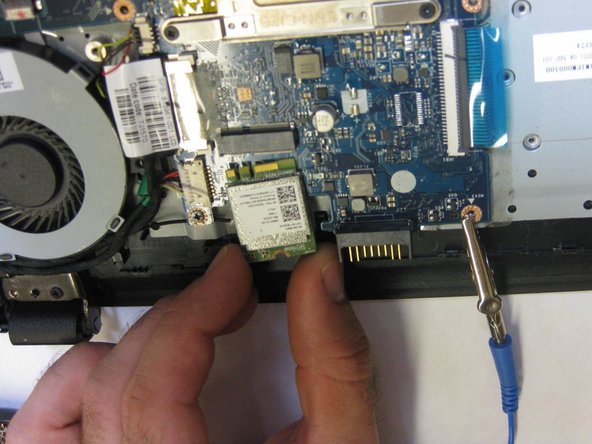
Carefully remove the Wifi card.
-


To reassemble your device, follow these instructions in reverse order.
To reassemble your device, follow these instructions in reverse order.
Команда

The Citadel Military College of South Carolina, Team S3-G9, Eggleston Fall 2019 Участник The Citadel Military College of South Carolina, Team S3-G9, Eggleston Fall 2019
CMCSC-EGGLESTON-F19S3G9
3 членов
Автор 4 руководств