Перейти к основному содержанию

HP 15-ay014dx Motherboard Replacement

Выберете то, что вам нужно

  1. HP 15-ay014dx Motherboard Replacement, Battery: шаг 1, изображение 1 из 1
    • Disconnect device from power source and power down.

  2. HP 15-ay014dx Motherboard Replacement: шаг 2, изображение 1 из 1
    • With the device turned upside down, use your index fingers to push the battery latches in towards each other.

  3. HP 15-ay014dx Motherboard Replacement: шаг 3, изображение 1 из 1
    • The latch on your left will stay at the inward position, while the latch on the right will slide back out.

    • Gently grasp the battery and pull it back away from the device and yourself.

  4. HP 15-ay014dx Motherboard Replacement, Optical Drive: шаг 4, изображение 1 из 1
    • Close the laptop and lay it down with the bottom facing up.

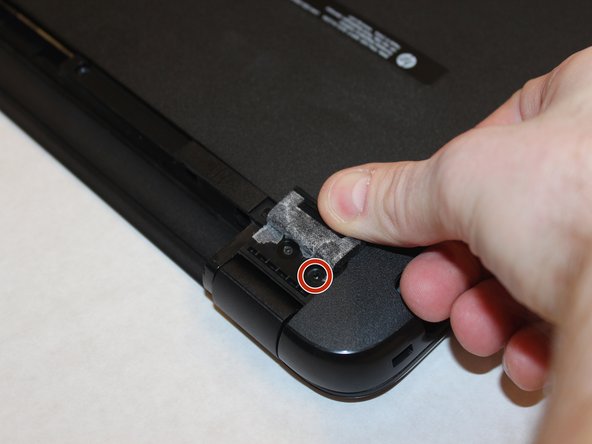
    • Using a size #00 Phillips screw drive remove the screw holding in the optical drive.

  5. HP 15-ay014dx Motherboard Replacement: шаг 5, изображение 1 из 1
    • Grip the optical drive and gently pull it out.

  6. HP 15-ay014dx Motherboard Replacement, RAM: шаг 6, изображение 1 из 1
    • Remove the 11 screws holding the body of the laptop together with a size #00 Phillips screwdriver.

  7. HP 15-ay014dx Motherboard Replacement: шаг 7, изображение 1 из 2 HP 15-ay014dx Motherboard Replacement: шаг 7, изображение 2 из 2
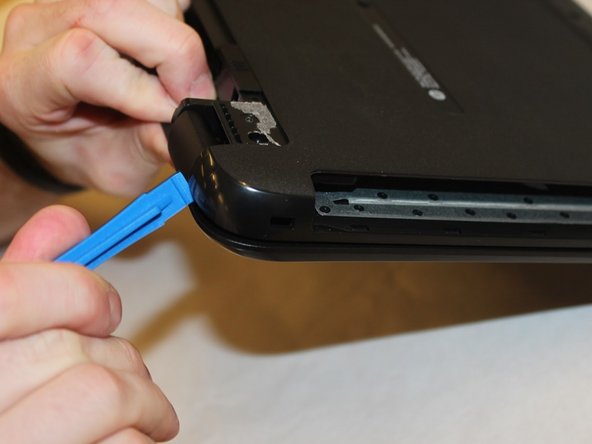
    • Use the spudger to press the tabs in the back of the computer. Carefully remove the back of the laptop by prying around the sides using the plastic opening tool.

  8. HP 15-ay014dx Motherboard Replacement: шаг 8, изображение 1 из 2 HP 15-ay014dx Motherboard Replacement: шаг 8, изображение 2 из 2
    • Undo the clips holding the RAM in place using the plastic opening tool.

  9. HP 15-ay014dx Motherboard Replacement: шаг 9, изображение 1 из 1
    • Carefully pull out the RAM from the motherboard.

  10. HP 15-ay014dx Motherboard Replacement, Hard Drive Disk: шаг 10, изображение 1 из 2 HP 15-ay014dx Motherboard Replacement, Hard Drive Disk: шаг 10, изображение 2 из 2
    • Remove the highlighted screws holding the body of the laptop together with a size #00 Phillips screwdriver.

  11. HP 15-ay014dx Motherboard Replacement: шаг 11, изображение 1 из 3 HP 15-ay014dx Motherboard Replacement: шаг 11, изображение 2 из 3 HP 15-ay014dx Motherboard Replacement: шаг 11, изображение 3 из 3
    • Using the spudger, push in the tabs in the back that hold the body together. Carefully pry the body apart by working the spudger around the body.

    • Pull the back cover off.

  12. HP 15-ay014dx Motherboard Replacement: шаг 12, изображение 1 из 3 HP 15-ay014dx Motherboard Replacement: шаг 12, изображение 2 из 3 HP 15-ay014dx Motherboard Replacement: шаг 12, изображение 3 из 3
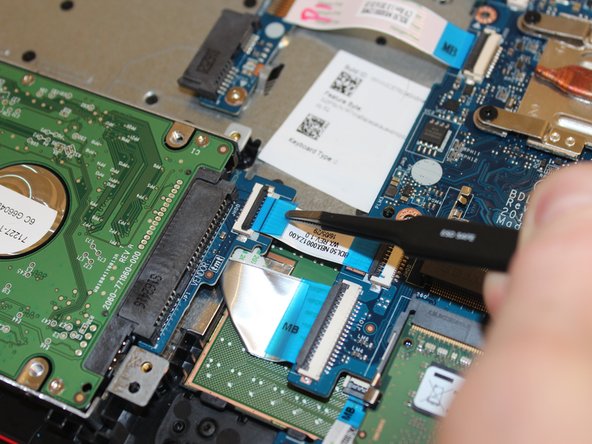
    • Pry up on the clamp holding the SATA power ribbon using the plastic opening tool.

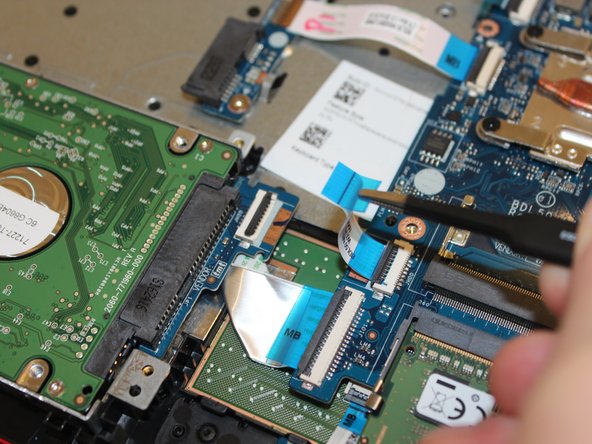
    • Pull out the SATA power ribbon using the tweezers.

  13. HP 15-ay014dx Motherboard Replacement: шаг 13, изображение 1 из 2 HP 15-ay014dx Motherboard Replacement: шаг 13, изображение 2 из 2
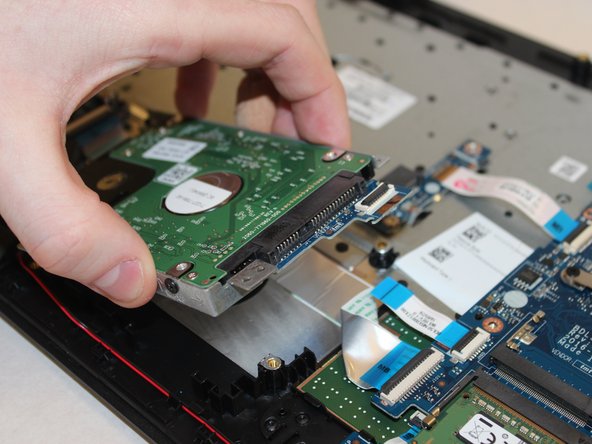
    • Remove the highlighted screws holding the hard drive to the body using the Philips #00 screwdriver.

    • Remove the hard drive.

  14. HP 15-ay014dx Motherboard Replacement: шаг 14, изображение 1 из 1
    • Remove the 4 screws holding the hard drive to the hard drive cage using the Philips #00 screwdriver.

  15. HP 15-ay014dx Motherboard Replacement, Wireless Card: шаг 15, изображение 1 из 1
    • Remove the 11 screws holding the body of the laptop together with a size #00 Phillips screwdriver.

  16. HP 15-ay014dx Motherboard Replacement: шаг 16, изображение 1 из 2 HP 15-ay014dx Motherboard Replacement: шаг 16, изображение 2 из 2
    • Using the spudger, push in the tabs in the back that hold the body together. Carefully pry the body apart by working the spudger around the body.

  17. HP 15-ay014dx Motherboard Replacement: шаг 17, изображение 1 из 2 HP 15-ay014dx Motherboard Replacement: шаг 17, изображение 2 из 2
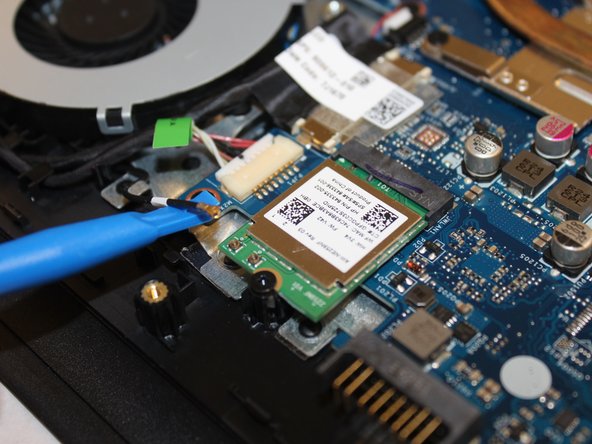
    • Using the spudger, carefully pry the wire connecting the wireless card to the motherboard off of it.

  18. HP 15-ay014dx Motherboard Replacement: шаг 18, изображение 1 из 1
    • Using the size #00 Phillips screwdriver remove the single screw holding it in place.

  19. HP 15-ay014dx Motherboard Replacement: шаг 19, изображение 1 из 1
    • carefully pull the card of its slot.

  20. HP 15-ay014dx Motherboard Replacement, Motherboard: шаг 20, изображение 1 из 3 HP 15-ay014dx Motherboard Replacement, Motherboard: шаг 20, изображение 2 из 3 HP 15-ay014dx Motherboard Replacement, Motherboard: шаг 20, изображение 3 из 3
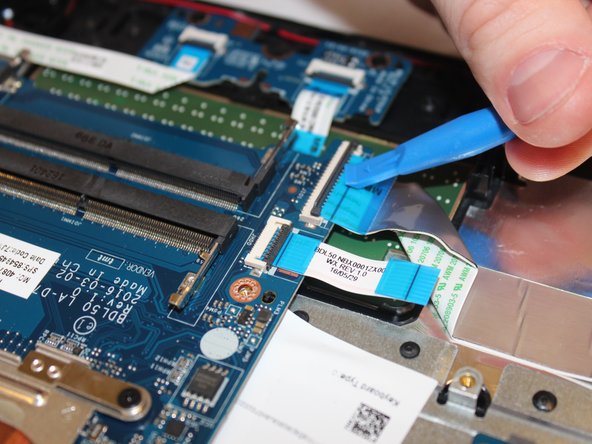
    • Disconnect all ribbon connectors by flipping up the black tabs and gently pulling them out.

    • Disconnect​ ​the​ ​speakers​ ​by​ ​gently ​pulling​​ ​the​ ​connector ​out.

    • Disconnect​ ​the​ ​Fan​ ​by​ ​gently ​pulling​​ ​the​ ​connector​ ​out.

    • Disconnect the power by gently pulling the connectors out.

  21. HP 15-ay014dx Motherboard Replacement: шаг 21, изображение 1 из 1
    • Unscrew the five screws securing the motherboards.

  22. HP 15-ay014dx Motherboard Replacement: шаг 22, изображение 1 из 1
    • Gently lift the motherboard up and out of the casing.

Заключение

To reassemble your device, follow these instructions in reverse order.

2 участников успешно повторили данное руководство.

Drake Scoville

Участник с: 09/21/17

533 Репутация

Автор 4 руководств

Команда

Washington State, Team S1-G4, Phelps-Hillen Fall 2017 Участник Washington State, Team S1-G4, Phelps-Hillen Fall 2017

WSU-PHELPS-HILLEN-F17S1G4

6 членов

Автор 7 руководств

0 Комментариев

Добавить комментарий

Просмотр статистики:

За последние 24часов: 0

За последние 7 дней: 3

За последние 30 дней: 11

За всё время: 1,584