Введение
This is a guide on how to replace the Fan and Heat Sink in the HP 15-db0015dx laptop. Use this guide to replace or upgrade the fan and heat sink. You may need to upgrade or replace the fan and heat sink if the computer is running too hot, smoking, making excessive noise during compute-intensive operations, or under-performing.
In replacing the heatsink, you will need to separate it from the CPU, which will require a cleaning and reapplication of the thermal paste. See this Thermal Paste Application guide for details on how to replace your thermal paste correctly to maintain proper thermal conductivity. Old thermal paste can cause issues with heat uptake by the heatsink, so just by replacing this thermal paste, you may notice better heat mitigation performance from your device.
Выберете то, что вам нужно
-
-
Power off the device before starting.
-
Remove the rubber strips that hide the screws using the spudger.
-
Flip the device and unscrew the eleven screws with a Phillips #0 screwdriver.
-
-
-
Use the spudger tool to pry open the back cover.
-
Lift the back panel to access the inside.
-
Slide the CD drive to the left, and remove.
-
-
-
-
Unscrew the three battery screws with a Phillips #0 screwdriver.
-
Lift the battery up, disconnecting the connector first.
-
Push forward and remove the battery.
-
-
-
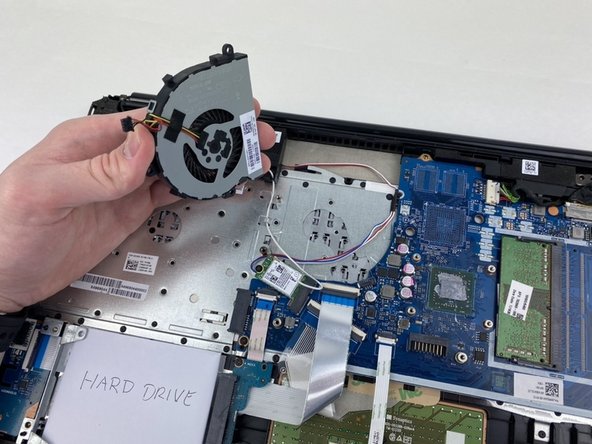
Lift the fan upward slightly.
-
Disconnect the fan cable by pinching on the sides of the connectors and sliding it out.
-
Lift the rest of the way to remove the fan.
-
-
-
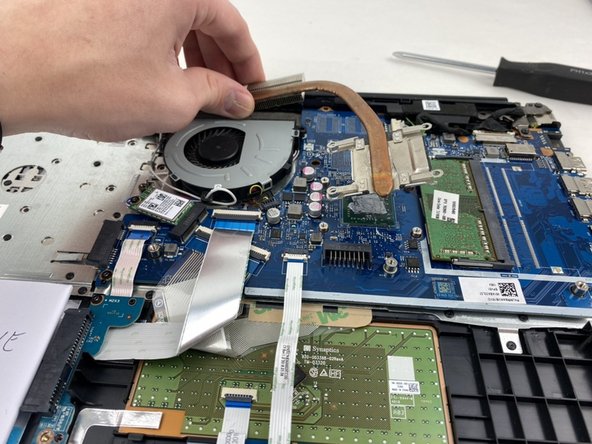
Remove the four screws with a Phillips #00 screwdriver.
-
Lift and remove the heat sink.
-


To reassemble your device, follow these instructions in reverse order.
To reassemble your device, follow these instructions in reverse order.
Отменить: Я не выполнил это руководство.
Еще один человек закончил это руководство.

Команда

Embry-Riddle Aeronautical University, Team S2-G5, Watkins Spring 2020 Участник Embry-Riddle Aeronautical University, Team S2-G5, Watkins Spring 2020
ERAU-WATKINS-S20S2G5
5 членов
Автор 8 руководств
3 Комментариев
It's best to remove the material on both the CPU side and the attached fan side.