Введение
This guide will assist you in replacing the hard drive. You will need to replace the hard drive if the laptop has bootup failures, frequent shutdowns, and if you hear clicking or grinding noises from the hard drive.
Выберете то, что вам нужно
-
-
Flip the laptop so you can see the serial number and the four 7mm screws in all the corners.
-
Click the hinges by pushing them inward, which are located at the top of the laptop.
-
Remove the battery by pulling it out.
-
-
-
Remove the two pieces of black tape that are each covering a 7mm screw at the top corners of the laptop.
-
Remove the fourteen 7mm JIS #1 screws.
-
-
-
-
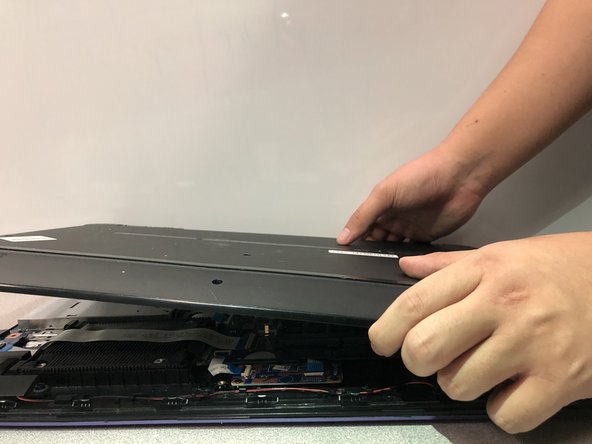
Lift the bottom cover of the laptop with a metal spudger by wedging the sides first and going all around.
-
-
-
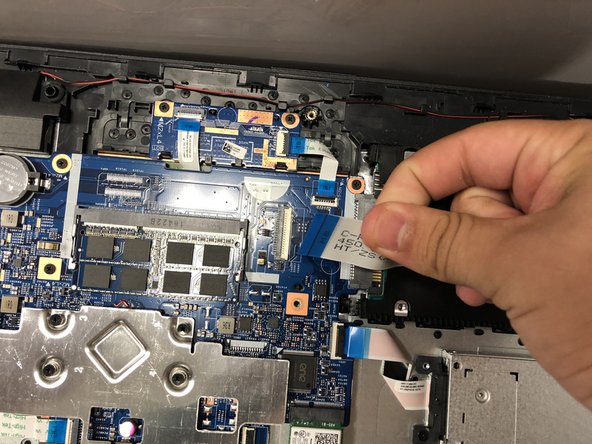
Disconnect the blue ends of the white ribbon cable by pulling the blue ends out of the connector.
-
-
-
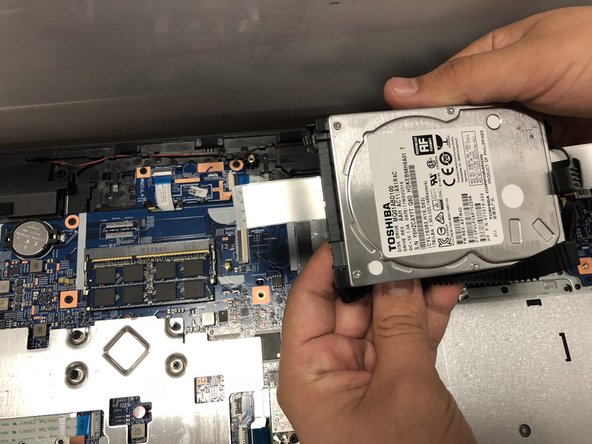
Lift the black rubber cover containing the hard drive by lifting the right side of the rubber cover.
-


To reassemble your device, follow these instructions in reverse order.
To reassemble your device, follow these instructions in reverse order.
Отменить: Я не выполнил это руководство.
Еще один человек закончил это руководство.
Команда

University of North Texas, Team S3-G1, Raign Fall 2018 Участник University of North Texas, Team S3-G1, Raign Fall 2018
UNT-RAIGN-F18S3G1
4 членов
Автор 5 руководств