Введение
This is a replacement guide for the HP Chromebook 11 G5 battery. The main purpose of the steps below is to show you how to replace the internal battery. If these steps are followed carefully and correctly the battery should be replaced easily.
Выберете то, что вам нужно
-
-
Remove four large rubber pads from the bottom of the device to reveal screws using the pointed end of a spudger.
-
-
-
Remove two smaller rubber pads from the bottom of the device to reveal screws using the pointed end of a spudger.
-
-
-
-
Wedge the flat-end of a metal spudger between the base of the device and the keyboard assembly while applying downward pressure. Slide the spudger across the entirety of the gap until the two components separate.
-
-
-
Disconnect the two ribbon cables connected to the motherboard by using the pointed end of a spudger to lift the plastic connector lids to allow the ribbon cables to be gently removed by hand.
-
-
-
Remove the two wires from the top of the WLAN module by pulling them gently with a spudger or your hand and snapping the wires out of place.
-
-
-
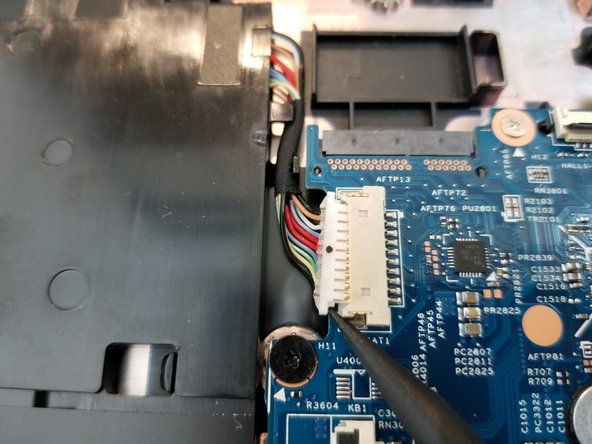
Remove the battery connector by pushing both edges outward using the sharp end of the spudger.
-
-
-
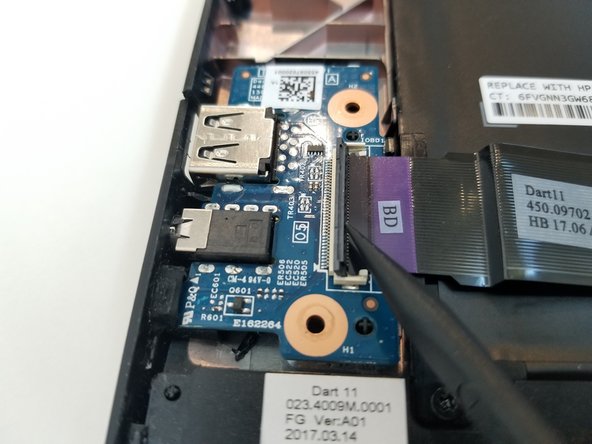
Remove the ribbon cable from the connector board by lifting the cover with the sharp end of the spudger and gently pulling the cable out with your hand.
-
-
-
Remove the two 3mm silver screws from the battery using a Phillips #00 screwdriver.
-
Remove the black 4mm screw with the Phillips #00 screwdriver.
-
Remove the battery by hand.
-


To reassemble your device, follow these instructions in reverse order.
To reassemble your device, follow these instructions in reverse order.
Отменить: Я не выполнил это руководство.
4 участников успешно повторили данное руководство.
Команда

York University, Team S1-G3, Woodhouse Winter 2020 Участник York University, Team S1-G3, Woodhouse Winter 2020
YORK-WOODHOUSE-W20S1G3
3 членов
Автор 5 руководств