Введение
This guide will walk you through the replacement of the trackpad on the HP Chromebook 11-v002dx.
Potential causes for failure include repeated mechanical stress, spillage of liquid into trackpad, etc. Indications of a failed or failing trackpad include loss of trackpad detection or loss of mouse click feature of the trackpad.
Take care when removing the keyboard not to damage data cables connecting the keyboard to the motherboard.
Выберете то, что вам нужно
-
-
Place your laptop bottom up on your work space.
-
Use a Phillips #0 screwdriver to remove the eleven 0.2 mm screws, including the six from underneath the adhesives.
-
-
-
Using a sharp tool, remove the six adhesives from the bottom of your laptop to expose the screwheads underneath. Two of the pads are small and four are larger.
-
-
-
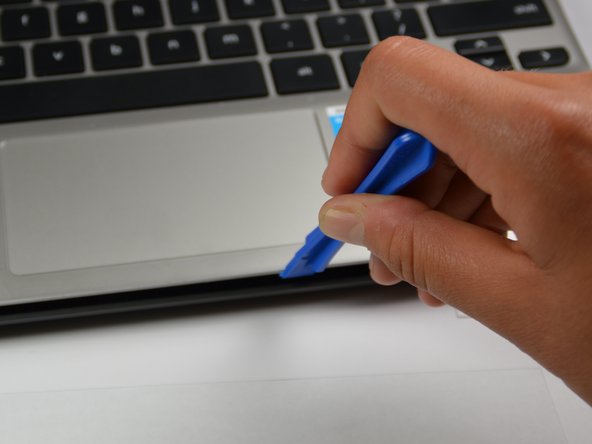
Use a plastic opening tool to loosen the keyboard face from the device.
-
Start prying at one end of the laptop and slowly work your way around so as not to break the keyboard.
-
-
-
-
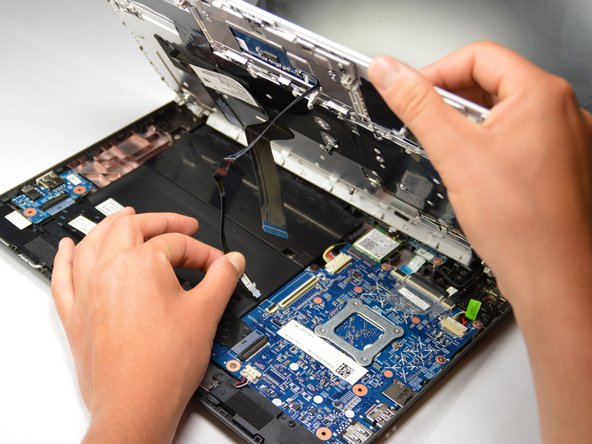
Lift the keyboard so that the inner workings of the laptop are exposed.
-
Gently pull each of the two ribbons connecting the keyboard to the device so that neither ribbon is still connected to the device, only to the keyboard.
-
-
-
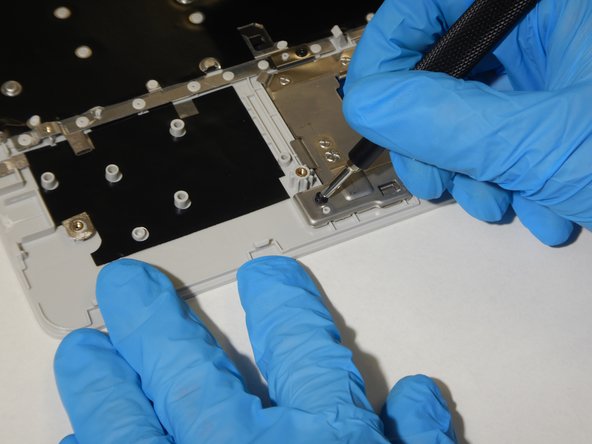
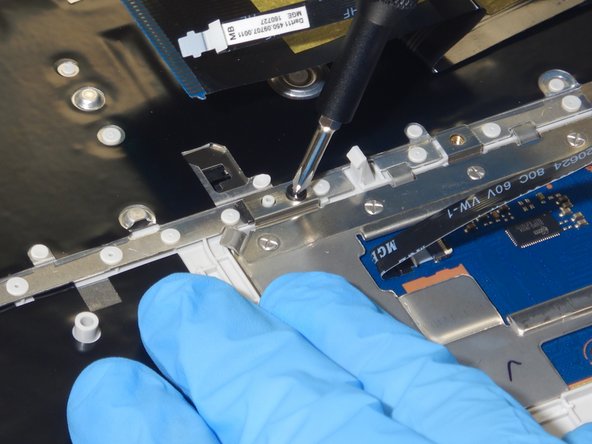
Using the Phillips #0 Screwdriver, remove the four 2.5mm screws on the bottom plate of the trackpad.
-
-
-
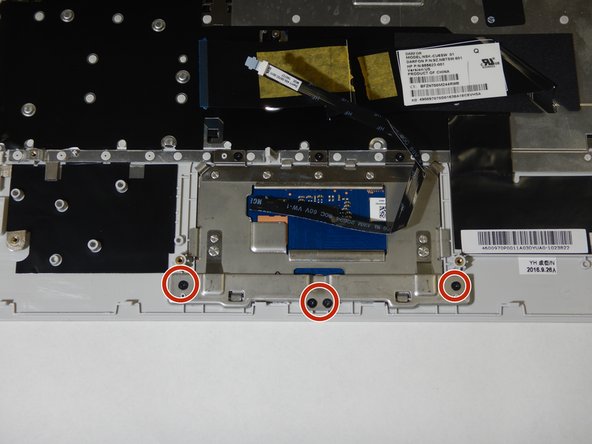
Using the Phillips # 0 Screwdriver, remove the three 2.5mm screws on the top of the trackpad.
-


To reassemble your device, follow these instructions in reverse order.
To reassemble your device, follow these instructions in reverse order.
Команда

The Citadel Military College of South Carolina, Team S3-G7, Eggleston Spring 2021 Участник The Citadel Military College of South Carolina, Team S3-G7, Eggleston Spring 2021
CMCSC-EGGLESTON-S21S3G7
1 член
Автор 3 руководств