Введение
This guide will allow the user to fix the battery in the HP Chromebook 11A G8 EE. In this guide, the used will accomplish steps in order to promptly fix the issue.
The battery powers the Chromebook in order to keep it functioning. You may need to fix your battery when it is only powering on when connected to the charging cable.
Be aware of a swollen battery, as it could catch fire. The signs of a swollen battery are the battery is hot, or has a smell.
Before beginning, make sure you power off your Chromebook, and remove any external power sources.
Выберете то, что вам нужно
-
-
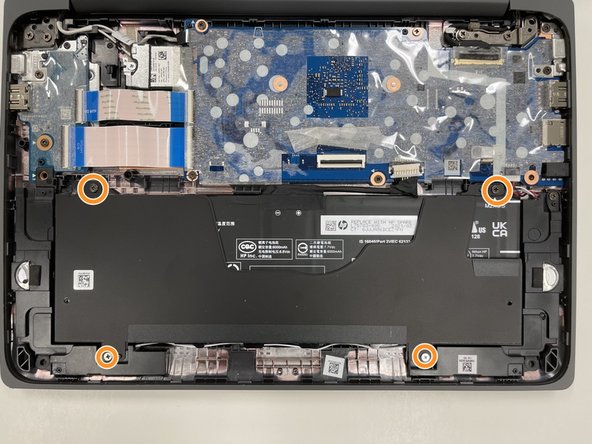
On the bottom of the laptop, remove four 7 mm screw using a Phillips #1 screwdriver.
-
Using the Phillips #1 screwdriver, remove the two remaining 8 mm screws by the hinges.
-
-
-
Flip the laptop over and open up the display.
-
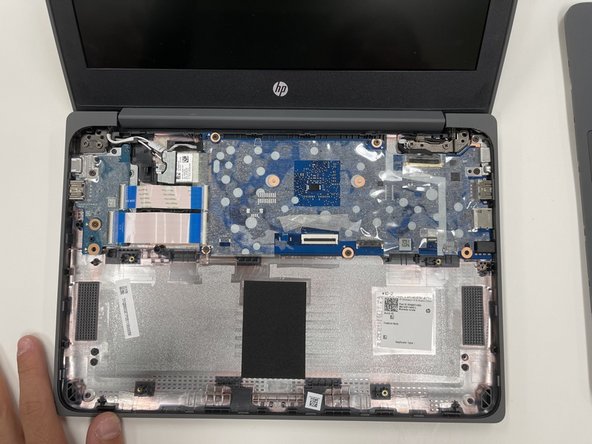
Using the iFixit opening tool, carefully separate the palm rest from the bottom cover by working your way around the perimeter and prying it up.
-
Lift the palm rest of the laptops towards you, away from the screen.
-
-
-
Carefully, lift the keyboard ribbon lock and disconnect the keyboard ribbon from the motherboard.
-
Disconnect the touchpad ribbon from the motherboard, and remove top cover.
-
Remove the keyboard.
-
-
-
-
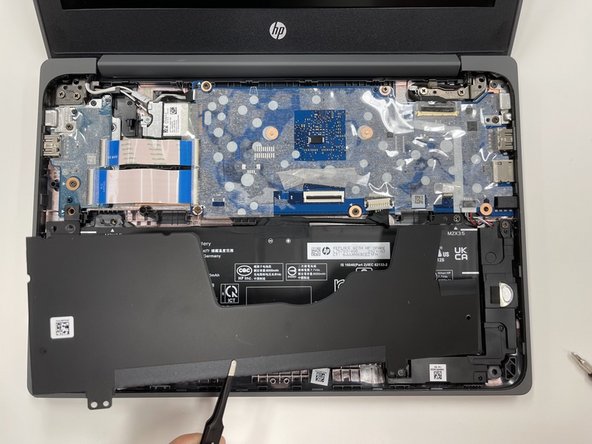
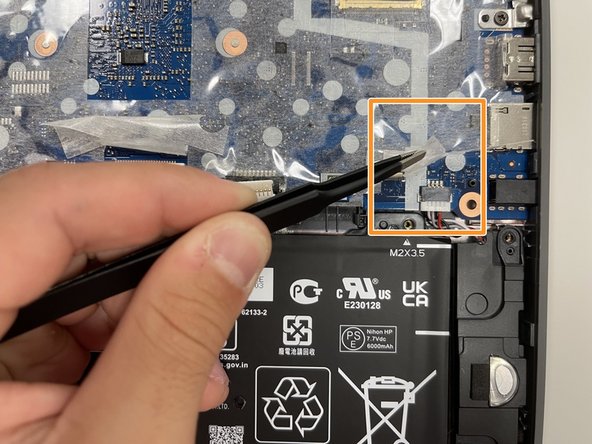
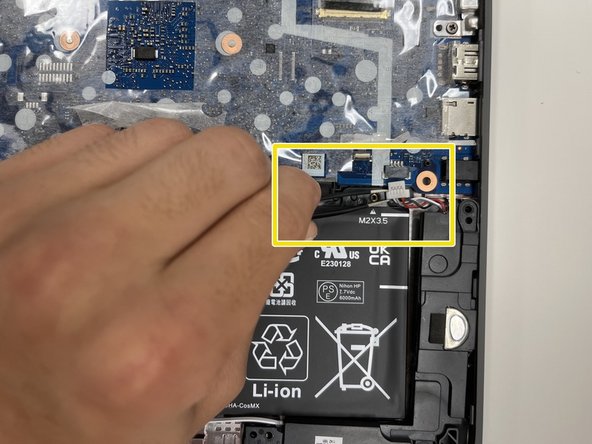
Using the tweezers, carefully disconnect the battery cable from the motherboard.
-
Use the Phillips #0 screwdriver, remove the four 3.5 mm screws that secure the battery cover to the battery.
-
Using the tweezers, carefully remove the battery cover.
-
-
-
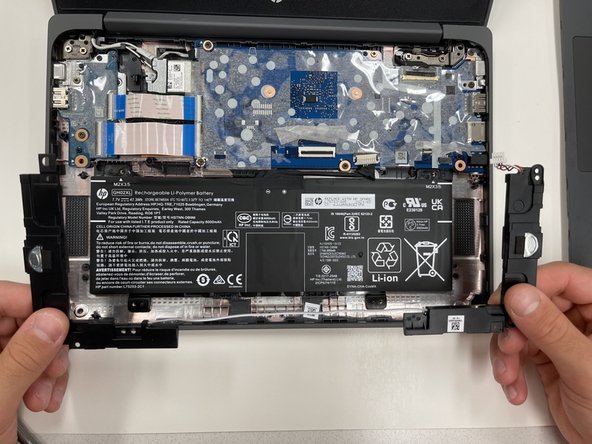
Using the Phillips #1 screwdriver, remove the 3.5 mm screw that secures the speaker to the frame.
-
Peel back the clear sheet.
-
Using the tweezers, carefully disconnect the speaker cable from the motherboard.
-
-
-
Remove the speaker cable from the routing channel on the keyboard.
-
Using your hands, carefully lift the speakers out of the alignment pins, and remove.
-


To reassemble your device, follow these instructions in reverse order.
To reassemble your device, follow these instructions in reverse order.
Отменить: Я не выполнил это руководство.
2 участников успешно повторили данное руководство.
Команда

University of Alabama, Team 2-1, Bedsole Fall 2021 Участник University of Alabama, Team 2-1, Bedsole Fall 2021
UA-BEDSOLE-F21S2G1
4 членов
Автор 7 руководств
Один комментарий
I am literally in school rn this is so easy. Great instructions easy to follow. Chromebooks are very easy to take apart in school because of the fact that the keyboard assembly and trackpad are one piece. 10/10 instructions would do this again.