Введение
Use this guide to replace a faulty battery in your HP Chromebook 14 G3.
The battery is the power source of your Chromebook. A faulty battery can cause your Chromebook to power down irregularly and cause your Chromebook to age faster. If these issues persist then it may cause the Chromebook to not function.
Make sure to troubleshoot your issue before following the guide as replacing the battery may not be the solution.
Power tools are not recommended for this type of repair because an excessive amount of force can break the computer's parts.
Выберете то, что вам нужно
-
-
-
Insert a Jimmy into the space between the frame and the plastic cover and lift gently so that the cover begins to pop up.
-
Do this all around the frame until the entire frame is loose.
-
-
-
With one hand, hold the cover in a way that you can see inside, and with the other, use tweezers and disconnect the large ribbon wire by loosening the black lock and pulling on it until it is loose.
-
-
-
Use tweezers to disconnect the small ribbon wire by loosening the black lock and pulling on it until it is loose.
-
Remove the frame from the laptop.
-
-
-
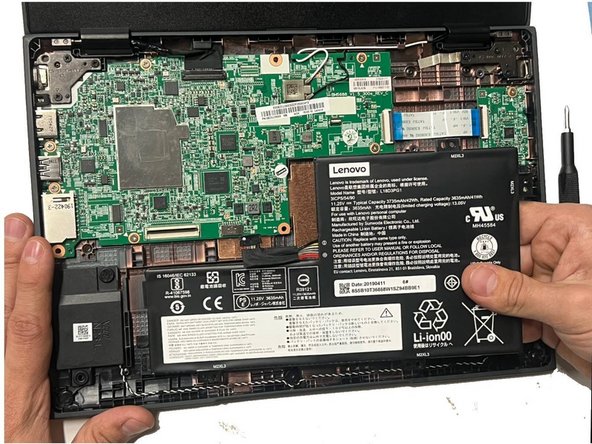
Use tweezers to carefully detach the battery's cable connector from the motherboard.
-
Remove the screws holding the battery in place using a Phillips screwdriver.
-
Remove the battery.
-


To reassemble your device, follow these instructions in reverse order.
To reassemble your device, follow these instructions in reverse order.
Команда

CSU Los Angeles, Team 13-8, Ribeiro Fall 2023 Участник CSU Los Angeles, Team 13-8, Ribeiro Fall 2023
CSULA-RIBEIRO-F23S13G8
3 членов
Автор 1 руководств