Эта версия возможно содержит некорректные исправления. Переключить на последнюю проверенную версию.
Выберете то, что вам нужно
-
Этот шаг не переведен. Помогите перевести
-
Turn the Chromebook upside down, as shown in the first image.
-
Remove the five rubber feet pieces as shown using a spudger.
-
Proceed to remove all exposed 4.2 mm Phillips #1 screws on the bottom of the Chromebook.
-
-
Этот шаг не переведен. Помогите перевести
-
Use a plastic opening tool to split the back panel from the keyboard.
-
Move the opening tool around the sides of the back panel to detach it. Do not fully remove the panel, taking note of the two ribbon cables.
-
-
-
Этот шаг не переведен. Помогите перевести
-
Remove both ribbon cables attaching the separated keyboard to the motherboard.
-
The large black ribbon cable was a tab that should be pried open to loosen the ribbon from its hub. Use the plastic opening tool as shown.
-
Gently pull out the short white ribbon cable out of its hub.
-
-
Этот шаг не переведен. Помогите перевести
-
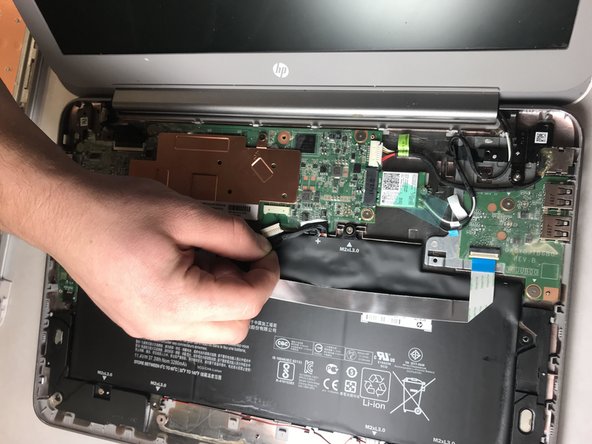
Disconnect the battery cable shown in the first picture before moving on. This can be done with an opening tool if necessary.
-
-
Этот шаг не переведен. Помогите перевести
-
Remove the piece of tape from the top of the Wi-Fi card.
-
Also, unhook the two cables from the card by lifting on the connectors.
-
Remove the single M2XL3 screw from the Wi-Fi card using a Phillips #1 screwdriver.
-
-
Этот шаг не переведен. Помогите перевести
-
Use a plastic opening tool to remove the card from the board. The card is now free to be taken out.
-


Отменить: Я не выполнил это руководство.
Еще один человек закончил это руководство.
Команда

IUPUI, Team S3-G5, Harley Fall 2018 Участник IUPUI, Team S3-G5, Harley Fall 2018
IUPUI-HARLEY-F18S3G5
3 членов
Автор 2 руководств