Введение
We are going to show you how to replace the dead fan in your device.
Выберете то, что вам нужно
-
-
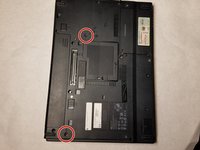
Flip the computer over so the backside is facing you.
-
Using the two prongs that are located in the back, slide the further left prong and the upper right prong to the left as indicated in the image.
-
Slide the battery out.
-
-
-
Flip your device over.
-
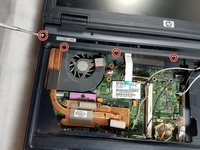
In the center of the bottom of the laptop, there is a panel with two screws. Using the JIS #1 screw head unscrew both.
-
Lift the panel.
-
-
-
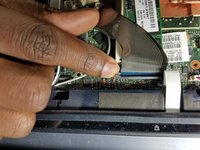
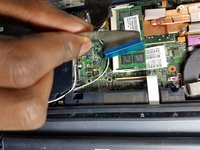
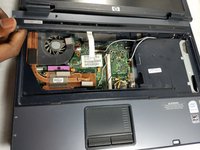
The RAM is held down by two prongs. Gently pull them until the RAM pops out of place.
-
Lift the RAM out of place.
-
-
-
-
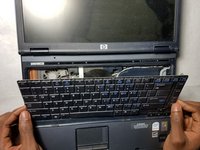
Look for tabs in between esc and f1, f4 and f5, f8 and f9, f12 and scroll.
-
Pull these tabs towards you.
-
-
-
Flip the laptop over and on the back of the center of the keyboard there is a screw with a rectangle beside it that looks like a keyboard. Remove this Phillips 5mm screw and another similar screw in the back top left of the keyboard.
-
Then carefully lift the keyboard out of place with your fingernails or a plastic opening tool.
-
-
-
There will be a metallic film attached to the keyboard from the motherboard. A black latch runs along the film keeping it in place. Lift the latch and detach the film; remove it to fully remove the keyboard.
-
-
-
Carefully undo the white film the same way you took out the metallic film
-
Once this film is removed the bar with the power button and media tools above the keyboard will pop out of place using a spudger.
-
-
-
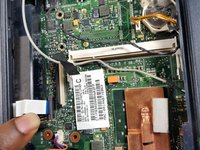
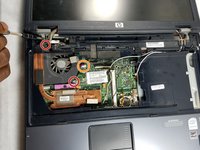
Underneath, a metal clamp will be revealed with two Torx Security T7 17mm screws. Unscrew these.
-
Carefully lift the cable out of place that is to the right of it.
-
-
-
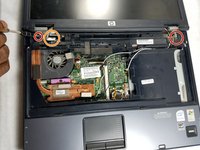
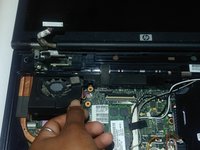
Unscrew these two JIS #1 5mm screws on the fan.
-
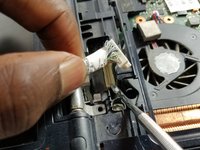
Carefully unplug the fans' wires.
-
Remove the fan and put in new one.
-


To reassemble your device, follow these instructions in reverse order.
To reassemble your device, follow these instructions in reverse order.
Отменить: Я не выполнил это руководство.
2 человек успешно провели ремонт по этому руководству.
Команду

UMass Dartmouth, Team S2-G5, Simcock Spring 2018 Участник UMass Dartmouth, Team S2-G5, Simcock Spring 2018
UMASSD-SIMCOCK-S18S2G5
3 членов
Автор 5 руководств
Один комментарий
Many Thanks!
BTW, my German keyboard was held by a 3rd screw. In step 3, one needs to remove the remaining screw next to the WIFI module as well.