Введение
The ink carriage motor is responsible for moving the ink cartridge around for it to disperse ink. Follow these steps carefully and it should be an easy fix.
Выберете то, что вам нужно
-
-
Remove the two 13 mm screws located on the back of the printer using a screwdriver with the T10 torx bit (star-shaped).
-
-
-
In the front of the printer, open the tray where the paper comes out and remove the two 13 mm screws located under the top of the printer.
-
-
-
With the front of the printer facing you, lift and raise the left side of the panel (like opening a book in reverse) until it disconnects from the clip on the right side of the panel.
-
-
-
-
Locate and remove the two flat ribbon connectors which connect the circuit board to the other printer components.
-
-
-
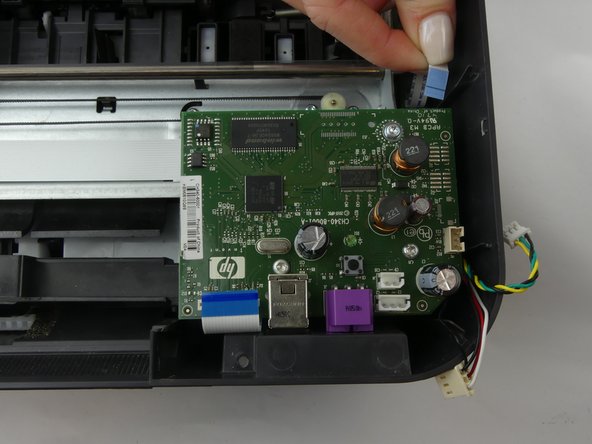
Locate and remove the three multicolored wire connectors which connect the circuit board to the other printer components.
-
-
-
Remove the top two 13mm screws using a screwdriver with the T10 torx bit.
-
Remove the bottom 9mm screw using a screwdriver with the T10 torx bit, and remove the plug port circuit board.
-
-
-
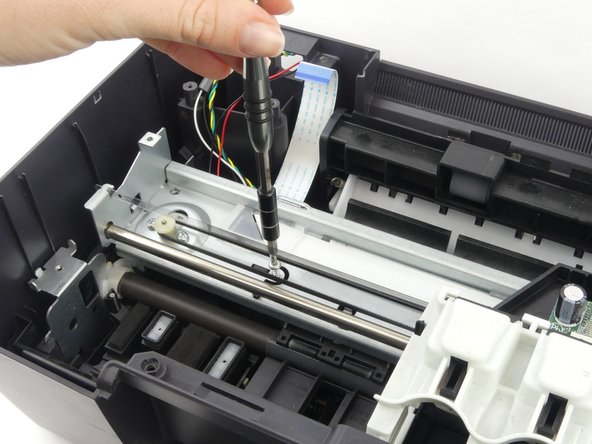
Remove the two 13mm screws with the screwdriver and a T10 torx bit.
-
Remove the one 9mm screw with the screwdriver and a T10 torx bit.
-
-
-
Remove the two 5mm screws which hold motor in place.
-
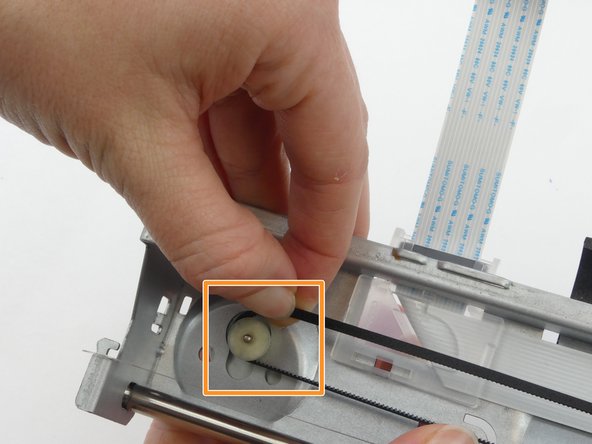
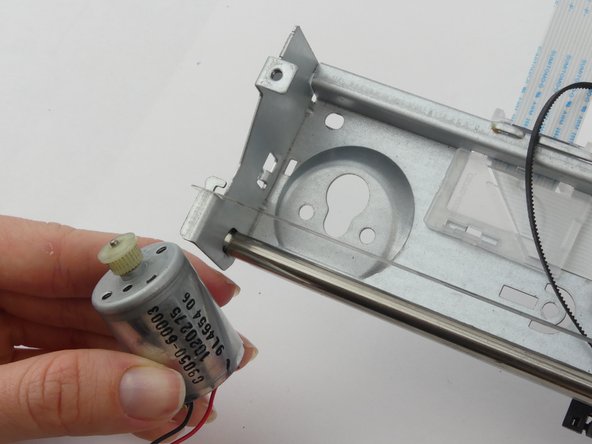
Remove the belt from the round motor gear, then remove the ink carriage motor.
-


To reassemble your device, follow these instructions in reverse order.
To reassemble your device, follow these instructions in reverse order.
Отменить: Я не выполнил это руководство.
2 участников успешно повторили данное руководство.
Команда

USF Tampa, Team S5-G3, Passmore Spring 2018 Участник USF Tampa, Team S5-G3, Passmore Spring 2018
USFT-PASSMORE-S18S5G3
4 членов
Автор 12 руководств