Этот документ имеет более свежие изменения. Перейти к последней непроверенной версии.
Введение
Malfunctioning buttons can hinder the usefulness of your printer and make performing certain routine tasks impossible. Replace them to prevent any future unnecessary hassle.
Выберете то, что вам нужно
-
-
Press your thumb down on the center of the button plate located on the left side of the printer.
-
Hook your fingers underneath the front edge of the button plate and pull upwards making sure to keep pressure on the middle of the plate with your thumb.
-
-
-
Once the front of the plate is loose, lift it up a few inches making sure to hold the back (paper feeding side) of the plate down.
-
Slide the plate towards the back of the printer and then lift up on the back of the plate.
-
The plate should now be disconnected from the tabs on the printer.
-
-
-
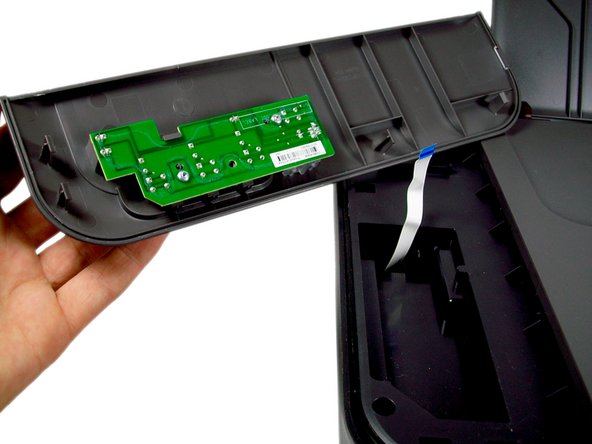
Turn the plate over to reveal the white strip of connecting tape that connects the plate to the printer.
-
Find where the tape is connected to the green button circuit board (Location circled in red)
-
Place two fingers on the tape right where it connects to the plate and gently pull the tape out of the circuit board.
-
-
-
-
Place the plate down on a flat surface with the button circuit board facing up.
-
Remove the three(3) T-10 Torx Screws from the circuit board.
-
-
-
After Removing the circuit board you will be able to see the backside of the set of function buttons.
-
Lightly push each of the six tabs away from the clips holding them in.
-
Once all of the tabs are loose from their clips, push the set of buttons down and out of the button plate.
-
-
-
The power button is not clipped in and should easily slide off of the plate once the button circuit board is removed.
-


To reassemble your device, follow these instructions in reverse order.
To reassemble your device, follow these instructions in reverse order.
Отменить: Я не выполнил это руководство.
Еще один человек закончил это руководство.
Команда

Cal Poly, Team 9-18, Amido Fall 2012 Участник Cal Poly, Team 9-18, Amido Fall 2012
CPSU-AMIDO-F12S9G18
4 членов
Автор 10 руководств