Эта версия возможно содержит некорректные исправления. Переключить на последнюю проверенную версию.
Выберете то, что вам нужно
-
Этот шаг не переведен. Помогите перевести
-
On the back of the computer, slide the left switch towards the outside of the laptop until you hear a click.
-
-
Этот шаг не переведен. Помогите перевести
-
Slide the battery away from the switches until it can be lifted away from the laptop.
-
Lift the battery away from the laptop.
-
-
Этот шаг не переведен. Помогите перевести
-
On the back of the laptop, slide the right switch toward the outside of the laptop until you hear a click.
-
-
Этот шаг не переведен. Помогите перевести
-
Slide the back shell of the laptop away from the switches until it can be lifted up.
-
Lift the shell straight up.
-
-
Этот шаг не переведен. Помогите перевести
-
Using a Phillips #0 bit, unscrew the two screws on opposite corners of the fan.
-
-
Этот шаг не переведен. Помогите перевести
-
Disconnect the small electrical connector. Pry the edge up with your finger nails or using a small plastic pry tool.
-
-
Этот шаг не переведен. Помогите перевести
-
Using a Phillips #0 bit, unscrew the six screws on the heat sink.
-
-
Этот шаг не переведен. Помогите перевести
-
Pry the inside edge up, pulling the entire assembly to the inside of the laptop, exposing the processor and graphics processor
-
-
Этот шаг не переведен. Помогите перевести
-
Blow compressed air through the vent from the outside and through the heat sink.
-
-
-
Этот шаг не переведен. Помогите перевести
-
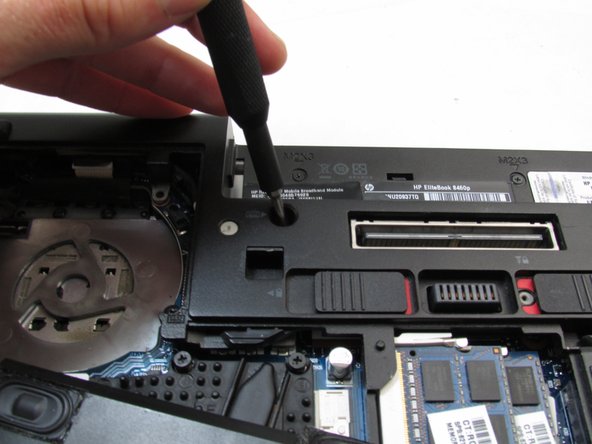
Using a Phillips #0 bit, unscrew the one Phillips head screw.
-
Using a T2 Torx screwdriver, remove the two 8.0mm Torx screws.
-
-
Этот шаг не переведен. Помогите перевести
-
With your fingernail, pry the edge of the optical drive away from the chassis of the laptop and pull it straight out.
-
-
Этот шаг не переведен. Помогите перевести
-
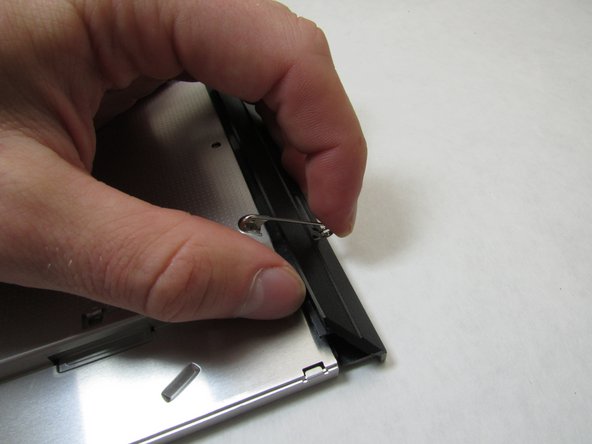
Using a small paper clip, push the paper clip straight in to open the optical drive.
-
-
Этот шаг не переведен. Помогите перевести
-
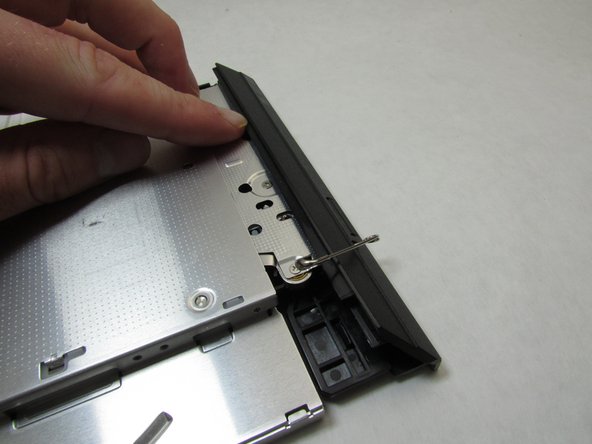
Using a small point, pop the tab out.
-
Rotate the plastic cover clockwise to release the tab on the left hand side of the optical drive.
-
-
Этот шаг не переведен. Помогите перевести
-
Pull the tab with the small engraved arrow up and towards the inside of the laptop.
-
-
Этот шаг не переведен. Помогите перевести
-
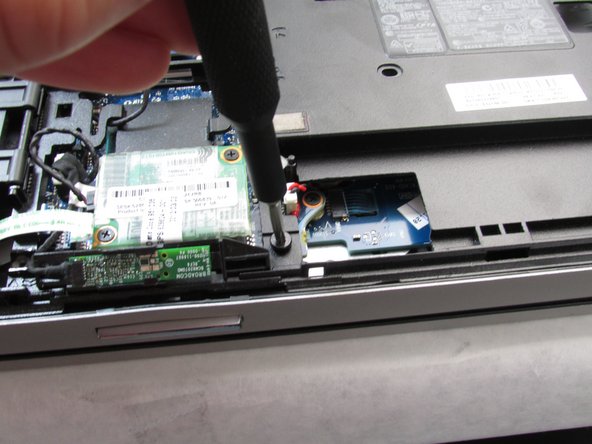
Using a Phillips #0 bit, unscrew the three screws that hold the hard drive assembly in place.
-
-
Этот шаг не переведен. Помогите перевести
-
Remove the silver metal cover by pulling straight up on the black tab.
-
-
Этот шаг не переведен. Помогите перевести
-
Disconnect the hard drive by pulling the drive straight out to the left.
-
-
Этот шаг не переведен. Помогите перевести
-
Using a Phillips #0 screwdriver, remove the two 3.0mm screws holding the speaker assembly in place.
-
-
Этот шаг не переведен. Помогите перевести
-
Grasping one corner with two fingers, lift the speaker assembly up and out of the laptop.
-
-
Этот шаг не переведен. Помогите перевести
-
Using a T2 Torx screwdriver, remove the six 8.0mm Torx screws.
-
-
Этот шаг не переведен. Помогите перевести
-
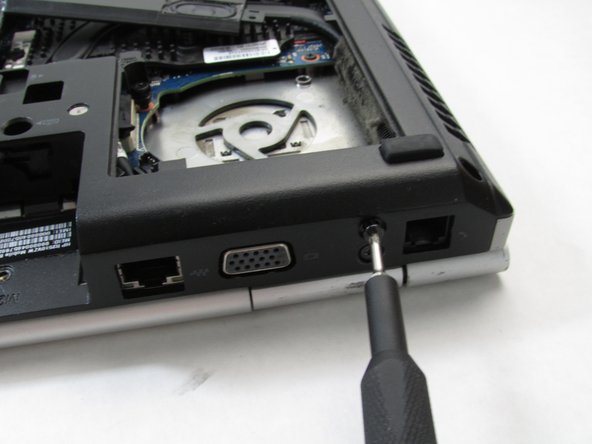
Using a Phillips #0 screwdriver, unscrew the Phillips screw next to the fan assembly.
-
-
Этот шаг не переведен. Помогите перевести
-
Using a Philips #0 screwdriver, unscrew the two Phillips screws next to the battery.
-
-
Этот шаг не переведен. Помогите перевести
-
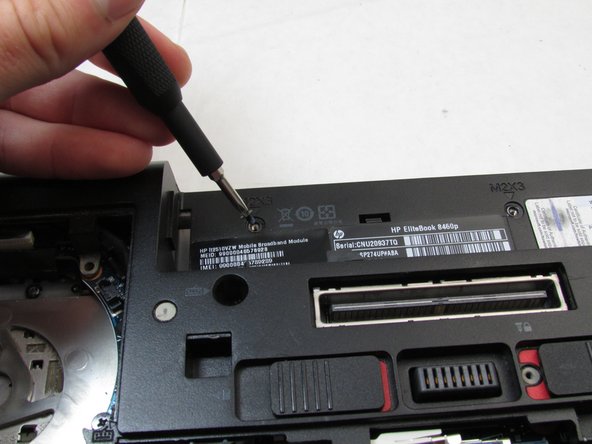
Using a Phillips #0 screwdriver, remove the three 2.0mm Phillips screws underneath the battery.
-
-
Этот шаг не переведен. Помогите перевести
-
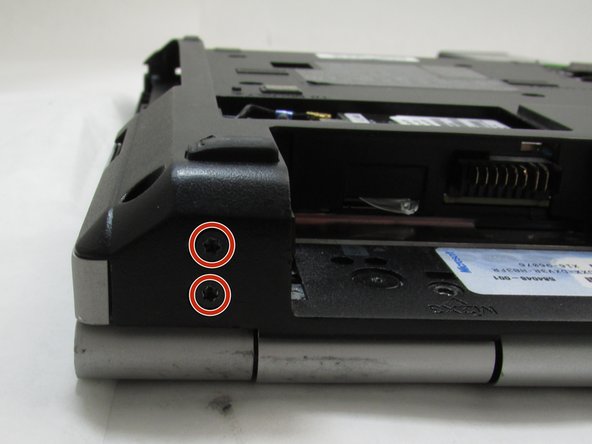
Using a Phillips #0 screwdriver, remove the two 3.0mm Phillips screws to the right of the optical drive slot
-
-
Этот шаг не переведен. Помогите перевести
-
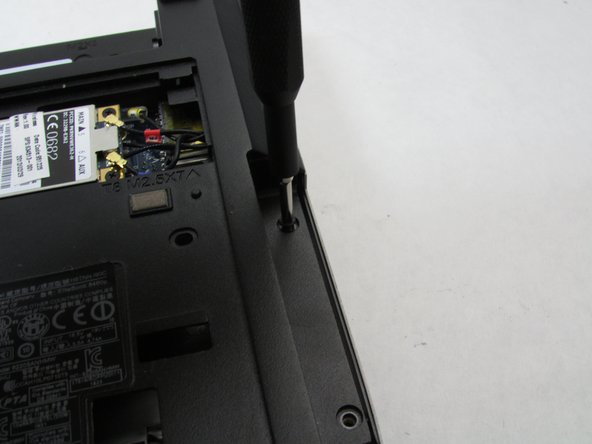
Using a Phillips #0 screwdriver, remove the two 2.0mm Phillips screws underneath the hard drive assembly.
-
-
Этот шаг не переведен. Помогите перевести
-
Using a T2 Torx screwdriver, remove the four 8.0mm Torx screws on the back side of the laptop.
-
-
Этот шаг не переведен. Помогите перевести
-
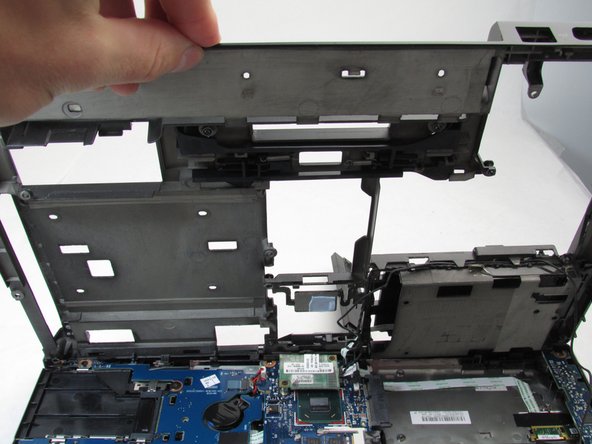
Using a spudger, work your way around the edge of the laptop popping the plastic chassis up.
-
-
Этот шаг не переведен. Помогите перевести
-
Lift the chassis up and detach the small connector between the hard drive and heat sink.
-
-
Этот шаг не переведен. Помогите перевести
-
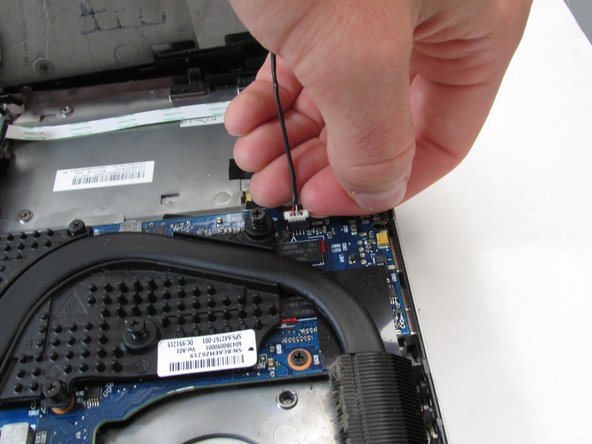
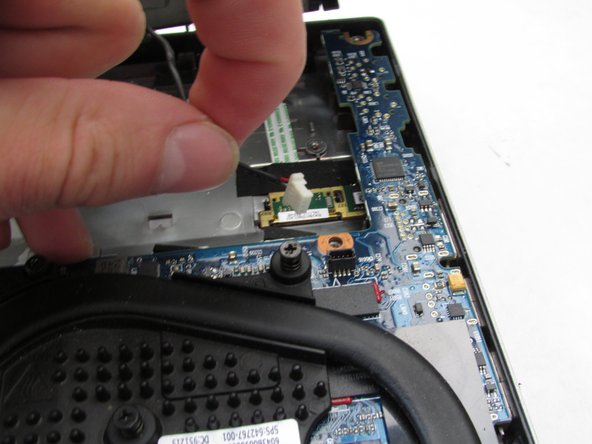
Disconnect the speaker connector from the motherboard.
-
Remove the old speaker assembly and connect the wire for the new speaker assembly in the same location.
-


Отменить: Я не выполнил это руководство.
6 участников успешно повторили данное руководство.

Команда

Embry-Riddle Aeronautical University, Team S12-G1, Lamothe Fall 2019 Участник Embry-Riddle Aeronautical University, Team S12-G1, Lamothe Fall 2019
ERAU-LAMOTHE-F19S12G1
4 членов
Автор 10 руководств
2 Комментариев
Thanks for the tutorial. I skipped step 11 - 29 and just cut the wire of the old speakers on both ends. Put in the new speaker and hid the wire under the lid of the hard drive. Looking back.. I could have done this straight away after step 5. Removing the fan and heat sinc isn't necessary if onne's going to cut the wire. Nevertheless, taking out the fan was good to remove all the dust in front of the outlet.
Thanks again!
Thanks for your idea..I have searching easy way for it 🙏