Введение
Whatever the reason is that you want to replace your hard drive, this guide will show you how to do just that! Whether it is broken or you want to upgrade your hard drive this guide will show you what to do.
Выберете то, что вам нужно
-
-
Before beginning, it is good to wear an anti-static wrist band to prevent electrical components from getting harmed.
-
Attach the anti-static wristband to your wrist, and clip the other end to an exposed piece of metal anywhere on the case.
-
-
-
Start by opening the device case by unscrewing the 10.5mm hand screw on the back of the computer.
-
-
-
Turn the computer onto its side to continue removing the case cover.
-
Slide the cover off by sliding it to the right.
-
-
-
-
Locate the SSD inside the open case.
-
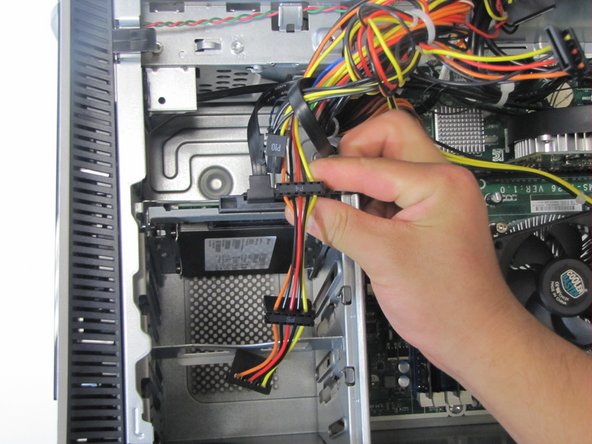
Unplug the SATA power cable from the hard drive by pulling straight up.
-
-
-
Finish disconnecting the hard drive by unplugging the black SATA interface cable by pulling up.
-
-
-
To remove the SSD and its casing, pull out on the side silver tab.
-
At the same time, pull up on the hard drive. It should slide out smoothly without much effort.
-
-
-
To completly remove the SSD from its casing, unscrew the four 5mm screws on opposite ends of the casing. Use a Torx T15 screw driver to accomplish this.
-


To reassemble your device, follow these instructions in reverse order.
To reassemble your device, follow these instructions in reverse order.
Отменить: Я не выполнил это руководство.
4 участников успешно повторили данное руководство.
Команда

Cal Poly, Team 5-9, Maness Fall 2015 Участник Cal Poly, Team 5-9, Maness Fall 2015
CPSU-MANESS-F15S5G9
4 членов
Автор 10 руководств