Перейти к основному содержанию

HP Envy m6-n010dx Fan Replacement

Выберете то, что вам нужно

  1. HP Envy m6-n010dx Fan Replacement, Battery: шаг 1, изображение 1 из 3 HP Envy m6-n010dx Fan Replacement, Battery: шаг 1, изображение 2 из 3 HP Envy m6-n010dx Fan Replacement, Battery: шаг 1, изображение 3 из 3
    • Find the battery removal slider.

    • Slide it across while simultaneously popping out and removing the device's battery.

  2. HP Envy m6-n010dx Fan Replacement, Hard Drive: шаг 2, изображение 1 из 1
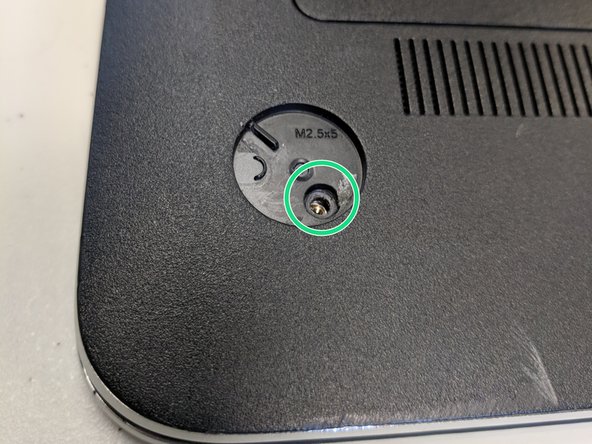
    • Remove the five marked screws found under the battery using a philips head screwdriver.

  3. HP Envy m6-n010dx Fan Replacement: шаг 3, изображение 1 из 2 HP Envy m6-n010dx Fan Replacement: шаг 3, изображение 2 из 2
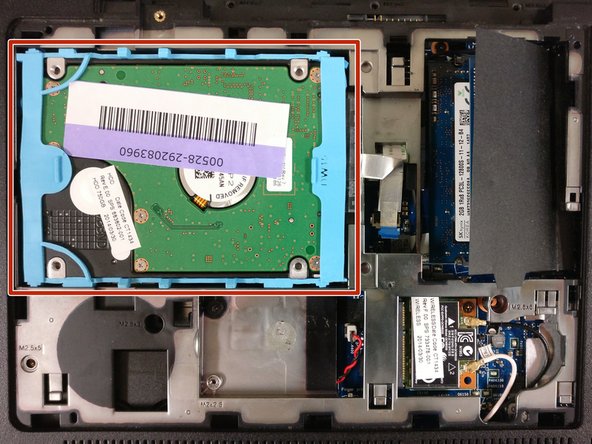
    • Remove the small panel on the back by prying it off. This should reveal the hard drive.

  4. HP Envy m6-n010dx Fan Replacement: шаг 4, изображение 1 из 3 HP Envy m6-n010dx Fan Replacement: шаг 4, изображение 2 из 3 HP Envy m6-n010dx Fan Replacement: шаг 4, изображение 3 из 3
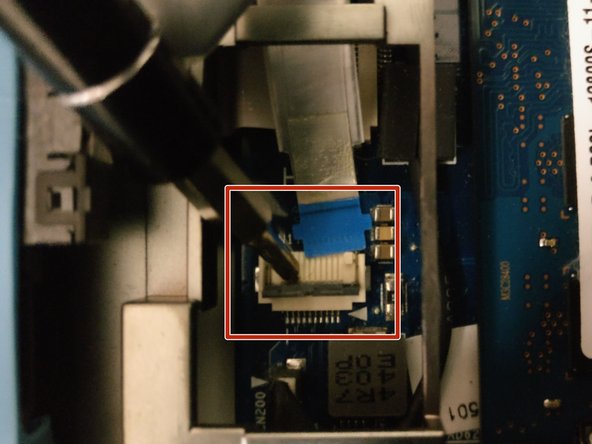
    • The hard drive is connected to the motherboard via this blue-tabbed cable, highlighted in red.

    • Gently pry off the cover to release the cable.

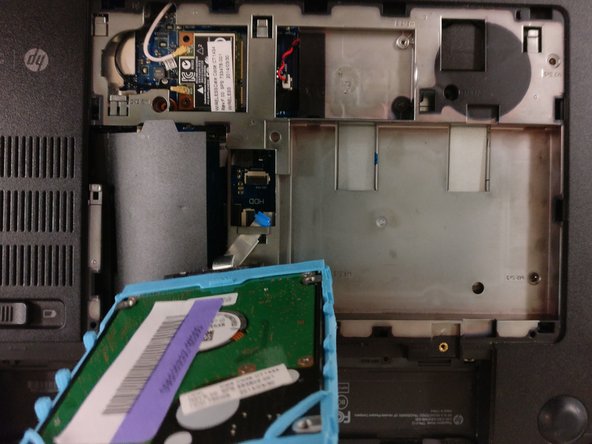
    • Slowly lift the hard drive out and away from the device.

  5. HP Envy m6-n010dx Fan Replacement, Fan: шаг 5, изображение 1 из 3 HP Envy m6-n010dx Fan Replacement, Fan: шаг 5, изображение 2 из 3 HP Envy m6-n010dx Fan Replacement, Fan: шаг 5, изображение 3 из 3
    • Remove the screws highlighted in red

    • Pry off with prying tool the lower two grip pads highlighted in orange

    • You may need to use more force than feels necessary

    • Remove the two additional screws underneath the lower grip pads

    • Remove the large back panel to reveal the inner workings

    • The back panel might be difficult to remove. Use a flat object to help pry it off, and don't be afraid to use force.

  6. HP Envy m6-n010dx Fan Replacement: шаг 6, изображение 1 из 3 HP Envy m6-n010dx Fan Replacement: шаг 6, изображение 2 из 3 HP Envy m6-n010dx Fan Replacement: шаг 6, изображение 3 из 3
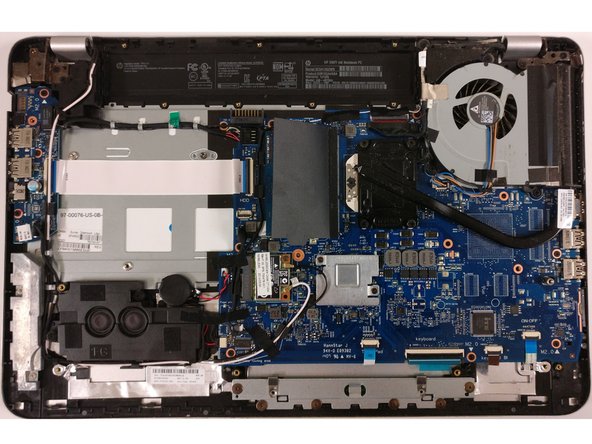
    • Locate fan

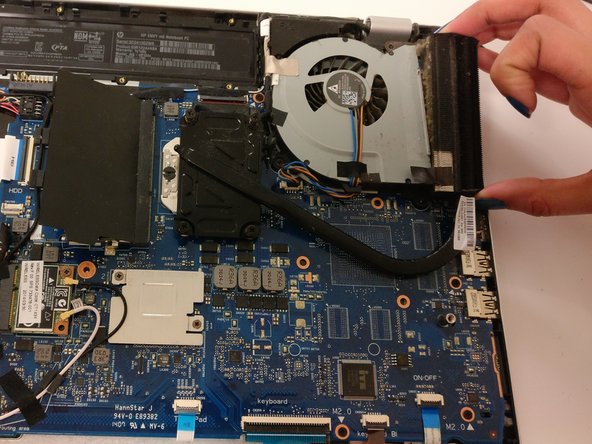
    • Gently remove tape that hold the heatsink and fan together

    • When reassembling , make sure to use new electrical tape so it will stick.

  7. HP Envy m6-n010dx Fan Replacement: шаг 7, изображение 1 из 3 HP Envy m6-n010dx Fan Replacement: шаг 7, изображение 2 из 3 HP Envy m6-n010dx Fan Replacement: шаг 7, изображение 3 из 3
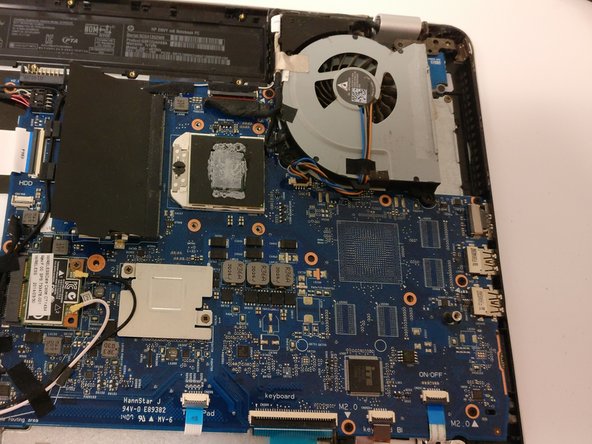
    • Loosen the four screws on the heat sink indicated in picture

    • Remove the heatsink

  8. HP Envy m6-n010dx Fan Replacement: шаг 8, изображение 1 из 2 HP Envy m6-n010dx Fan Replacement: шаг 8, изображение 2 из 2
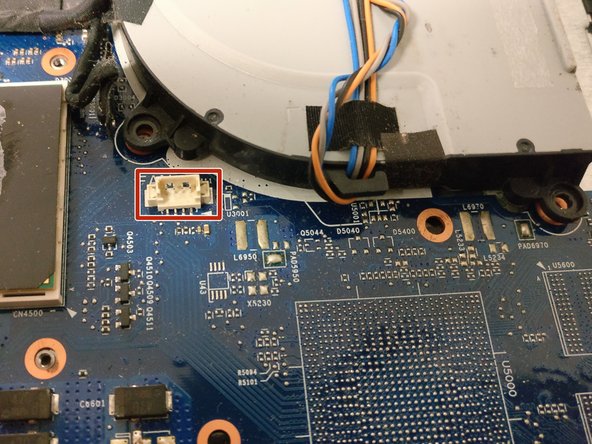
    • Gently disconnect the wire connecting the fan to the motherboard

  9. HP Envy m6-n010dx Fan Replacement: шаг 9, изображение 1 из 3 HP Envy m6-n010dx Fan Replacement: шаг 9, изображение 2 из 3 HP Envy m6-n010dx Fan Replacement: шаг 9, изображение 3 из 3
    • Remove screws indicated in photo.

    • Remove fan

Заключение

To reassemble your device, follow these instructions in reverse order.

6 участников успешно повторили данное руководство.

Sandra Ramirez

Участник с: 02/08/18

247 Репутация

1 руководство автора

Команда

University of North Texas, Team S2-G1, Thomas Spring 2018 Участник University of North Texas, Team S2-G1, Thomas Spring 2018

UNT-THOMAS-S18S2G1

4 членов

Автор 6 руководств

0 Комментариев

Добавить комментарий

Просмотр статистики:

За последние 24часов: 2

За последние 7 дней: 5

За последние 30 дней: 7

За всё время: 1,055