Перейти к основному содержанию

HP Envy m6-n010dx Hard Drive Replacement

Выберете то, что вам нужно

  1. HP Envy m6-n010dx Hard Drive Replacement, Battery: шаг 1, изображение 1 из 3 HP Envy m6-n010dx Hard Drive Replacement, Battery: шаг 1, изображение 2 из 3 HP Envy m6-n010dx Hard Drive Replacement, Battery: шаг 1, изображение 3 из 3
    • Find the battery removal slider.

    • Slide it across while simultaneously popping out and removing the device's battery.

  2. HP Envy m6-n010dx Hard Drive Replacement, Hard Drive: шаг 2, изображение 1 из 1
    • Remove the five marked screws found under the battery using a philips head screwdriver.

  3. HP Envy m6-n010dx Hard Drive Replacement: шаг 3, изображение 1 из 2 HP Envy m6-n010dx Hard Drive Replacement: шаг 3, изображение 2 из 2
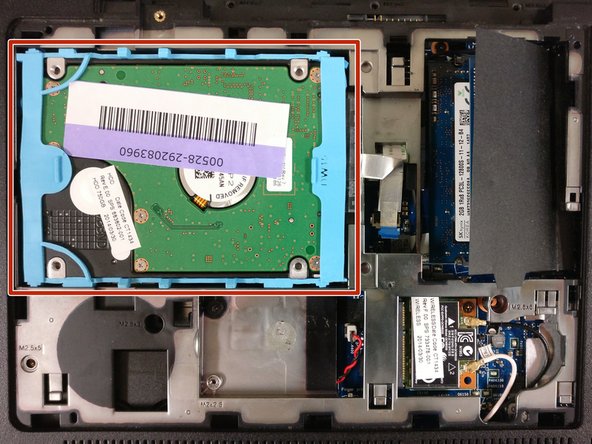
    • Remove the small panel on the back by prying it off. This should reveal the hard drive.

  4. HP Envy m6-n010dx Hard Drive Replacement: шаг 4, изображение 1 из 3 HP Envy m6-n010dx Hard Drive Replacement: шаг 4, изображение 2 из 3 HP Envy m6-n010dx Hard Drive Replacement: шаг 4, изображение 3 из 3
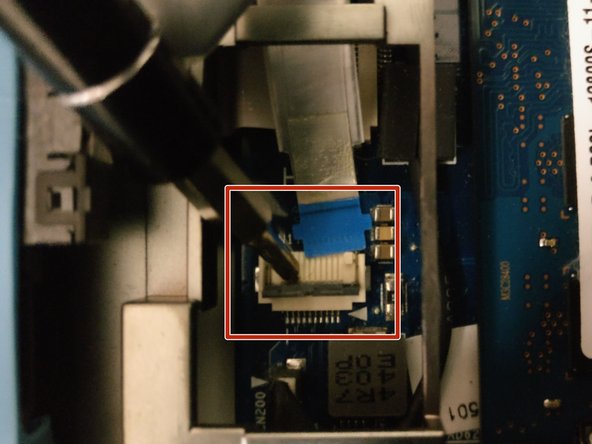
    • The hard drive is connected to the motherboard via this blue-tabbed cable, highlighted in red.

    • Gently pry off the cover to release the cable.

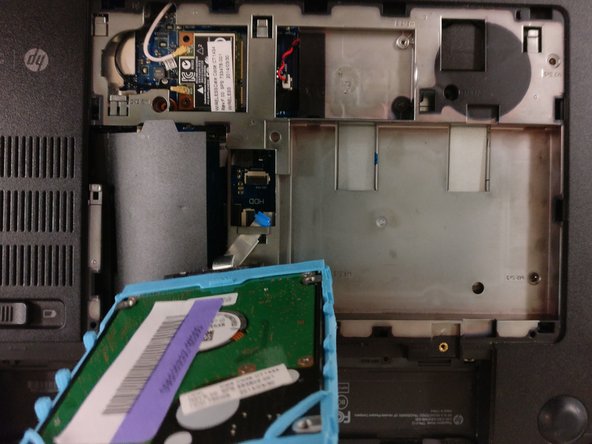
    • Slowly lift the hard drive out and away from the device.

Заключение

To reassemble your device, follow these instructions in reverse order.

Еще один человек закончил это руководство.

Johnathan Morales

Участник с: 02/08/18

393 Репутация

Автор 3 руководств

Команда

University of North Texas, Team S2-G1, Thomas Spring 2018 Участник University of North Texas, Team S2-G1, Thomas Spring 2018

UNT-THOMAS-S18S2G1

4 членов

Автор 6 руководств

0 Комментариев

Добавить комментарий

Просмотр статистики:

За последние 24часов: 0

За последние 7 дней: 1

За последние 30 дней: 2

За всё время: 1,262