Введение
In this guide, you will learn how to remove the hard drive in order to either replace, upgrade, or manage the hard drive.
Выберете то, что вам нужно
-
-
Carefully wedge an iFixit opening tool under the cover and slide it alongside the case to ensure that all clips are un-clipped.
-
-
-
-
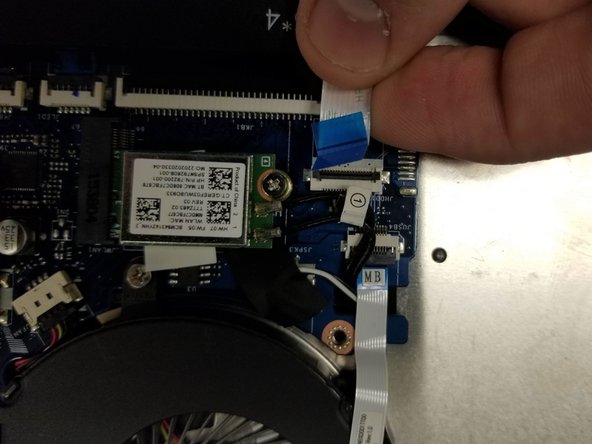
Remove the cable connecting the hard drive to the motherboard by carefully lifting the black tab, then pulling out the disconnected ribbon cable.
-
-
-
Remove the cable connecting the battery to the motherboard by gripping the fabric and pulling downward.
-
-
-
Remove the six screws that hold the battery down with a Phillips #0 screwdriver.
-
Once the screws are removed you should be able to easily lift up on the battery to remove it. (You may need to detach the ribbon cable glued to the battery )
-
-
-
Unscrew the two screws that have a pink spacer below them with a Phillips #0 screwdriver.
-
Lift directly up to remove the main speaker.
-
Gently pull the wire out of the plastic track that it's set in.
-
-
-
Follow the cable around the inside of the case and remove the cable to the main board
-
Once this is removed you can fully remove the speaker!
-
-
-
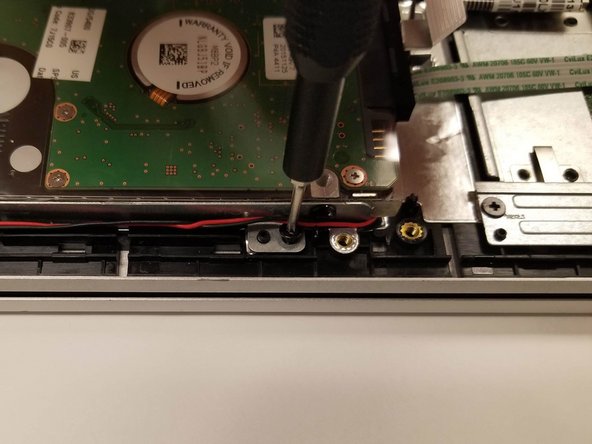
There are wires over some of the screws, use a thin implement to get the wires out of their track.
-
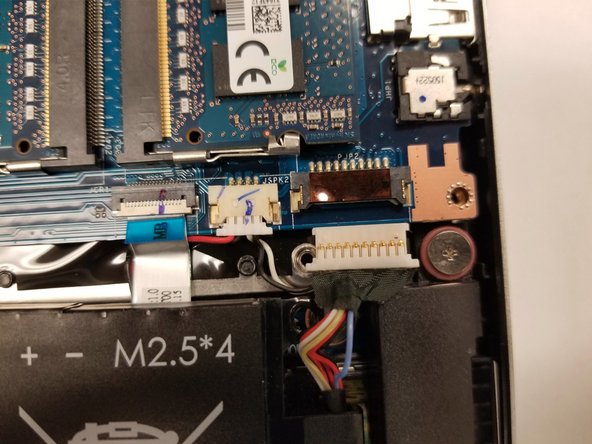
Unplug the SATA cable from the motherboard (covered in the teardown for the battery).
-
Remove the 4 screws
-
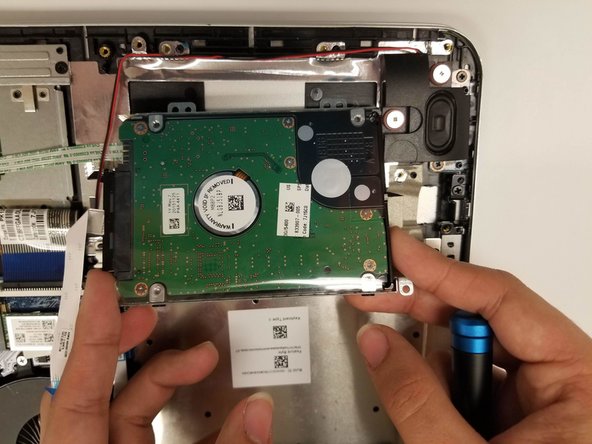
Remove the Hard drive from the unit
-


To reassemble your device, follow these instructions in reverse order.
To reassemble your device, follow these instructions in reverse order.
Отменить: Я не выполнил это руководство.
Еще один человек закончил это руководство.

Команда

Gateway, Team S1-G1, Saknee Fall 2019 Участник Gateway, Team S1-G1, Saknee Fall 2019
GCC-SAKNEE-F19S1G1
2 членов
Автор 5 руководств
Один комментарий
Thanks for this guide. It really helped out and drastically sped up the whole process.
I needed to install a 2.5" SSD and new RAM to my girlfriend's machine and have never opened up a HP laptop.
Appreciate all the effort that went in to this!