Перейти к основному содержанию

HP Envy x360 m6-aq105dx Solid State Drive Replacement

Архивированное руководство
Это руководство сохранено для исторических целей. Используйте его обновлённую версию, чтобы выполнить ремонт.

Выберете то, что вам нужно

  1. HP Envy x360 m6-aq105dx Solid State Drive Replacement, Back Cover: шаг 1, изображение 1 из 1
    • Ground yourself by touching a metal object or surface. This prevents electrical damage to other components in the laptop.

    • Remove the two 7.8 mm screws using the Phillips #0 screwdriver.

    • Remove the six 5.2 mm screws using the Torx T5 screwdriver.

  2. HP Envy x360 m6-aq105dx Solid State Drive Replacement: шаг 2, изображение 1 из 1
    • Light to moderate force is required to remove the back cover.

    • Insert the Jimmy in between the frame of the laptop and the removable back cover and remove the back cover from the device.

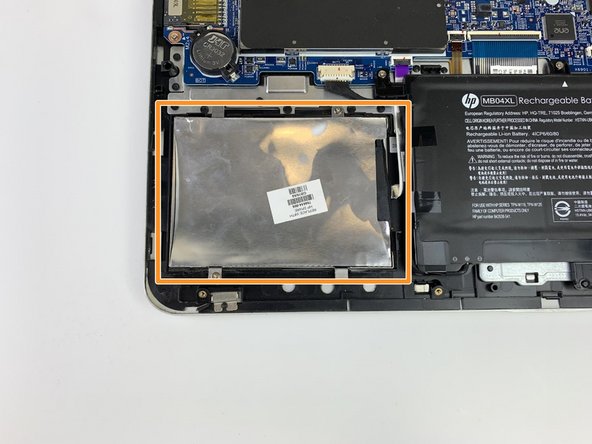
  3. HP Envy x360 m6-aq105dx Solid State Drive Replacement, Solid State Drive: шаг 3, изображение 1 из 1
    • Remove the two 4.6 mm screws securing old hard drive/solid-state drive in place using the Phillips #0 screwdriver.

  4. HP Envy x360 m6-aq105dx Solid State Drive Replacement: шаг 4, изображение 1 из 2 HP Envy x360 m6-aq105dx Solid State Drive Replacement: шаг 4, изображение 2 из 2
    • Disconnect the SATA cable connected to the old hard drive/solid-state drive.

    • Remove the solid state drive.

Заключение

To reassemble your device, follow these instructions in reverse order.

Ryan Blazier

Участник с: 01/16/20

217 Репутация

Автор 2 руководств

Команда

0 Комментариев

Добавить комментарий

Просмотр статистики:

За последние 24часов: 0

За последние 7 дней: 0

За последние 30 дней: 0

За всё время: 36