Введение
First of all: my apologies for my english, my native language is Dutch.
So i hope you'll understand my written guide ;)
Have fun!
Выберете то, что вам нужно
-
-
Turn the device over and remove the screws from the battery. Remove the black panels holding the HDD, ram, and wifi.
-
-
-
Locate the screw for the DVD player and remove it. Then remove the DVD player with a thin spudger.
-
-
-
Remove the screws that are circled in the picture. These screws hold the case of the laptop.
-
-
-
-
Remove the WIFI antenna cables from WIFI card.
-
Then remove the screws of the WIFI card and remove the card.
-
-
-
Flip the laptop around and gently remove the keyboard with your fingers.
-
Start with the corners of the keyboard.
-
Gently loosen the keyboard with a flat head screwdriver or a thin spudger.
-
-
-
After removing the keyboard, find the other screws located in the grey panel.
-
Remove the black plastic. Be careful with the white flat cable.
-
-
-
Remove the hinge screws with the screwdriver from the left side to the right side.
-
Under one of the two hinges, there is a hidden screw (case)
-
-
-
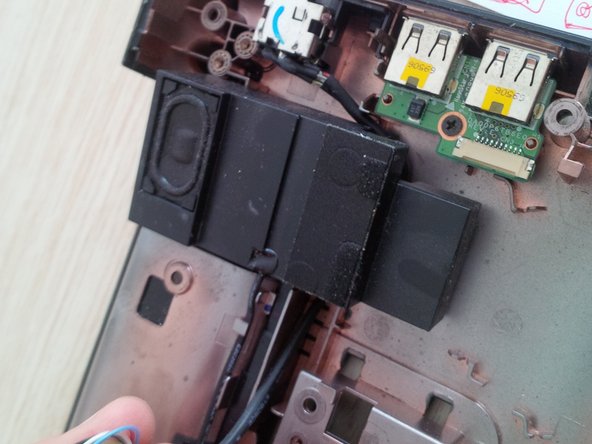
Remove the black plastic.
-
Remove the audio boxes.
-
Remove all the other wires and cables.
-
Then gently separate the screen from the case.
-
-
-
Use an iOpener to separate the grey case from the bottom case.
-
Careful: the battery compartment is together with the grey panel.
-
Tip: "slide" the iOpener while opening until you hear clicks. It is easy if you slide.
-
-
-
Remove the motherboard by removing the screws first. Be careful with the cables and the wires.
-
Be careful with the connector of the DC power jack. You can replace the USB drivers on that side as well.
-
-
-
To remove the Processor, unlock the processor socket with a flat screwdriver.
-
Then gently remove the Processor.
-


2 Комментариев
Thanks a bunch this helped a whole lot!!!!
Thank you very much. Very well explained :)