Этот документ имеет более свежие изменения. Перейти к последней непроверенной версии.
Введение
These steps will show how to replace the power plug from the printer. This guide may be used if the prongs of the plug are broken or if a new power supply is needed all together.
Выберете то, что вам нужно
-
-
Flip printer on it's back. Using the plastic spudger, pry off front panel. There will be two main points to focus as shown.
-
-
-
Using the plastic spudger, remove the button housing from the top left of printer.
-
-
-
-
Use the plastic spudger to remove the side panel. There are three main prying points as shown.
-
-
-
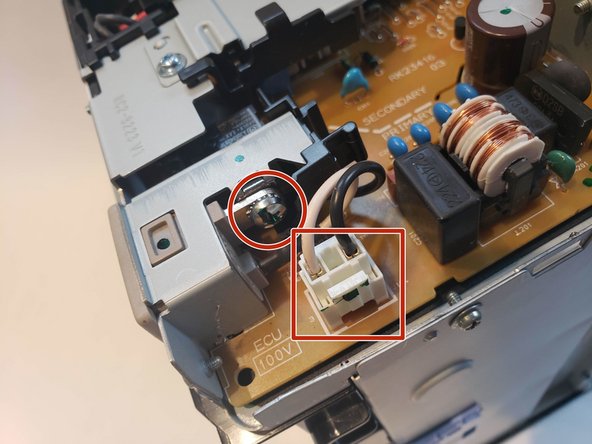
The power plug will be held together with one Phillips screw 7mm and wire connection.
-
-
-
Unplug wire connector and unscrew the Phillips 7mm screw with #1 Phillips screw driver.
-
-
-
Apply pressure using spudger on top of the power plug to release it from metal housing. While doing that pull the power plug out.
-


To reassemble your device, follow these instructions in reverse order.
To reassemble your device, follow these instructions in reverse order.
Отменить: Я не выполнил это руководство.
3 участников успешно повторили данное руководство.
Команда

UW Stout, Team S6-G4, Ogden Fall 2018 Участник UW Stout, Team S6-G4, Ogden Fall 2018
UWSTOUT-OGDEN-F18S6G4
4 членов
Автор 10 руководств