Введение
Is your HP Laserjet Pro 200 overheating when printing out important papers? If so, this guide demonstrates how to quickly replace the fan inside your printer. All you need is a Phillips #2 Screwdriver, iFixit Opening Tool, Metal Spudger, and a friend to help you with one of the steps!
Выберете то, что вам нужно
-
-
Turn the printer so that the front is facing to your left.
-
Flip the printer so that it is laying with its right side facing down and the bottom facing you.
-
-
-
Remove the 8 mm screw on the top edge of the printer using a #2 Phillips head screwdriver.
-
-
-
-
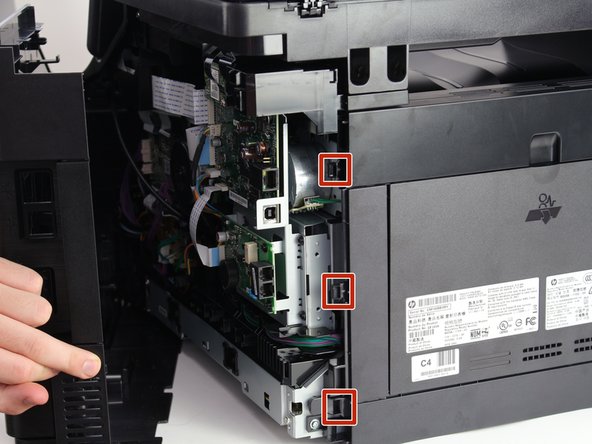
Use a flathead screwdriver to depress these tabs while lightly pulling the panel towards you.
-
Begin with the upmost tab and move your way down, individually depressing the tabs while simultaneously pulling the panel towards you, removing it from the printer.
-
-
-
Gently pull out the plug that supplies power to the fan from the socket on the circuit board.
-
-
-
Push each tab outwards from the fan.
-
Simultaneously pull the fan towards you until the fan clears the face of the printer.
-


To reassemble your device, follow the instructions in reverse order.
To reassemble your device, follow the instructions in reverse order.
Отменить: Я не выполнил это руководство.
2 участников успешно повторили данное руководство.
Команда

Cal Poly, Team S9-G14, Maness Spring 2019 Участник Cal Poly, Team S9-G14, Maness Spring 2019
CPSU-MANESS-S19S9G14
4 членов
Автор 11 руководств