Введение
This guide will teach you how to replace the carriage belt on your HP Officejet Pro 6835 or 6830. Be prepared to get ink on your hands, as some components may have ink on them.
Выберете то, что вам нужно
-
-
Open the main lid as far as it will go.
-
Use a plastic opening tool to gently pry off the hinge on the right side by pushing it to the left and off the hook.
-
Open the lid further.
-
-
-
Use a T9 torx screwdriver to remove a total of ten (10) 12mm screws from the main cover by turning the screwdriver counterclockwise.
-
-
-
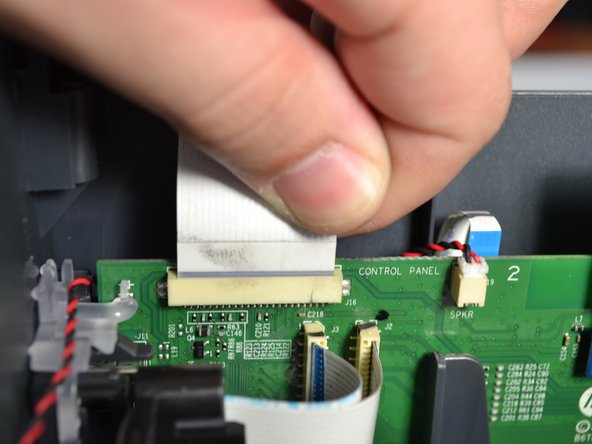
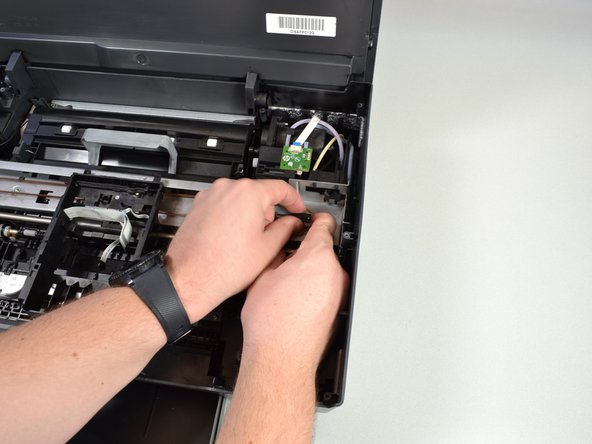
Grab the base of the white ribbon cable connecting the cover to the base of the printer and pull it out.
-
-
-
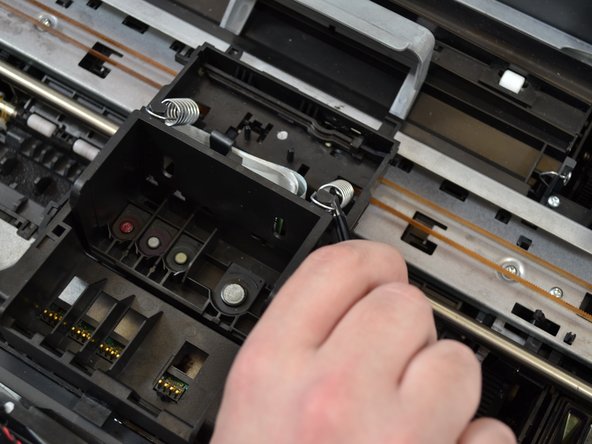
Using tweezers, pinch the top of the spring located on the right side of the printhead.
-
Pull the spring up and around the hook of the carriage to remove the spring from the printhead.
-
Use the same procedure to remove the left spring.
-
-
-
-
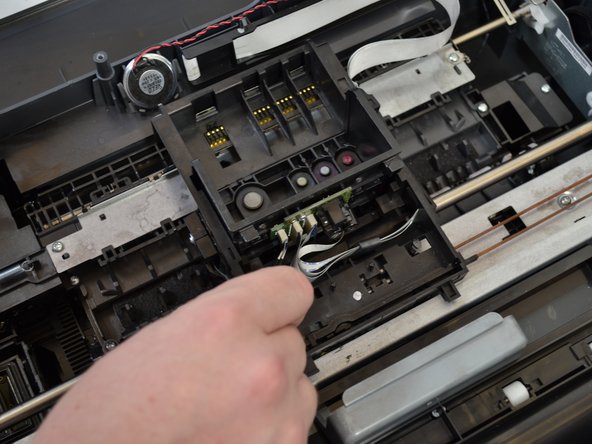
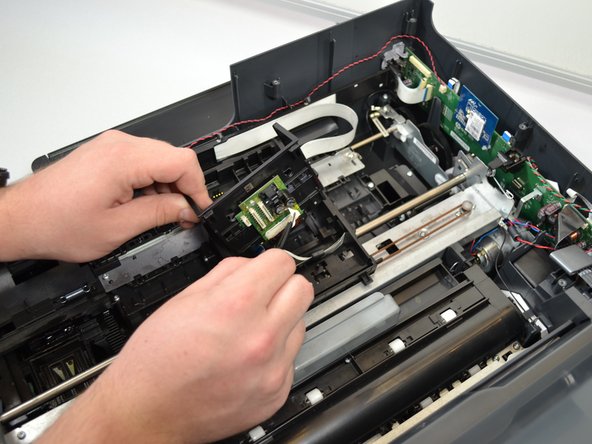
Pinch the left most white cable located on the back of the printhead with your tweezers.
-
Pull the cable to remove it from the printhead.
-
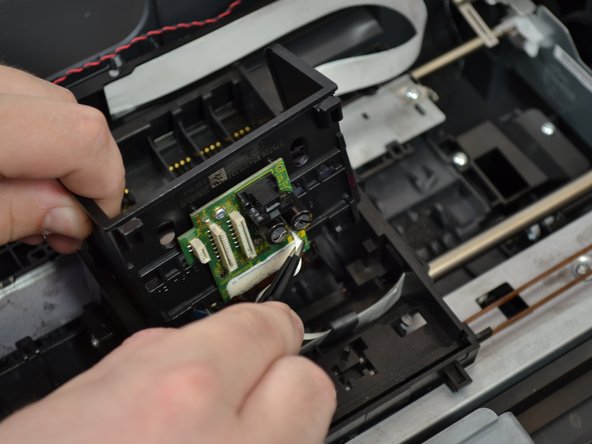
Continue this process to remove all three white cable from the printhead.
-
-
-
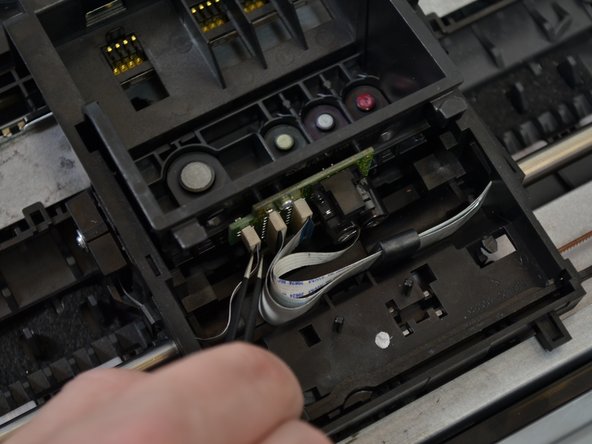
Lift the printhead off the printer to expose the last white cable.
-
Pinch the the last cable with the tweezers.
-
Pull the cable to disconnect it from the printhead.
-
-
-
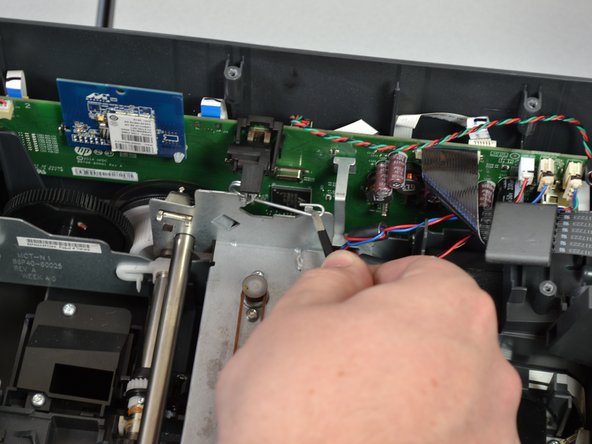
Using the tweezers, remove the right side of the metal clamp that is holding the metal frame in place by pulling up.
-
With the tweezers, unhook the metal coil side of the clamp and pull up to remove it completely.
-
Repeat these steps on the other side of the printer.
-
-
-
On the right side of the printer, remove the screw (6mm T9) holding the carriage belt wheel by turning the screwdriver counterclockwise.
-
-
-
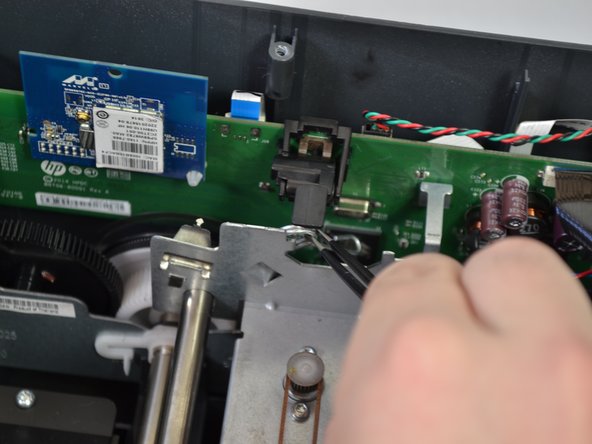
Using the tweezers, remove the metal clamp directly under the screw that was just removed by pulling up.
-
-
-
Using one hand, loosen the carriage belt around the wheel by compressing the spring against the wheel.
-
While still compressing the spring, use your other hand to grab the spring and wheel and pull up to remove them.
-
-
-
Unwrap the carriage belt from the hook on the other side of the printer using the tweezers by pulling to the left and up.
-
-
-
Grab the metal rod connected to the carriage.
-
Push the rod to the left and lift up the right end.
-
Lift the metal rod completely out of the printer by lifting straight up, and slide the rod out of the carriage by pushing the left end to the right.
-
-
-
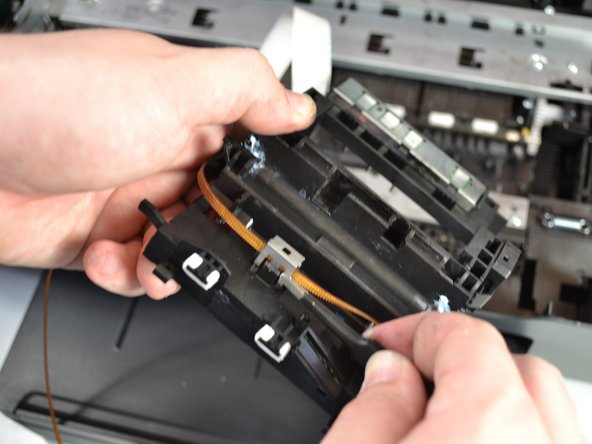
Flip the carriage upside down.
-
Using the metal tweezers, remove the clamp over the carriage belt by first pulling up on the back of the clamp, then on the front.
-
-
-
Remove the carriage belt by holding the carriage in one hand and pulling the carriage belt up with the other.
-


To reassemble your device, follow these instructions in reverse order.
To reassemble your device, follow these instructions in reverse order.
Отменить: Я не выполнил это руководство.
Еще один человек закончил это руководство.
Команда

Cal Poly, Team S2-G4, Livingston Winter 2018 Участник Cal Poly, Team S2-G4, Livingston Winter 2018
CPSU-LIVINGSTON-W18S2G4
4 членов
Автор 16 руководств