Введение
Sometimes the battery for the motherboard on the HP Officejet Pro 8600 Plus goes bad. This guide describes how to replace the battery located on the motherboard.
Выберете то, что вам нужно
-
-
Turn the printer so the back is facing you.
-
Put the printer in a vertical position by lifting its right side.
-
-
-
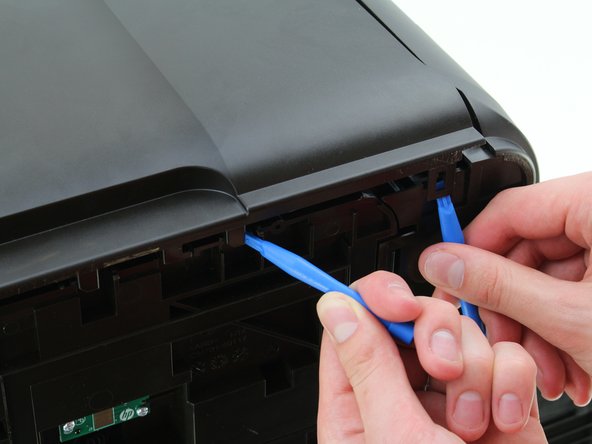
Insert the plastic opening tool underneath the slot on the right that aligns with the edge of the back panel.
-
Insert a second plastic opening tool in the notch lining up with the crease in the back panel.
-
-
-
-
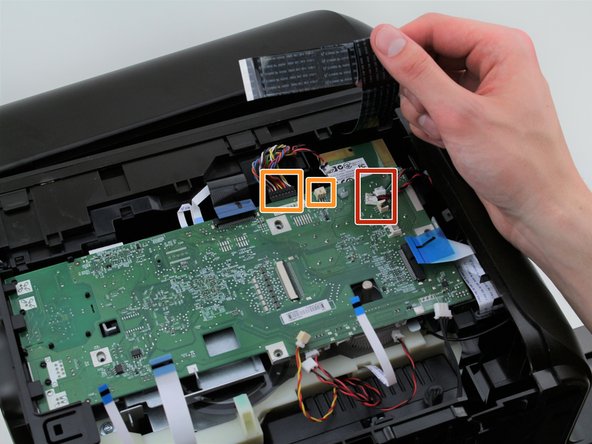
Remove the black brace from the right side of the motherboard, located near the black ribbon cable.
-
-
-
Remove the cables connected to the top of the motherboard by gently pulling them out of their ports.
-
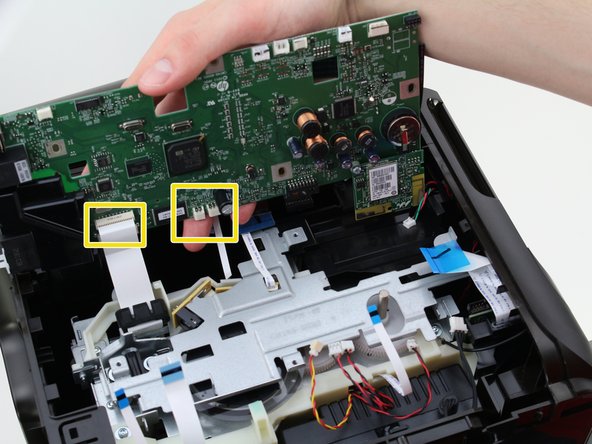
Remove the cables connected to the edge of the motherboard by gently pulling them out of their ports.
-
Remove the cables connected to the underside of the motherboard by gently pulling them out of their ports.
-
-
-
Turn the motherboard over so the back is facing upward.
-
Use the plastic opening tool to pry the battery out of place.
-
-
-
Remove the battery by grabbing its edges, lifting upward, and sliding sideways.
-


To reassemble your device, follow these instructions in reverse order.
To reassemble your device, follow these instructions in reverse order.
Отменить: Я не выполнил это руководство.
9 участников успешно повторили данное руководство.

Команда

Cal Poly, Team S16-G4, Livingston Spring 2018 Участник Cal Poly, Team S16-G4, Livingston Spring 2018
CPSU-LIVINGSTON-S18S16G4
4 членов
Автор 10 руководств
2 Комментариев
Are there any procedures required after either battery replacement or motherboard replacement? Re-loading of firmware, initialization, etc. Does the printer's serial number change as a result of battery replacement or motherboard replacement?
Bonjour ,
ma batterie est ok , par contre la courroie s'effiloche.
Peut on la remplacer et si oui comment y accéder?
J'ai déplacé le tendeur pour augmenter la tension de la courroie mais ce n'est pas suffisant.
Merci
BàV phil