Введение
The control panel on the HP Officejet Pro 8600 plus may have touchscreen issues or display problems. This guide describes how to replace the control panel.
Выберете то, что вам нужно
-
-
Wedge the plastic opening tool into each of the three plugs to pry them from the control panel hinge located above the control panel screen.
-
-
-
-
Disconnect the control panel from the hinge by gently lifting upward, then outward towards you.
-
-
-
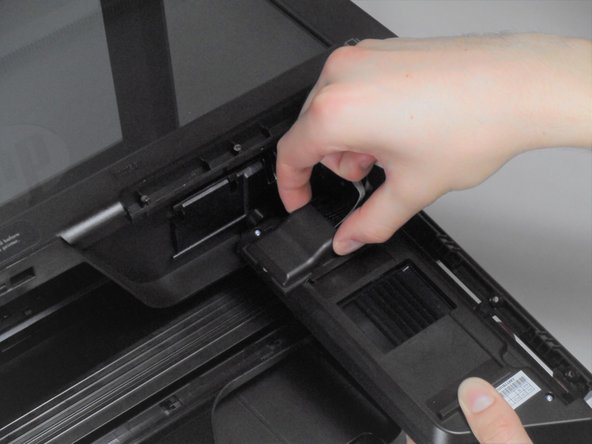
Detach the control panel from the black plastic latch by gently lifting upward, then outward towards you.
-
-
-
Turn over the control panel, making the screen face downwards.
-
Place two fingers on the rectangular, plastic wire cover and squeeze inward. Slide the cover downward, away from the cables, until the cover is fully removed.
-
-
-
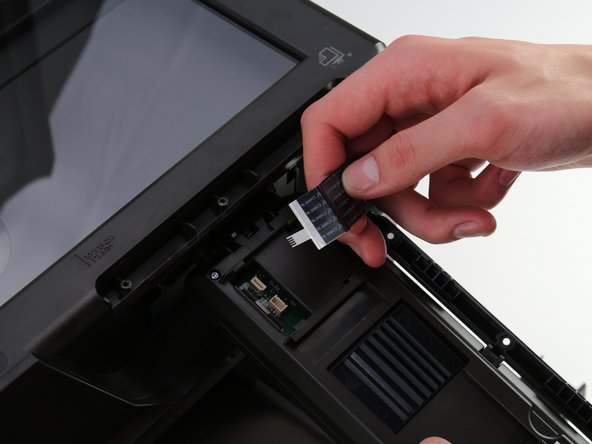
Disconnect the two ribbon cables from the panel by pulling them upward out of their ports.
-


To reassemble your device, follow these instructions in reverse order.
To reassemble your device, follow these instructions in reverse order.
Отменить: Я не выполнил это руководство.
9 участников успешно повторили данное руководство.

Команда

Cal Poly, Team S16-G4, Livingston Spring 2018 Участник Cal Poly, Team S16-G4, Livingston Spring 2018
CPSU-LIVINGSTON-S18S16G4
4 членов
Автор 10 руководств
4 Комментариев
This worked pretty much exactly as described; was a fairly straightforward procedure. Just have to be super-careful with those ribbon cables - they’re pretty delicate!
This is the easy one. Please do one for the HP Officejet Pro 8610. How the !&&* do you remove the led panel. It’s maddening!
Now if only I could find a replacement panel that I can trust! Any suggestions on where to buy the part?