Перейти к основному содержанию

HP Pavilion 13-s128nr RAM Replacement

Выберете то, что вам нужно

  1. HP Pavilion 13-s128nr RAM Replacement, Back Panel: шаг 1, изображение 1 из 2 HP Pavilion 13-s128nr RAM Replacement, Back Panel: шаг 1, изображение 2 из 2
    • Use the iFixit opening tool to take off the rubber caps.

    • Remove the screws using the Phillips #0 screwdriver.

  2. HP Pavilion 13-s128nr RAM Replacement: шаг 2, изображение 1 из 1
    • Use the Jimmy to pry around the seam of the laptop.

    • Remove the back panel of the laptop.

    • Don't completely remove the back panel as there are ribbon cables that can be easily damaged if removed quickly.

  3. HP Pavilion 13-s128nr RAM Replacement: шаг 3, изображение 1 из 2 HP Pavilion 13-s128nr RAM Replacement: шаг 3, изображение 2 из 2
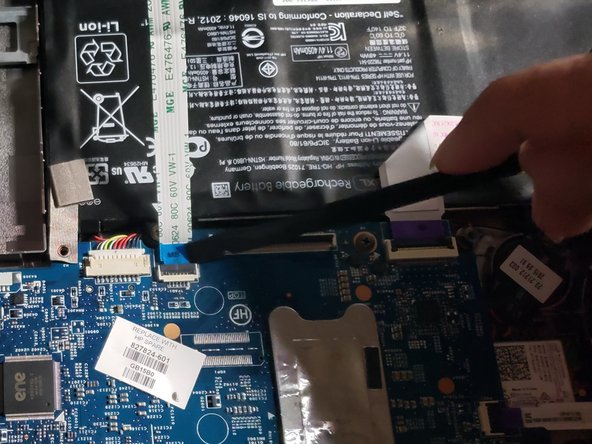
    • Using the iFixit opening tool to lift the tabs holding in the cables connecting the keyboard to the motherboard.

    • Pull the cable from the motherboard.

  4. HP Pavilion 13-s128nr RAM Replacement, Battery: шаг 4, изображение 1 из 2 HP Pavilion 13-s128nr RAM Replacement, Battery: шаг 4, изображение 2 из 2
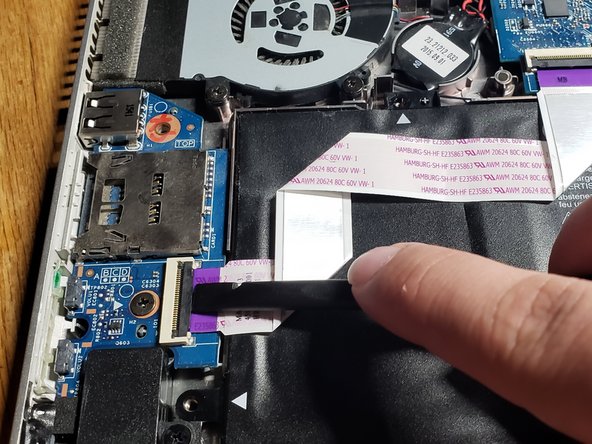
    • Lift upwards on the black tabs the purple strip is connected to.

    • Gently pull the purple strip out of its place.

  5. HP Pavilion 13-s128nr RAM Replacement: шаг 5, изображение 1 из 1
    • Using the Phillips #0 screwdriver, remove the five screws holding the battery in place.

  6. HP Pavilion 13-s128nr RAM Replacement: шаг 6, изображение 1 из 1
    • Pull the white cable connected to the motherboard out using the iFixit opening tool.

  7. HP Pavilion 13-s128nr RAM Replacement: шаг 7, изображение 1 из 1
    • Remove the battery.

    • There are little snap tabs on the right side of the battery. Be sure not to break them by pulling the battery out towards the left side.

  8. HP Pavilion 13-s128nr RAM Replacement, RAM: шаг 8, изображение 1 из 1
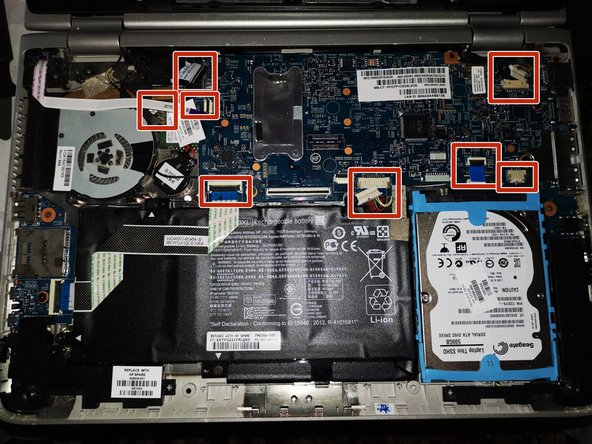
    • Look on previous instruction for how to open the laptop!

    • Remove these cables

  9. HP Pavilion 13-s128nr RAM Replacement: шаг 9, изображение 1 из 1
    • First, these two small.

    • Second, these six.

  10. HP Pavilion 13-s128nr RAM Replacement: шаг 10, изображение 1 из 1
    • While fliping the motherboard, lift the CMOS battery from it's place.

  11. HP Pavilion 13-s128nr RAM Replacement: шаг 11, изображение 1 из 1
    • 2 RAM-slots under this cover

    • M.2 Wi-Fi card

Заключение

To reassemble your device, follow these instructions in reverse order.

Прикрепленные документы

alibappan

Участник с: 02/26/22

109 Репутация

1 руководство автора

0 Комментариев

Добавить комментарий

Просмотр статистики:

За последние 24часов: 0

За последние 7 дней: 3

За последние 30 дней: 12

За всё время: 324