Введение
This guide will show you how to successfully remove the wireless card from the laptop. You will need the screwdriver listed in the tools section.
Выберете то, что вам нужно
-
-
Step 1 – Battery: Locate the battery release slider on the bottom of the laptop and move it in the direction of the arrow to the unlock position.
-
The yellow highlighted edge of the battery should pop up slightly when the switch is moved
-
-
-
Step 2: Using the edge of the battery that has popped up, lift the battery out of the computer.
-
-
-
With the laptop upside down, locate the three screws on the wireless card cover and unscrew the screws.
-
All three screws will have a 3.5 mm diameter head.
-
Two of the screws will be silver, 7mm in length, and will stay attached to the cover.
-
One screw will be black, 13mm in length, and will separate from the cover. Set this screw aside.
-
-
-
-
Grab one of the edges to the cover and lift up (towards you).
-
Set the cover to the side.
-
-
-
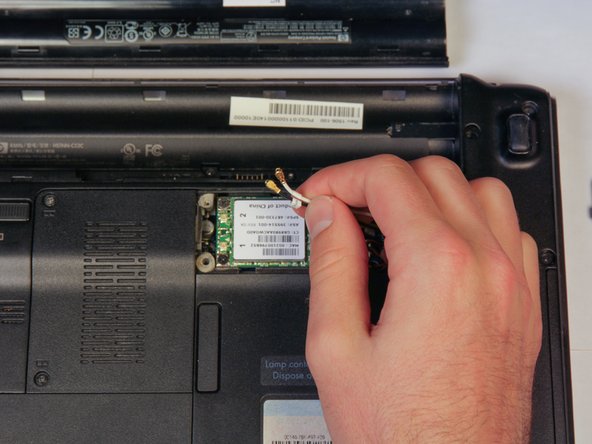
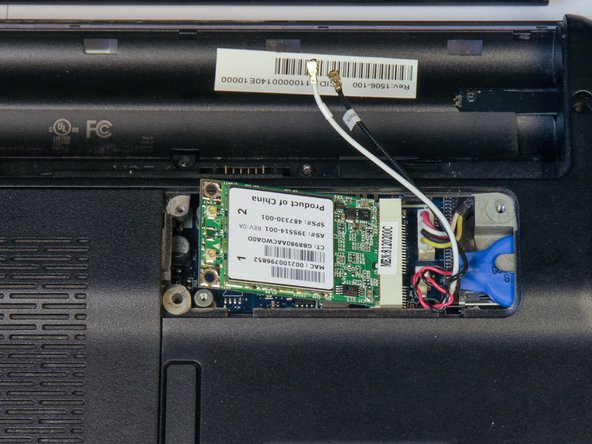
Locate the two black screws connecting the wireless card to the laptop. They will have a 3.5 mm diameter head and be 4mm long. Remove the screws.
-
-
-
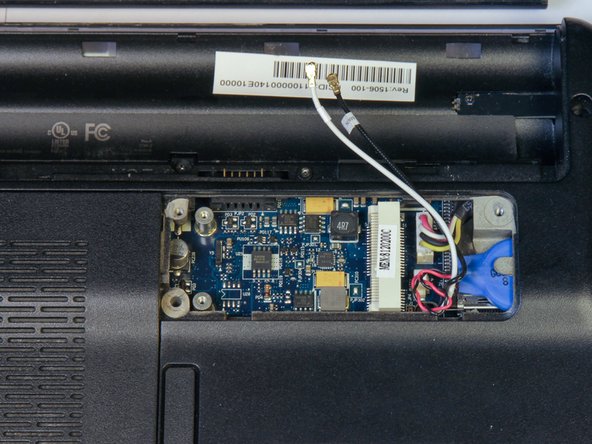
Grab the sides of the wireless card and pull it up and to the left to disconnect from the laptop.
-


To reassemble your device, follow these instructions in reverse order.
To reassemble your device, follow these instructions in reverse order.
Отменить: Я не выполнил это руководство.
Еще один человек закончил это руководство.
Команда

Cal Poly, Team 14-10, Forte Fall 2013 Участник Cal Poly, Team 14-10, Forte Fall 2013
CPSU-FORTE-F13S14G10
4 членов
Автор 5 руководств