Перейти к основному содержанию

HP Pavilion Sleekbook 14-b013cl Screen Replacement

Выберете то, что вам нужно

  1. HP Pavilion Sleekbook 14-b013cl Screen Replacement, Battery: шаг 1, изображение 1 из 2 HP Pavilion Sleekbook 14-b013cl Screen Replacement, Battery: шаг 1, изображение 2 из 2
    • Flip the computer over and move the battery lock switch to the "unlocked" position (marked by an orange lock icon).

  2. HP Pavilion Sleekbook 14-b013cl Screen Replacement: шаг 2, изображение 1 из 2 HP Pavilion Sleekbook 14-b013cl Screen Replacement: шаг 2, изображение 2 из 2
    • Press the switch on the right-hand side of the back of the device towards the center until the gray battery icon is no longer visible. This will eject the battery.

  3. HP Pavilion Sleekbook 14-b013cl Screen Replacement: шаг 3, изображение 1 из 2 HP Pavilion Sleekbook 14-b013cl Screen Replacement: шаг 3, изображение 2 из 2
    • Carefully pull the battery away from the device.

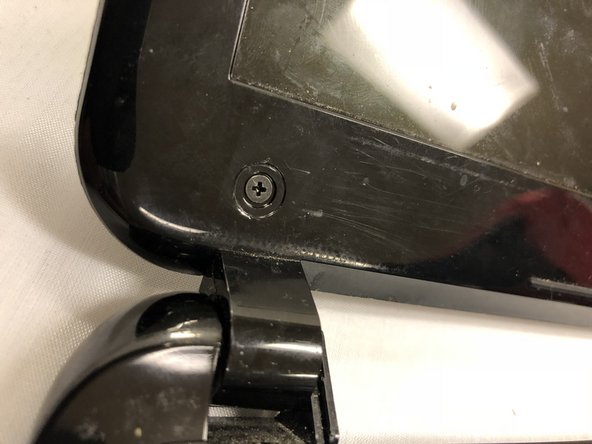
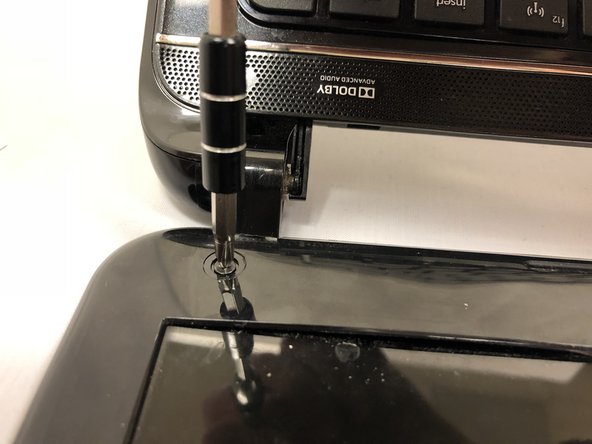
  4. HP Pavilion Sleekbook 14-b013cl Screen Replacement, Screen: шаг 4, изображение 1 из 3 HP Pavilion Sleekbook 14-b013cl Screen Replacement, Screen: шаг 4, изображение 2 из 3 HP Pavilion Sleekbook 14-b013cl Screen Replacement, Screen: шаг 4, изображение 3 из 3
    • Using a 1.0 Flathead screwdriver, remove the two stickers covering the screws that hold the screen in place.

    • Use a Phillips #1 screwdriver to remove the two 3.2mm screws that are now visible.

  5. HP Pavilion Sleekbook 14-b013cl Screen Replacement: шаг 5, изображение 1 из 3 HP Pavilion Sleekbook 14-b013cl Screen Replacement: шаг 5, изображение 2 из 3 HP Pavilion Sleekbook 14-b013cl Screen Replacement: шаг 5, изображение 3 из 3
    • Using a plastic opening tool, pry the plastic screen protector off, sliding the tool along the seam. Press the tool in until you hear the plastic tabs clicking as they come undone.

    • Separate the plastic that makes up the hinges for the screen, as they are part of the same screen protector.

    • Use your hands or plastic tool to peel the screen protector away from the adhesive holding it in place.

  6. HP Pavilion Sleekbook 14-b013cl Screen Replacement: шаг 6, изображение 1 из 2 HP Pavilion Sleekbook 14-b013cl Screen Replacement: шаг 6, изображение 2 из 2
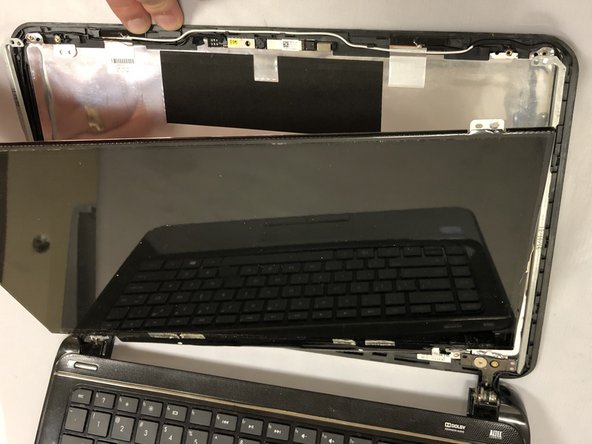
    • Using a Phillips #1 screwdriver, remove the six 2.8mm screws holding the screen in place.

    • Lift the screen away from the cover until you have access to the connector cable near the bottom of the screen.

  7. HP Pavilion Sleekbook 14-b013cl Screen Replacement: шаг 7, изображение 1 из 2 HP Pavilion Sleekbook 14-b013cl Screen Replacement: шаг 7, изображение 2 из 2
    • Peel away any sticker holding the connector in place and simply pull the tab out of the connector parallel with the screen.

    • Remove the screen from the device.

Заключение

To reassemble your device, follow these instructions in reverse order.

Еще один человек закончил это руководство.

Duncan Steele

Участник с: 04/10/18

308 Репутация

Автор 2 руководств

Команда

Eastern Washington University, Team S2-G3, Ramos Spring 2018 Участник Eastern Washington University, Team S2-G3, Ramos Spring 2018

EWU-RAMOS-S18S2G3

5 членов

Автор 5 руководств

0 Комментариев

Добавить комментарий

Просмотр статистики:

За последние 24часов: 0

За последние 7 дней: 1

За последние 30 дней: 1

За всё время: 446