Введение
This guide covers the removal and replacement of the HP Pavilion x2 10-n113dx front facing camera. From opening the device to the removal of the camera circuit board. Throughout this guide we will use a PH0 driver bit, blue plastic opening tools, and a pair of tweezers.
Выберете то, что вам нужно
-
-
Separate the screen from the keyboard.
-
The keyboard and screen are held together via magnets.
-
Open the device and pull the screen parallel to its face.
-
-
-
Separate the screen from body of the computer with a blue spudger.
-
Using a plastic spudger, gently begin separating the face from the body.
-
Separate each side gently.
-
-
-
Once each edge has been separated, gently lift the face (screen) from the back.
-
Be sure to not do so quickly or you risk tearing the keyboard ribbon cable.
-
Rotate the device 180 degrees for the following steps.
-
-
-
-
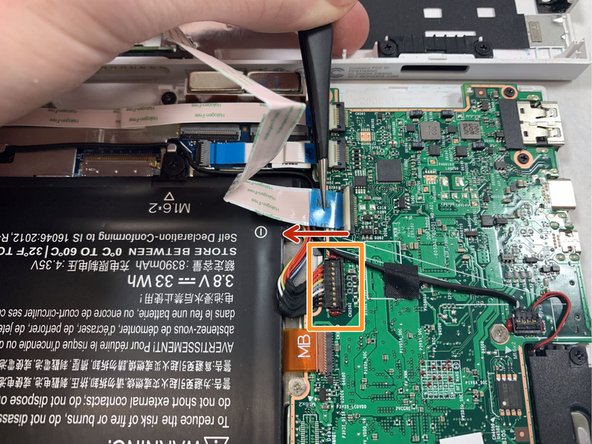
Follow the attached ribbon cable to the circuit board of the device.
-
On the side of the ribbon cable, use a small plastic spudger to pop open this plastic lock and gently pull in the direction of the cable to remove.
-
Gently lift up on the battery connector just below the earlier removed ribbon cable to remove.
-
-
-
Unscrew and remove each of the four indicated screws using the Phillips #0 screwdriver.
-
Begin with the bottom left 4.5mm diameter screw.
-
Continue to the remaining three 2.0 mm diameter screws.
-
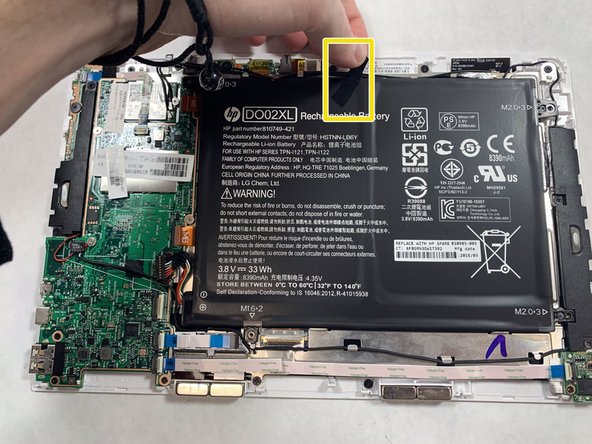
Once all four screws have been removed lift the battery from the device using the indicated pull tab along the top edge.
-
-
-
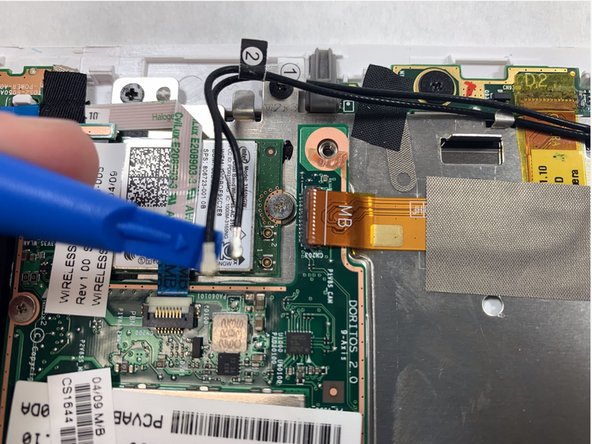
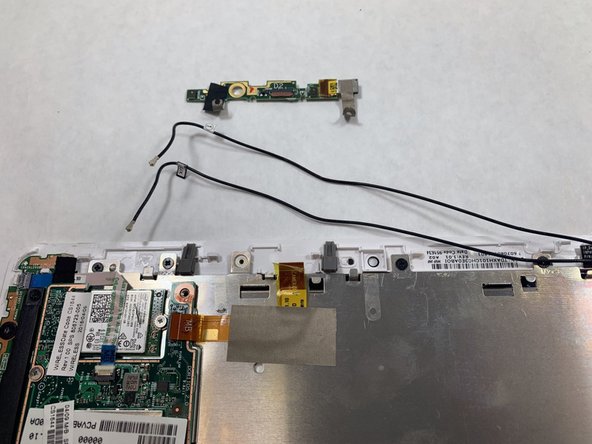
Using a small blue plastic spudger pop off the two speaker wires from the circuit board.
-
Once removed from the board carefully move the wires from the raised clips on the metal plating.
-
-
-
Using the Phillips #0 screwdriver, remove the 4.5mm screw from the camera circuit board.
-
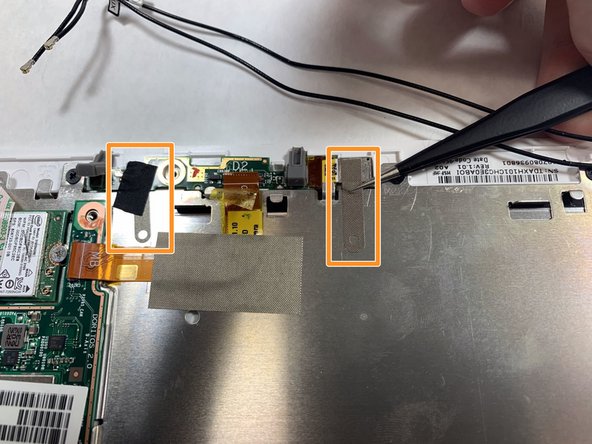
Using a plastic spudger flip up the two rubber covers to the right and left of the 4.5mm screw.
-
-
-
Carefully remove the ribbon cable from the camera circuit board with tweezers.
-
Carefully remove the wire mesh tape from the metal plating using tweezers.
-


To reassemble your device, follow these instructions in reverse order.
To reassemble your device, follow these instructions in reverse order.
Команда

IUPUI, Team S1-G4, Harley Spring 2019 Участник IUPUI, Team S1-G4, Harley Spring 2019
IUPUI-HARLEY-S19S1G4
3 членов
Автор 3 руководств