Перейти к основному содержанию

HP Photosmart M547 Screen Replacement

Выберете то, что вам нужно

  1. HP Photosmart M547 Screen Replacement, Screen: шаг 1, изображение 1 из 3 HP Photosmart M547 Screen Replacement, Screen: шаг 1, изображение 2 из 3 HP Photosmart M547 Screen Replacement, Screen: шаг 1, изображение 3 из 3
    • Disconnect from all power sources. (Remove batteries, chargers, etc.)

  2. HP Photosmart M547 Screen Replacement: шаг 2, изображение 1 из 2 HP Photosmart M547 Screen Replacement: шаг 2, изображение 2 из 2
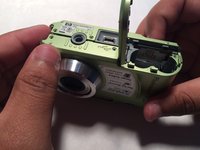
    • Remove the five 5mm screws from the bottom of the camera with a PH00 screwdriver.

  3. HP Photosmart M547 Screen Replacement: шаг 3, изображение 1 из 1
    • Pop the silver siding off of the camera. Proceed carefully as to not break the plastic.

  4. HP Photosmart M547 Screen Replacement: шаг 4, изображение 1 из 2 HP Photosmart M547 Screen Replacement: шаг 4, изображение 2 из 2
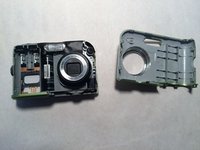
    • Make sure that the siding is fully removed and the battery dock is open. Carefully pry the top off of the camera.

  5. HP Photosmart M547 Screen Replacement: шаг 5, изображение 1 из 1
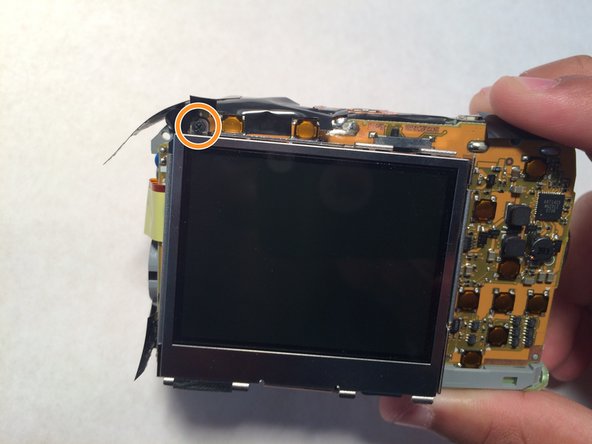
    • Approach from the front of the camera, make sure that the black/red wires as not covering the screw.

    • Carefully remove the black 5mm screw from the camera with a PH00 screwdriver.

  6. HP Photosmart M547 Screen Replacement: шаг 6, изображение 1 из 1
    • Flip the camera over and pop off the plastic siding.

  7. HP Photosmart M547 Screen Replacement: шаг 7, изображение 1 из 2 HP Photosmart M547 Screen Replacement: шаг 7, изображение 2 из 2
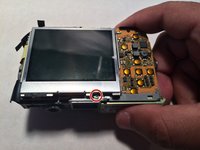
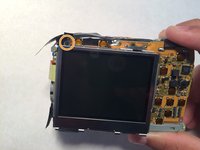
    • Look for the silver 5mm screw connecting the screen to the circuit board. Then carefully remove it using a PH00 screwdriver.

    • On the opposite corner of the screen there is a similar screw. Carefully remove that one as well.

    • You may need to peel back thin, black plastic to get to the screw. The plastic is purely there for dust protection.

  8. HP Photosmart M547 Screen Replacement: шаг 8, изображение 1 из 1
    • When you lift the screen off of the rest of the camera, you will see a small piece of ribbon wire connecting the screen and circuit board.

    • To remove this connection, you must lift the black bar at the base of the ribbon wire (on the circuit board), then slide the ribbon wire out.

  9. HP Photosmart M547 Screen Replacement: шаг 9, изображение 1 из 1
    • Congratulations! You have removed the screen, you can now replace it and reassemble your camera.

Заключение

To reassemble your device, follow these instructions in reverse order.

Jason Curran

Участник с: 02/08/17

101 Репутация

1 руководство автора

Команда

Central Coast New Tech High, Team 5-8, Rushing Spring 2017 Участник Central Coast New Tech High, Team 5-8, Rushing Spring 2017

CCNTH-RUSHING-S17S5G8

2 членов

Автор 2 руководств

0 Комментариев

Добавить комментарий

Просмотр статистики:

За последние 24часов: 0

За последние 7 дней: 6

За последние 30 дней: 17

За всё время: 802