Перейти к основному содержанию

HP Probook 4425s Hard Drive Replacement

Выберете то, что вам нужно

  1. HP Probook 4425s Hard Drive Replacement, Hard Drive: шаг 1, изображение 1 из 2 HP Probook 4425s Hard Drive Replacement, Hard Drive: шаг 1, изображение 2 из 2
    • Turn the laptop off.

    • Flip the laptop over.

  2. HP Probook 4425s Hard Drive Replacement: шаг 2, изображение 1 из 2 HP Probook 4425s Hard Drive Replacement: шаг 2, изображение 2 из 2
    • Remove the battery.

  3. HP Probook 4425s Hard Drive Replacement: шаг 3, изображение 1 из 1
    • Remove the four 3 mm Phillips head screws that secure the switch cover in place.

  4. HP Probook 4425s Hard Drive Replacement: шаг 4, изображение 1 из 2 HP Probook 4425s Hard Drive Replacement: шаг 4, изображение 2 из 2
    • Flip over and open the laptop.

    • Remove the now loosened cover by grabbing both sides and sliding up.

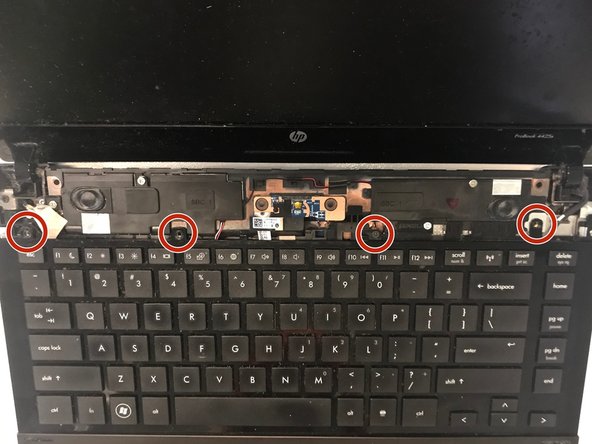
    • Remove the four 3mm Phillips head black screws directly above the keyboard.

  5. HP Probook 4425s Hard Drive Replacement: шаг 5, изображение 1 из 2 HP Probook 4425s Hard Drive Replacement: шаг 5, изображение 2 из 2
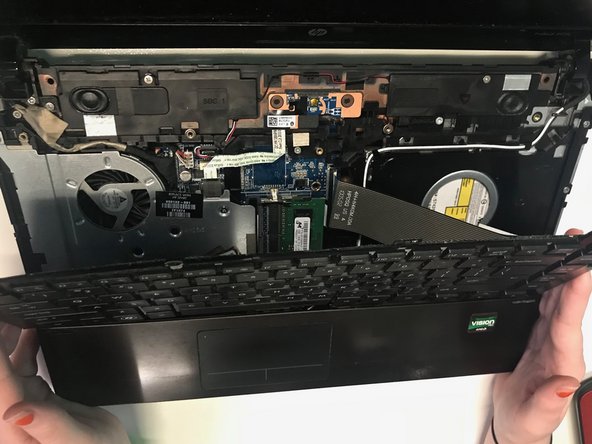
    • Carefully remove the keyboard by sliding it up towards the screen of the computer in order to release the keyboard ribbon cable.

  6. HP Probook 4425s Hard Drive Replacement: шаг 6, изображение 1 из 3 HP Probook 4425s Hard Drive Replacement: шаг 6, изображение 2 из 3 HP Probook 4425s Hard Drive Replacement: шаг 6, изображение 3 из 3
    • Remove the three black 3 mm Phillips head screws from the under the keyboard that are directly above the mouse pad.

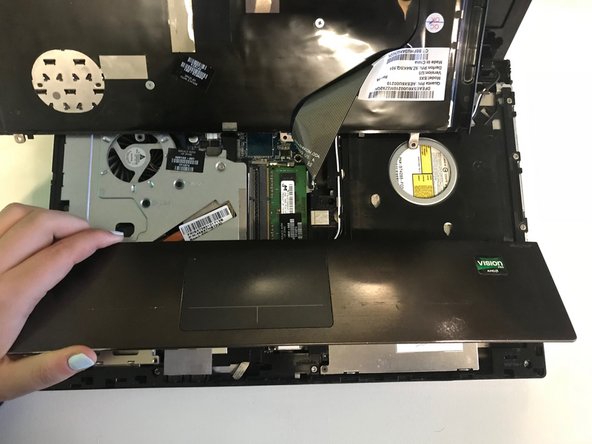
    • Carefully remove the mouse pad.

  7. HP Probook 4425s Hard Drive Replacement: шаг 7, изображение 1 из 2 HP Probook 4425s Hard Drive Replacement: шаг 7, изображение 2 из 2
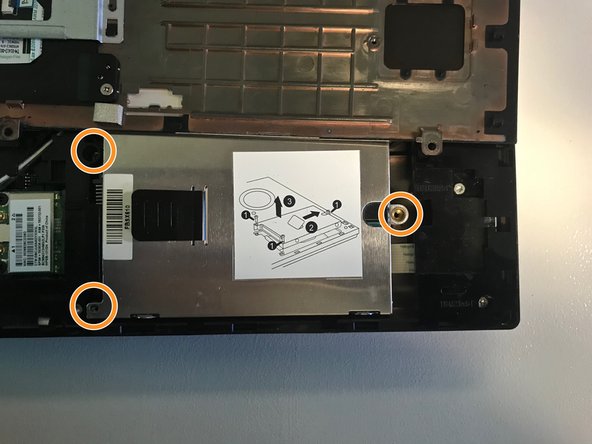
    • The hard drive should be located on the right side of the laptop under the mouse pad.

    • Remove the two black 2 mm Phillips screws holding the hard drive in place on the left side, and remove the larger Phillips head screw on the right side of the hard drive.

  8. HP Probook 4425s Hard Drive Replacement: шаг 8, изображение 1 из 2 HP Probook 4425s Hard Drive Replacement: шаг 8, изображение 2 из 2
    • Remove the hard drive.

Заключение

To reassemble your device, follow these instructions in reverse order.

Kaity

Участник с: 09/28/18

157 Репутация

1 руководство автора

Команда

University of North Texas, Team S8-G6, Riccardelli Fall 2018 Участник University of North Texas, Team S8-G6, Riccardelli Fall 2018

UNT-RICCARDELLI-F18S8G6

3 членов

Автор 3 руководств

0 Комментариев

Добавить комментарий

Просмотр статистики:

За последние 24часов: 1

За последние 7 дней: 3

За последние 30 дней: 20

За всё время: 1,440