Введение
This device's motherboard is a green, "L"-shaped component internally located against the front screen and beneath the battery. Replacement requires the removal of the battery prior to removing the motherboard and involves the disconnection of two gold ribbons and 6 screws. In this guide, you will be removing the following:
- Back Cover
- Battery
- Charging Port
- Speaker Unit
- Motherboard
If the guide steps are accurately followed, replacement should be a breeze. So, prepare your required tools, a new motherboard for your tablet, and set aside about 20 to 30 minutes to delve into the inner workings of your HP Slate.
Выберете то, что вам нужно
-
-
Begin your replacement by using a T3 or T4 Torx screwdriver.
-
Remove the two 1.4mm x 3mm Torx Head screws at the top of the device.
-
-
-
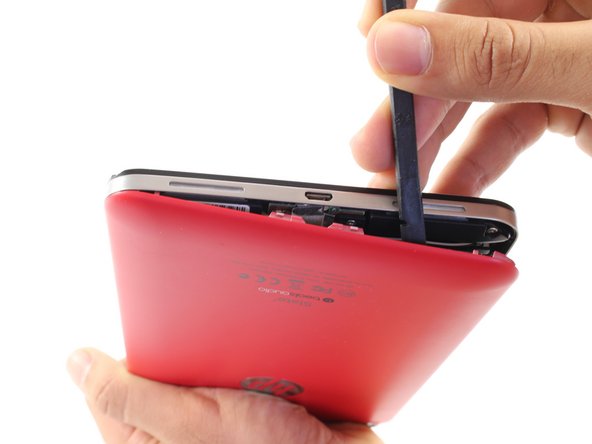
With the pointed end of the spudger, remove the thin metal band.
-
-
-
Using the flat end of the spudger, pry back the rear plastic cover.
This is basically how I opened my HP 10 Plus 2201. "Using the flat end of the spudger, pry back (apart) the rear plastic cover from tablet.
-
-
-
Locate and remove the yellow tape covering the red and white speaker wires.
The inside of my HP 10 Plus 2210 looks similar but not exactly as this illustration
The battery connections weren't the plug in type. The three battery battery wires (red, white, & black) were soldered into place,
-
-
-
Using the pointed end of the spudger, push both sides of the speaker wire connector out of its base.
Do not pull on wires. Never force anything.
note the route of the speaker cables round the battery
-
-
-
-
Gently pull back the foil covering the gold charging port ribbon.
Hpcom Support Helps HP Printer users to download and install All Hp Printers drivers. We also provide all possible solutions to fix hp Printer problems. If you face any issue in install Hp printer driver or having other problems with the hp Printer, you can follow our 100 % working solutions. In case you can’t able to continue printing, then feel free to contact us. We are happy to serve you.
-
-
-
Using the flat end of the spudger, lift up the black panel covering the charging port connector.
-
Gently slide the charging port ribbon out from its housing.
-
-
-
Push the white battery connector out of its housing using the pointed end of the spudger.
-
-
-
Using the #00 Phillips Head screwdriver, remove the 5 screws holding the battery in place.
-
The four 1.75mm x 3mm silver Phillips Head screws circled in red are interchangeable.
-
The black 1.75mm x 4mm Phillips Head screw must go back to the same spot during reassembly.
-
-
-
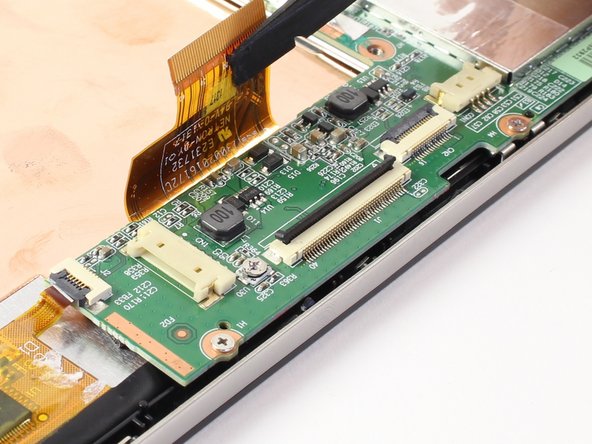
Disconnect the LCD screen ribbon by lifting up the black panel with the flat end of a spudger and sliding the gold strip out.
-
-
-
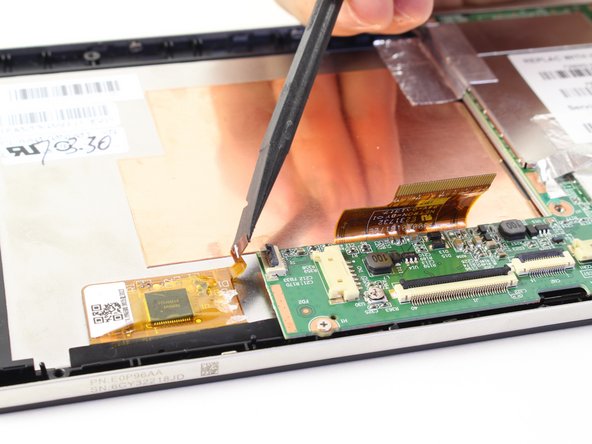
Likewise, disconnect the square radio chip ribbon by lifting up the black panel with a spudger and sliding the gold strip out.
-
-
-
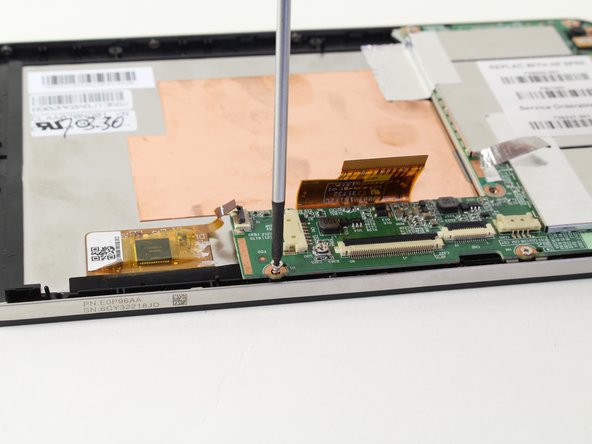
You will be using a #00 Phillips Head screwdriver to free the motherboard.
-
Remove the six 1.75mm x 3mm Phillips Head screws holding the motherboard to the screen.
-
-
-
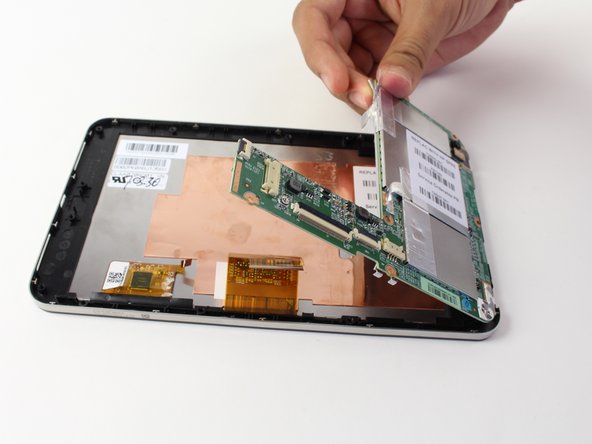
Using your hand, lift up the silver tape from the copper plate.
-
Lift the motherboard out of the device.
You will need to transfer the camera from the old motherboard to the new.
Gently disconnect the connector marked “BYD”.
Gently press down on the camera lens in order to release ir from the board and feed the connector through the motherboard by turning the connector in a diagonal position in order to feed it through the motherboard.
-


To reassemble your device, follow these instructions in reverse order.
To reassemble your device, follow these instructions in reverse order.
Отменить: Я не выполнил это руководство.
4 участников успешно повторили данное руководство.

Команда

Cal Poly, Team 13-30, Maness Spring 2014 Участник Cal Poly, Team 13-30, Maness Spring 2014
CPSU-MANESS-S14S13G30
3 членов
Автор 8 руководств
On the HP 10 Plus 2201 there are no head screws. I used the spudger to 'carefully' separate the case. There are little snaps on the inside of case that will separate with little pressure on spudger.
RB Richter - Ответить
I used these directions to replace HP Plus 10 2201 battery. I bypassed speaker installation.
RB Richter - Ответить