Введение
This guide will instruct you on how to remove and replace the SD card reader. The SD card reader may need to be replaced if it is not working. First, you will need to remove the backplate and battery by following the respective steps.
Выберете то, что вам нужно
-
-
Turn off and unplug the laptop.
-
Flip over the laptop so that the bottom backplate is exposed.
-
-
-
Use a T5 screwdriver to remove the six 3 mm screws that secure the backplate.
-
Use the same screwdriver to remove the two 7 mm screws.
-
-
-
-
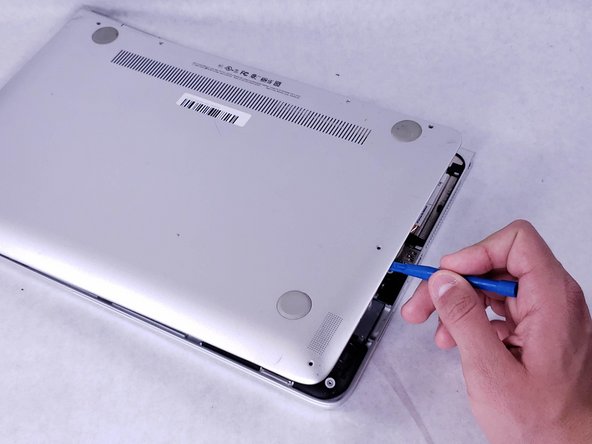
Insert an opening tool under the bottom cover at the screen hinges, and gently pry the cover free.
-
Carefully work your way around the cover's edges to pop it off completely.
-
-
-
With the backplate removed, remove the four 3 mm screws securing the battery with a Phillips #1 screwdriver.
-
With the screws removed, disconnect the 3 wires connected to the battery.
-
-
-
Remove the 2 mm long Phillips #000 head screw on the SD Card Reader.
-
Using a plastic spudger, release the pressure connector marked with the green rectangle by gently prying up from below.
-
Once the pressure connector is undone, the white ribbon cable connected to the SD Card Reader will pull out with no resistance.
-
With the ribbon cable disconnected and the screw out, the SD Card Reader will be free to remove and replace.
-


To reassemble your device, follow these instructions in reverse order.
To reassemble your device, follow these instructions in reverse order.
Команда

UMass Dartmouth, Team S2-G4, Simcock Spring 2019 Участник UMass Dartmouth, Team S2-G4, Simcock Spring 2019
UMASSD-SIMCOCK-S19S2G4
3 членов
Автор 6 руководств