Введение
The CMOS battery maintains the computer's startup settings as well as its internal clock. If your computer notifies you about changing this battery, it is best to do so immediately. Use this guide if you need to replace the CMOS battery in your HP dv5-1125nr.
Выберете то, что вам нужно
-
-
Инструмент, используемый на этом этапе:Phillips #00 Screwdriver$5.49
-
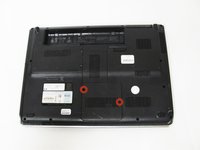
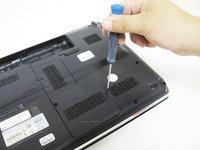
Remove these two 4mm Phillips screws on the back panel using a Phillips #00 screwdriver and remove the cover to reveal the CMOS battery
-
-
Инструмент, используемый на этом этапе:Flathead 3/32" or 2.5 mm Screwdriver$5.49
-
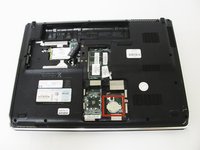
Locate the CR2032 watch battery
-
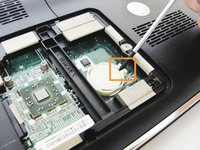
Using a 2.5mm flathead screwdriver, carefully pry up the battery using the tab to the right of the battery
-


To reassemble your device, follow these instructions in reverse order.
To reassemble your device, follow these instructions in reverse order.
Отменить: Я не выполнил это руководство.
10 человек успешно провели ремонт по этому руководству.

Команду

Cal Poly, Team 9-15, Regan Spring 2014 Участник Cal Poly, Team 9-15, Regan Spring 2014
CPSU-REGAN-S14S9G15
4 членов
Автор 10 руководств