Перейти к основному содержанию

HTC EVO Design 4G Screen Replacement

Выберете то, что вам нужно

  1. HTC EVO Design 4G Screen Replacement, Screen: шаг 1, изображение 1 из 1
    • Tools: Phillips #000 Screwdriver, T4 Torx Screwdriver, Safety Pry Tool (Guitar pick), Tweezers

  2. HTC EVO Design 4G Screen Replacement, Removing Casing: шаг 2, изображение 1 из 1
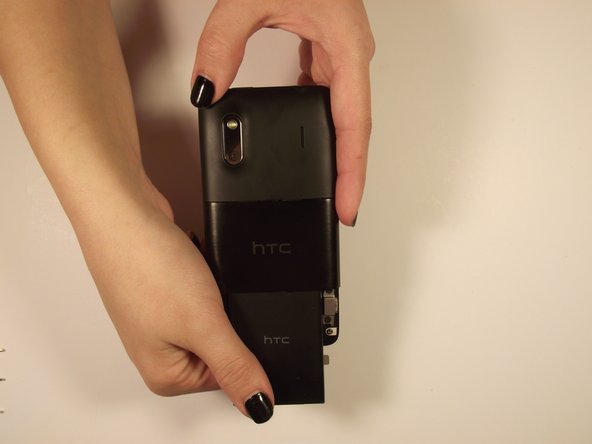
    • Use fingers on either end of the button edges of the phone to pull back cover off. It should slide off.

  3. HTC EVO Design 4G Screen Replacement, Removing Battery: шаг 3, изображение 1 из 2 HTC EVO Design 4G Screen Replacement, Removing Battery: шаг 3, изображение 2 из 2
    • When open, pull on “Open” tab and it should rotate towards you

    • Grab the bottom edge of the battery and pull it toward you

  4. HTC EVO Design 4G Screen Replacement, Removing Casing: шаг 4, изображение 1 из 2 HTC EVO Design 4G Screen Replacement, Removing Casing: шаг 4, изображение 2 из 2
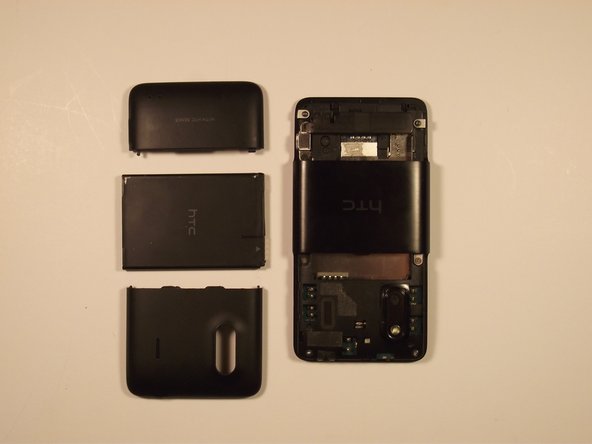
    • On the side of the top casing on the phone there should be a slot. Use your safety pry tool (guitar pick) pry around the perimeter of the casing to remove it

    • Info*: The adhesive tape that you may find will not be necessary for replacement later

  5. HTC EVO Design 4G Screen Replacement, Removing Screws: шаг 5, изображение 1 из 2 HTC EVO Design 4G Screen Replacement, Removing Screws: шаг 5, изображение 2 из 2
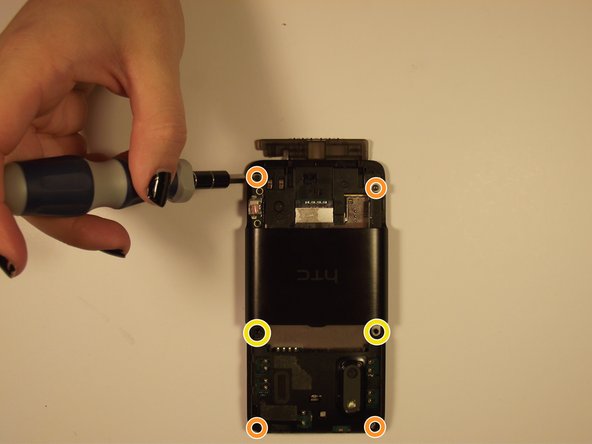
    • Remove the two Phillips screws to release the casing above the port

    • Remove the top and bottom pairs of Torx screws.

    • Remove the middle pair of two Phillips screws.

  6. HTC EVO Design 4G Screen Replacement, Removing Casing: шаг 6, изображение 1 из 3 HTC EVO Design 4G Screen Replacement, Removing Casing: шаг 6, изображение 2 из 3 HTC EVO Design 4G Screen Replacement, Removing Casing: шаг 6, изображение 3 из 3
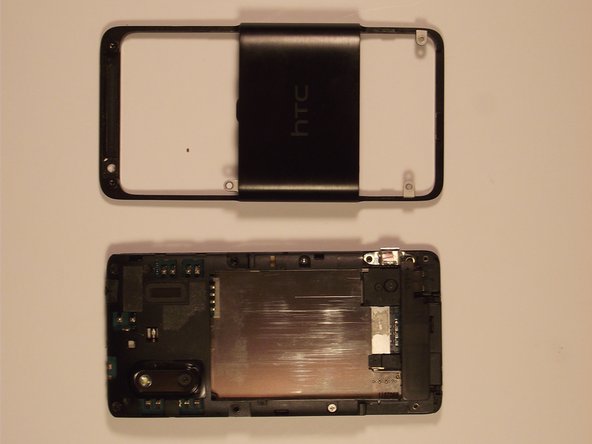
    • To remove the remaining cover, lift the side port, which was previously uncovered, then lift the outer shell from the bottom of the phone and slide it forward

  7. HTC EVO Design 4G Screen Replacement, Removing Screws Continued: шаг 7, изображение 1 из 2 HTC EVO Design 4G Screen Replacement, Removing Screws Continued: шаг 7, изображение 2 из 2
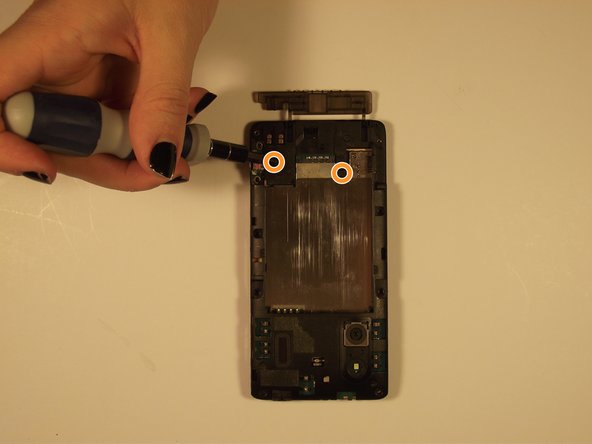
    • Remove the two revealed screws on the outside (Torx = red, Phillips = orange), and then remove the two phillips on the bottom of the phone

  8. HTC EVO Design 4G Screen Replacement, Removing Rear Housing: шаг 8, изображение 1 из 2 HTC EVO Design 4G Screen Replacement, Removing Rear Housing: шаг 8, изображение 2 из 2
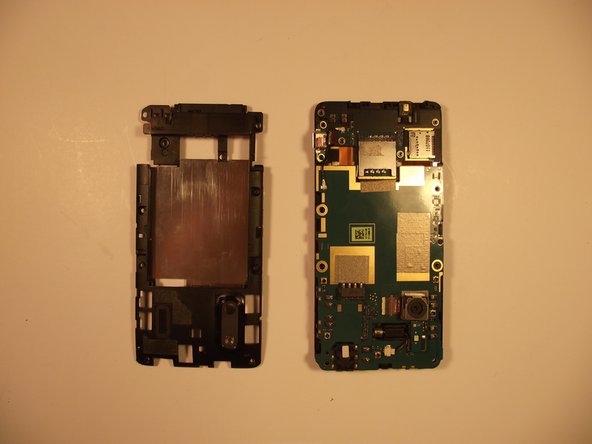
    • Remove the rear housing by prying around the edge with your Safety Pry Tool

  9. HTC EVO Design 4G Screen Replacement, Pull the Plug: шаг 9, изображение 1 из 1
    • Unplug the wire connecting the vibrator to the board with your tweezers

  10. HTC EVO Design 4G Screen Replacement, Like a Book: шаг 10, изображение 1 из 1
    • Unfold motherboard from the screen (open carefully like a book)

  11. HTC EVO Design 4G Screen Replacement, Flex Cables: шаг 11, изображение 1 из 1
    • Disconnect the two aluminum flex cables

  12. HTC EVO Design 4G Screen Replacement, Broken Bond: шаг 12, изображение 1 из 1
    • The flex cables should be the only binding and after being removed should leave you with the separate screen

Заключение

Replace the screen and to reassemble your device, follow these instructions in reverse order.

Еще один человек закончил это руководство.

Victoria

Участник с: 10/23/14

94 Репутация

Автор 3 руководств

Команда

UMass Dartmouth, Team 5-4, Vijaybhaskar Fall 2014 Участник UMass Dartmouth, Team 5-4, Vijaybhaskar Fall 2014

UMASSD-VIJAYBHASKAR-F14S5G4

3 членов

Автор 3 руководств

0 Комментариев

Добавить комментарий

Просмотр статистики:

За последние 24часов: 0

За последние 7 дней: 1

За последние 30 дней: 2

За всё время: 601