Перейти к основному содержанию

HTC Fortress Back Panel Replacement

Выберете то, что вам нужно

  1. HTC Fortress Back Panel Replacement, Battery: шаг 1, изображение 1 из 2 HTC Fortress Back Panel Replacement, Battery: шаг 1, изображение 2 из 2
    • Remove the back cover of the device by sliding it upward.

    • You may need to remove the phone stylus first.

  2. HTC Fortress Back Panel Replacement: шаг 2, изображение 1 из 2 HTC Fortress Back Panel Replacement: шаг 2, изображение 2 из 2
    • Remove the battery by pulling it away from the back of the phone.

  3. HTC Fortress Back Panel Replacement, SIM Card: шаг 3, изображение 1 из 3 HTC Fortress Back Panel Replacement, SIM Card: шаг 3, изображение 2 из 3 HTC Fortress Back Panel Replacement, SIM Card: шаг 3, изображение 3 из 3
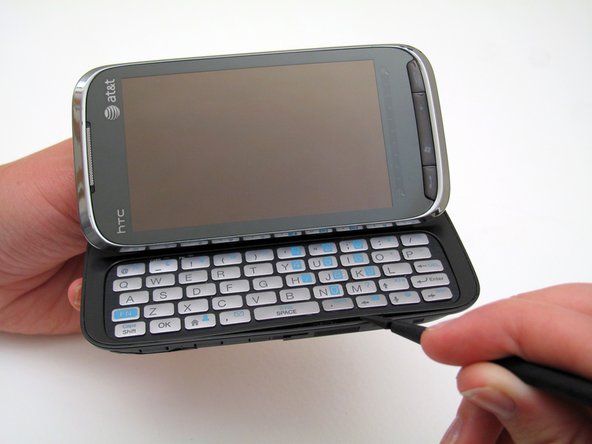
    • Insert the stylus into the small slot.

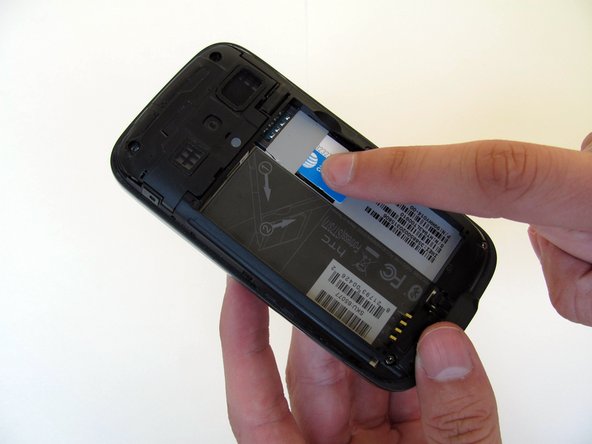
    • Use the stylus as a lever to push the sim card out of its fitting.

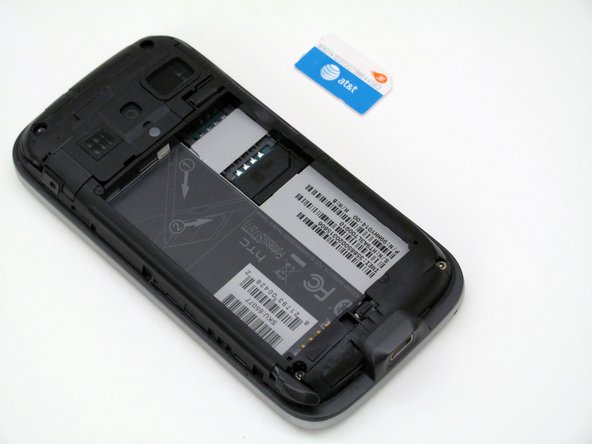
    • Use your finger to slide the card out the rest of the way.

  4. HTC Fortress Back Panel Replacement, Back Panel: шаг 4, изображение 1 из 2 HTC Fortress Back Panel Replacement, Back Panel: шаг 4, изображение 2 из 2
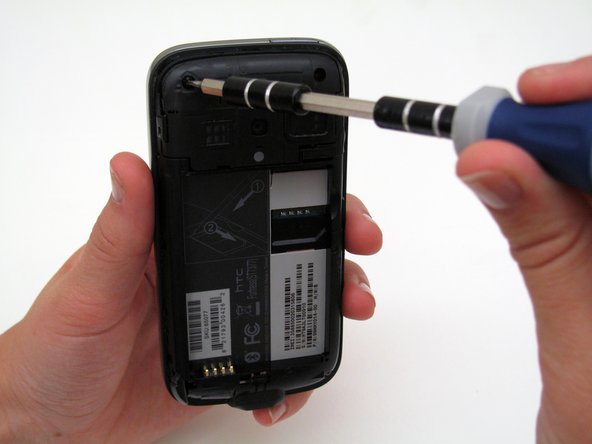
    • Remove the two 4mm-long screws using the T4 Torx Screwdriver.

    • Remove the two 3.5mm-long screws using the T4 Torx Screwdriver.

    • Keep the 4mm-long upper screws separate from the 3.5mm-long bottom screws. They are different!

  5. HTC Fortress Back Panel Replacement: шаг 5, изображение 1 из 3 HTC Fortress Back Panel Replacement: шаг 5, изображение 2 из 3 HTC Fortress Back Panel Replacement: шаг 5, изображение 3 из 3
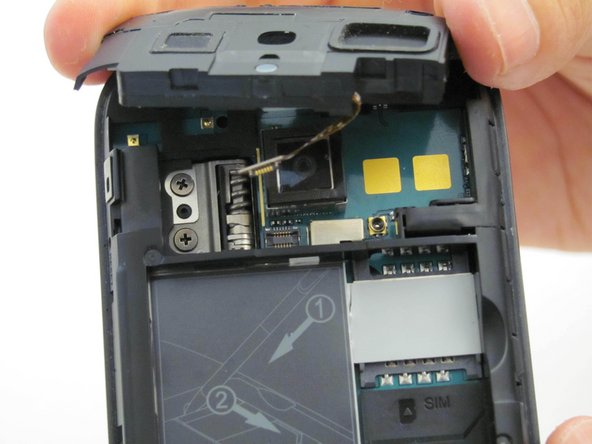
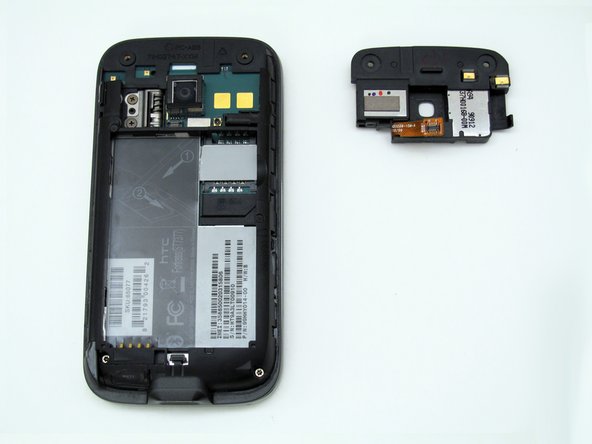
    • Remove the camera panel by hand (black cover above the battery slot).

    • Be careful, there is a cable attached underneath the camera panel.

    • Gently pull the camera panel away from the phone to detach the cable.

    • During reassembly, reattach the cable by holding the silver-plated ending slightly above its slot and using the spudger to gently press it into its fitting. Then, insert the camera panel so it is flush with the back panel again.

  6. HTC Fortress Back Panel Replacement: шаг 6, изображение 1 из 3 HTC Fortress Back Panel Replacement: шаг 6, изображение 2 из 3 HTC Fortress Back Panel Replacement: шаг 6, изображение 3 из 3
    • Notice the 8 small clips around the perimeter of the phone shown here...

  7. HTC Fortress Back Panel Replacement: шаг 7, изображение 1 из 2 HTC Fortress Back Panel Replacement: шаг 7, изображение 2 из 2
    • ...and the 2 clips shown here.

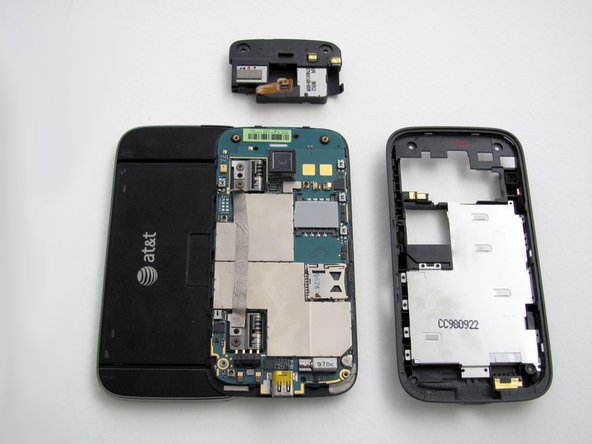
    • Insert the spudger into the seam along the edge of phone, and gently pry the back panel from the keyboard. Follow the seam along the perimeter of the phone.

    • Only pry right next to the clips shown in the above step, as well as the clips next to the charging port.

  8. HTC Fortress Back Panel Replacement: шаг 8, изображение 1 из 2 HTC Fortress Back Panel Replacement: шаг 8, изображение 2 из 2
    • Remove the back panel by pulling it away from the phone.

    • Slide the panel downwards as you remove it, making sure to clear the charging port.

Заключение

To reassemble your device, follow these instructions in reverse order.

Еще один человек закончил это руководство.

Lucas David

Участник с: 04/19/13

540 Репутация

Автор 9 руководств

Команда

Cal Poly, Team 4-13, Maness Spring 2013 Участник Cal Poly, Team 4-13, Maness Spring 2013

CPSU-MANESS-S13S4G13

4 членов

Автор 18 руководств

0 Комментариев

Добавить комментарий

Просмотр статистики:

За последние 24часов: 0

За последние 7 дней: 1

За последние 30 дней: 2

За всё время: 528