Эта версия возможно содержит некорректные исправления. Переключить на последнюю проверенную версию.
Выберете то, что вам нужно
-
Этот шаг не переведен. Помогите перевести
-
Apply pressure to the dark plastic casing and slide the casing downward, off of the phone.
-
-
Этот шаг не переведен. Помогите перевести
-
Pull on the red tab to slide the battery out.
-
Take out the battery.
-
Replace with new battery.
-
-
Этот шаг не переведен. Помогите перевести
-
Use a T5 Torx screwdriver to remove the five screws anchoring the plastic flap to the phone.
-
-
-
Этот шаг не переведен. Помогите перевести
-
Once the screws are removed from the plastic flap, the piece should easily come out.
-
-
Этот шаг не переведен. Помогите перевести
-
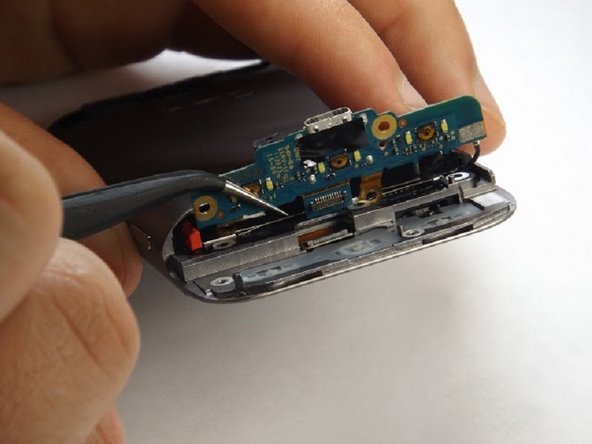
After the screws are removed, fold circuit panel upwards, exposing the phone's primary buttons.
-
In order to remove the circuit board you must disconnect the labeled component.
-
-
Этот шаг не переведен. Помогите перевести
-
Once the back side of the buttons are exposed, they will fall out either by punching them out from the front side, or by using tweezers to pull them out of the back.
-
-
Этот шаг не переведен. Помогите перевести
-
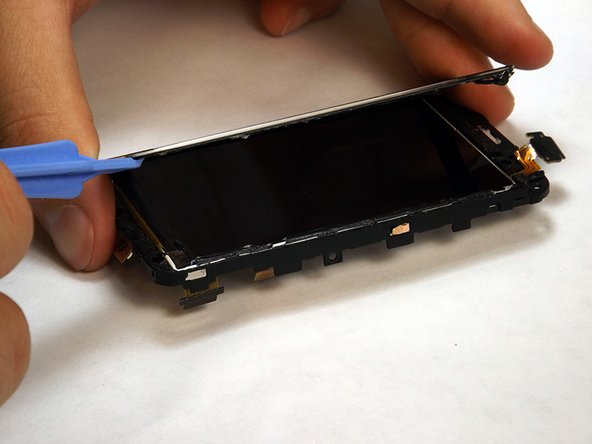
Rotate your HTC Freestyle so that the main screen is facing upward and toward you.
-
Use a plastic opening tool to pry the screen and electronic internals apart from the main phone housing.
-
-
Этот шаг не переведен. Помогите перевести
-
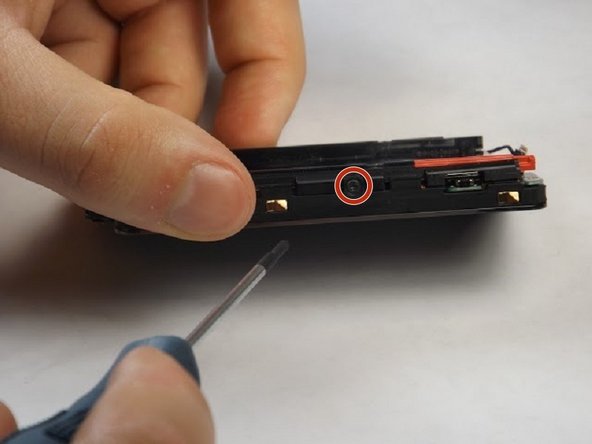
Orient the component so that the battery compartment and camera are facing upwards.
-
Use the #00 Phillips screwdriver to remove the exterior screws that are holding the piece together.
-
-
Этот шаг не переведен. Помогите перевести
-
Once the screws are removed, the motherboard can be separated from the other components after prying open the gold-colored clamps hidden underneath the battery compartment.
-
Rotate the phone 180 degrees and pry the second clamp that is located on the other side of the component.
-
The motherboard will then easily be removed from the rest.
-
-
Этот шаг не переведен. Помогите перевести
-
Once the screen and motherboard are separated, use a plastic opening tool to pry along the edges of the touchscreen. **Note, the use of a heat gun/heating element will help loosen the adhesive from behind the screen to make prying less physically straining.
-
The screen should now be fully removed.
-


Команда

USF Tampa, Team 8-3, Leahy Fall 2014 Участник USF Tampa, Team 8-3, Leahy Fall 2014
USFT-LEAHY-F14S8G3
4 членов
Автор 10 руководств