Перейти к основному содержанию

HTC Rhyme Battery Replacement

Выберете то, что вам нужно

  1. HTC Rhyme Battery Replacement, Removing Back Cover: шаг 1, изображение 1 из 2 HTC Rhyme Battery Replacement, Removing Back Cover: шаг 1, изображение 2 из 2
    • Slide the bottom back cover off of the phone.

  2. HTC Rhyme Battery Replacement: шаг 2, изображение 1 из 1
    • Locate the four screws on the plastic cover and unscrew them.

  3. HTC Rhyme Battery Replacement: шаг 3, изображение 1 из 2 HTC Rhyme Battery Replacement: шаг 3, изображение 2 из 2
    • Pry the sticker off from the sides.

    • You can use a metal spudger to do this.

    • Peel the sticker off with your hands.

  4. HTC Rhyme Battery Replacement, Remove the plastic cover: шаг 4, изображение 1 из 1
    • Remove the plastic cover using your hands.

  5. HTC Rhyme Battery Replacement: шаг 5, изображение 1 из 1
    • Remove the yellow ribbon.

  6. HTC Rhyme Battery Replacement: шаг 6, изображение 1 из 3 HTC Rhyme Battery Replacement: шаг 6, изображение 2 из 3 HTC Rhyme Battery Replacement: шаг 6, изображение 3 из 3
    • Lift up the blue flaps underneath the battery.

    • Lift up the black flap at the top of the phone.

    • Lift up the black flap at the bottom of the phone.

  7. HTC Rhyme Battery Replacement, Remove the Motherboard: шаг 7, изображение 1 из 2 HTC Rhyme Battery Replacement, Remove the Motherboard: шаг 7, изображение 2 из 2
    • Remove all 4 screws.

    • Carefully remove the motherboard with your hands.

  8. HTC Rhyme Battery Replacement, Removing the Back Plastic Casing: шаг 8, изображение 1 из 3 HTC Rhyme Battery Replacement, Removing the Back Plastic Casing: шаг 8, изображение 2 из 3 HTC Rhyme Battery Replacement, Removing the Back Plastic Casing: шаг 8, изображение 3 из 3
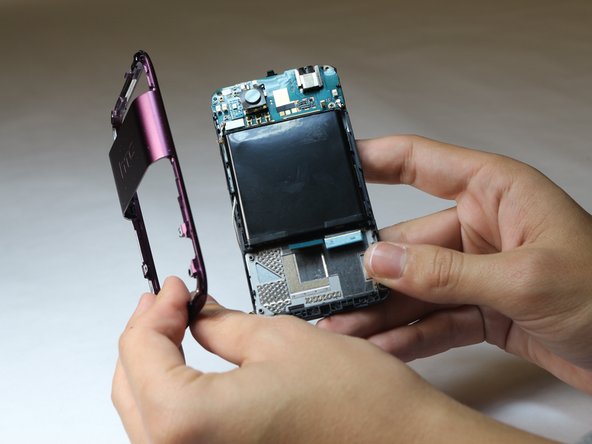
    • Pry the back plastic casing off with your hands.

  9. HTC Rhyme Battery Replacement, Removing the Battery: шаг 9, изображение 1 из 3 HTC Rhyme Battery Replacement, Removing the Battery: шаг 9, изображение 2 из 3 HTC Rhyme Battery Replacement, Removing the Battery: шаг 9, изображение 3 из 3
    • Remove the screws.

    • Use a metal spudger to remove the battery.

Заключение

To reassemble your device, follow these instructions in reverse order.

2 участников успешно повторили данное руководство.

Elizabeth Steiner

Участник с: 10/08/14

435 Репутация

Автор 3 руководств

Команда

USF Tampa, Team 9-6, Leahy Fall 2014 Участник USF Tampa, Team 9-6, Leahy Fall 2014

USFT-LEAHY-F14S9G6

3 членов

Автор 10 руководств

0 Комментариев

Добавить комментарий

Просмотр статистики:

За последние 24часов: 0

За последние 7 дней: 2

За последние 30 дней: 4

За всё время: 5,040