Выберете то, что вам нужно
-
-
Remove the back cover of the device to access the internal components of the HTC 7 Surround.
-
To remove the back cover, use the circular hole to lift up the cover while holding the front of the device down.
-
-
-
-
Look at the bottom right hand corner of the device and remove the silver tape covering the SD card slot with your fingers.
-
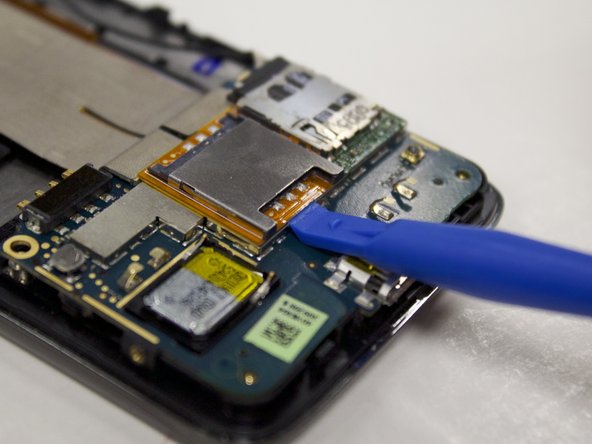
Insert the plastic opening tool directly underneath the orange surface below the SIM card until its removed from the surface of the device.
-
-
-
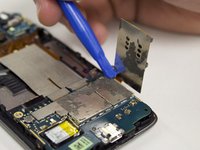
To get to the attachment that the SD/SIM card is attached to; insert the plastic opening tool underneath the lower motherboard until it is removed from the bottom half of the device.
-
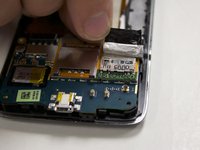
You will notice the SD/SIM card is attached to the lower motherboard by a yellow piece of tape. Remove the tape from the back of motherboard with your fingers.
-
-
-
You will notice a ribbon that connects the upper and lower motherboard together. With your fingers, carefully pull up both ribbons that are attached to the lower motherboard.
-
-
-
After you remove the ribbon, insert the plastic opening tool underneath the lower motherboard until it is released from the bottom of the device.
-
-
-
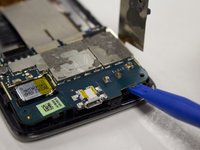
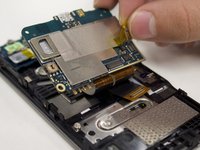
For you to remove the upper motherboard, insert the plastic opening tool underneath the upper motherboard until it is removed from the bottom of the device (same as in step 2).
-


To reassemble your device, follow these instructions in reverse order.
To reassemble your device, follow these instructions in reverse order.
Команду

University of North Texas, Team S2-G5, Riccardelli Fall 2018 Участник University of North Texas, Team S2-G5, Riccardelli Fall 2018
UNT-RICCARDELLI-F18S2G5
3 членов
Автор 5 руководств