Этот документ имеет более свежие изменения. Перейти к последней непроверенной версии.
Введение
A 25 minute, quick and dirty, tutorial to get your screen replaced and get you on with your life.
Выберете то, что вам нужно
-
-
To remove the battery, place your thumb beneath the tab and begin to lift.
-
Pinching the battery, lift up at an angle from the bottom of the phone.
-
-
-
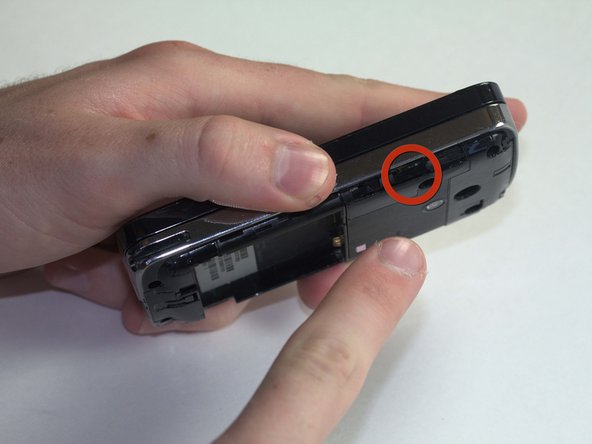
Use a T6 screwdriver to remove the four screws on the rear plate of the HTC Touch Pro.
-
-
-
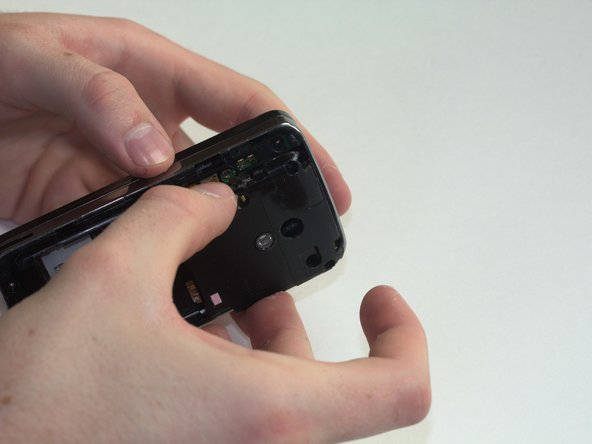
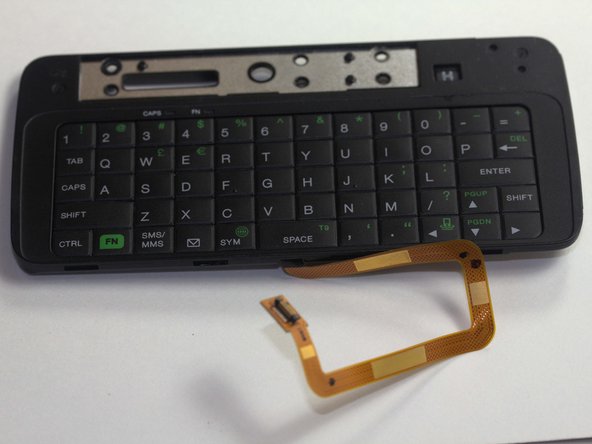
Insert your spudger along the slit between the keyboard and the external casing. Pry open as shown.
-
-
-
-
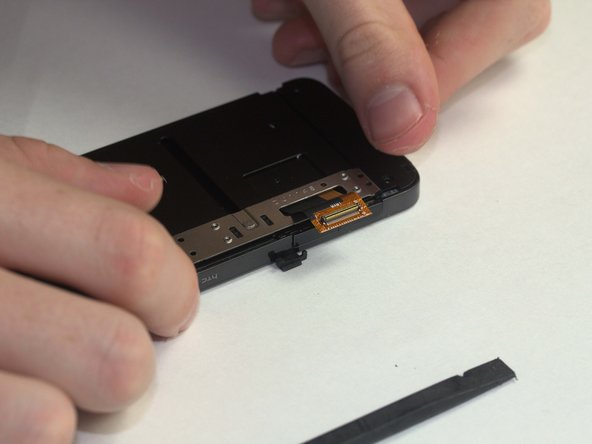
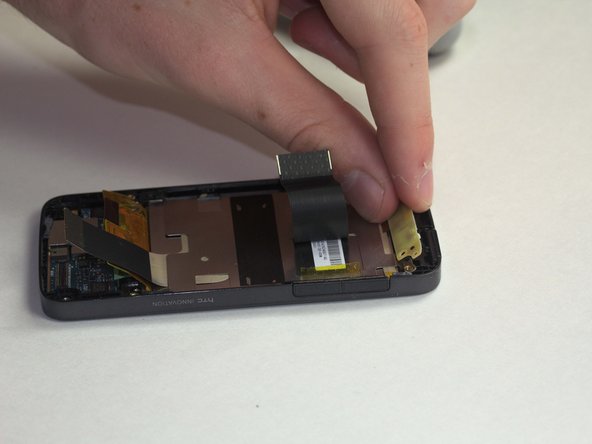
Remove the keyboard ribbon from the motherboard. To do this, simply grasp the ribbon at its base and pry it up at an angle. The ribbon has a metal end that is easily removed from the motherboard.
-
-
-
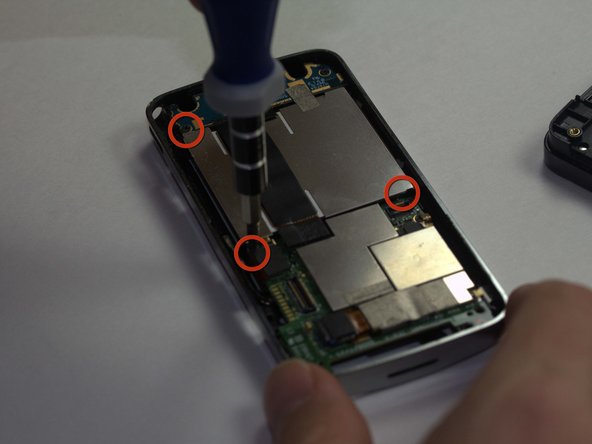
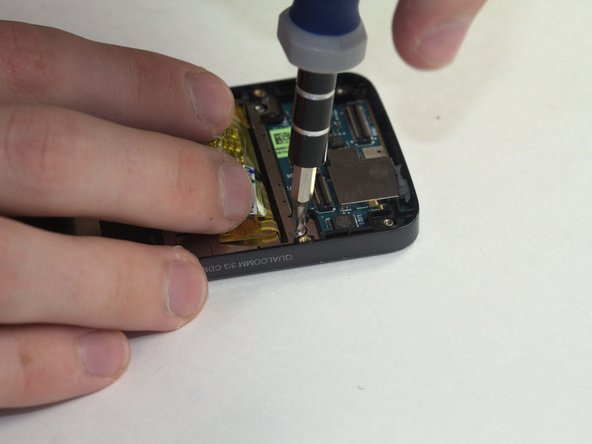
Using a Phillips Head size 0 screwdriver, remove the 3 screws holding in the battery compartment.
-
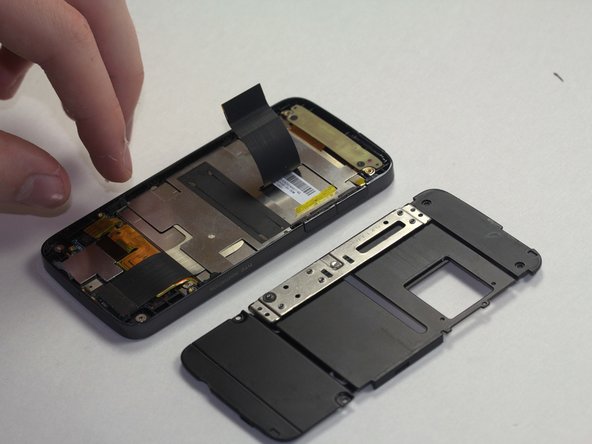
Remove the ribbon covering the battery compartment by pinching it at the base and lifting.
-
-
-
Move the black slider over to the side without the keyboard ribbon. This is done as to allow the display ribbon to slide out later.
-
Using a PH 0 screwdriver, remove the 4 screws on the black slider.
-
-
-
Pry the keyboard away from the screen. Open on the side containing the keyboard ribbon.
-
-
-
Remove the screws on the back of the screen assembly with a PH 0 screwdriver.
-
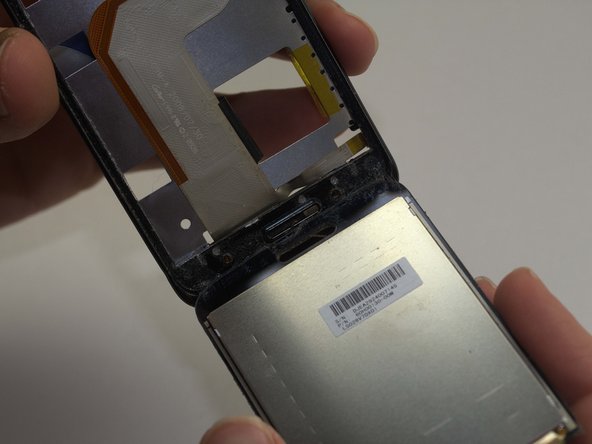
Move the silver slider across the phone so that you are able to pry the back off without damaging the display ribbon.
-
-
-
Using a small wedge, such as a small flat head screwdriver, pry the rear of screen assembly off from the side opposite to the display ribbon.
-
-
-
Remove anything connected to the circuit board behind the phone's navigation buttons.
-
Using a PH 0 screwdriver, remove the 4 screws holding this circuit board in.
-
-
-
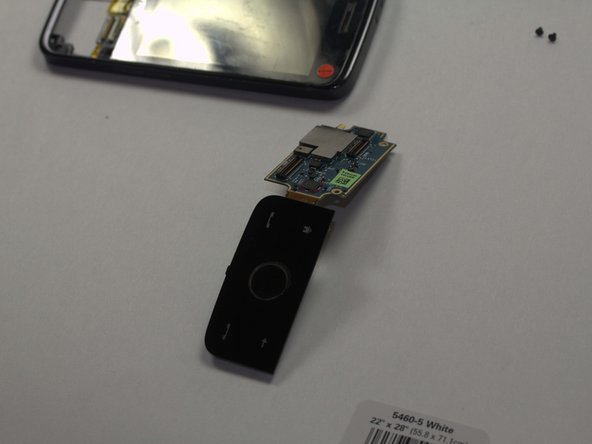
Push on the back of this board gently so as to make the navigation buttons fall out the front. Flip over and remove the screws holding the circuit board in on the front side.
-
Remove the navigation buttons from the phone and replace as necessary.
-
-
-
Using a PH 0 screwdriver, undo the 2 screws on the top of the screen.
-
Remove the beige piece as shown.
-
-
-
At this point, the only thing holding the screen in is glue. Gently push on the back of the screen until you are able to grab it from the bottom.
-
From there, simply peel the two apart.
-


To reassemble your device, follow these instructions in reverse order.
To reassemble your device, follow these instructions in reverse order.
Отменить: Я не выполнил это руководство.
2 участников успешно повторили данное руководство.
Команда

Cal Poly, Team 20-67, Walters Spring 2011 Участник Cal Poly, Team 20-67, Walters Spring 2011
CPSU-WALTERS-S11S20G67
4 членов
Автор 10 руководств