Перейти к основному содержанию

Hamilton Galileo Ventilator Power Supply Replacement

Медицинское оборудование
Ни iFixit, ни данное руководство по ремонту не одобрены и не связаны с производителем медицинского оборудования.

Выберете то, что вам нужно

  1. Hamilton Galileo Ventilator Power Supply Replacement, Opening the Column in the Hamilton Galileo: шаг 1, изображение 1 из 1
    • Use a grounding cable and wrist band connected to the GALILEO or other work surface when you are working on the GALILEO.

    • Remove from GALILEO: External mains power supply, Air and oxygen supplies, Patient breathing circuit (for convenience only), Flow Sensor tubes (for convenience only).

  2. Hamilton Galileo Ventilator Power Supply Replacement: шаг 3, изображение 1 из 1
    • Loosen the rear panel of the column by removing the six hexagonal-drive (Allen) screws that hold it in place.

  3. Hamilton Galileo Ventilator Power Supply Replacement: шаг 4, изображение 1 из 2 Hamilton Galileo Ventilator Power Supply Replacement: шаг 4, изображение 2 из 2
    • Without removing any electrical connections, open the left side of the column as wide as practical.

    • This exposes: GALILEO’s internal power supply, The battery fuse, The diagnostic LEDs on the power supply’s main circuit board, and the back up batteries.

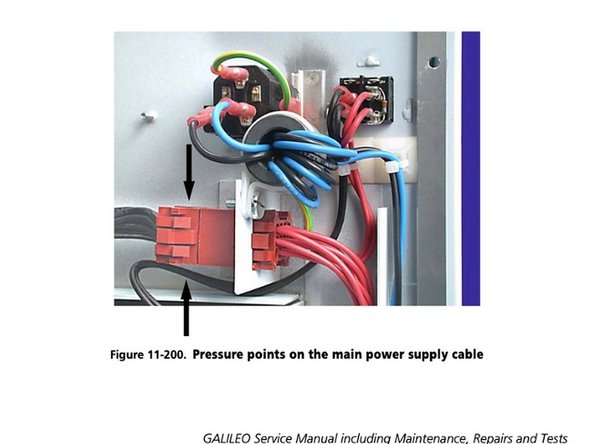
    • Make sure no electrical connections are touching the column.

    • Make sure all green/brown grounding (earthing) cables are securely in place.

  4. Hamilton Galileo Ventilator Power Supply Replacement, Power Supply: шаг 6, изображение 1 из 2 Hamilton Galileo Ventilator Power Supply Replacement, Power Supply: шаг 6, изображение 2 из 2
    • Remove all cables connecting power supply to GALILEO.

    • To remove the main power connector, squeeze on the two points indicated in the second picture.

    • Remove the rear cover and place it on a suitable surface.

  5. Hamilton Galileo Ventilator Power Supply Replacement: шаг 8, изображение 1 из 1
    • Unscrew the retaining strip securing the power supply in its housing.

  6. Hamilton Galileo Ventilator Power Supply Replacement: шаг 9, изображение 1 из 1
    • Slide the power supply out from its housing.

  7. Hamilton Galileo Ventilator Power Supply Replacement: шаг 10, изображение 1 из 2 Hamilton Galileo Ventilator Power Supply Replacement: шаг 10, изображение 2 из 2
    • To install the new power supply, simply do steps 5-2 in reverse.

    • Make sure the security clamp (shown in picture) is tight before reinstalling power supply.

    • Perform the internal voltage test linked here: page 7-5 of Section 7.3, Checking voltages.

    • If this test is not successful, it is likely that there is a loose connection somewhere between the internal power supply and the printed circuit boards. Check the wires to make sure they are securely fastened.

    • When the above test is successful, continue with the tests in the following sections:

    • 1) Section7, Checking hardware, voltages, and interface

    • 2) Either: Section 9, Running Original Upgrade 1 test software OR Section 10, Running Upgrade 2 test software

Заключение

To reassemble your device, follow these instructions in reverse order.

Еще один человек закончил это руководство.

Ian Van Sciver

Участник с: 04/09/20

332 Репутация

Автор 2 руководств

Команда

Cal Poly, Team S7-G26, Paton Spring 2020 Участник Cal Poly, Team S7-G26, Paton Spring 2020

CPSU-PATON-S20S7G26

3 членов

Автор 4 руководств

0 Комментариев

Добавить комментарий

Просмотр статистики:

За последние 24часов: 0

За последние 7 дней: 3

За последние 30 дней: 4

За всё время: 502