Введение
Replacing the DC motor requires you remove the back panel and light sensor circuit board. The most difficult part of this replacement is removing the clips holding the fur on to the back panel.
Выберете то, что вам нужно
-
-
Use a flathead screwdriver to remove the two 10mm screws on the base of the Furby.
-
-
-
Use a Phillips #0 driver to unscrew the eight 10mm screws.
-
Remove the base ring after unscrewing all the screws.
-
-
-
Locate the two middle clips first.
-
Locate the two remaining clips on Furby's sides, they are opposite each other.
-
Orient the Furby upside down with the tail facing away from you.
-
-
-
Insert a metal prying tool directly into the clip opening.
-
Press upward into the clip. At the same time, use your other hand to pull away the plastic seam from the Furby's body.
-
Repeat the previous step to remove the remaining three clips.
-
-
-
-
Locate the two 10mm screws and remove them with the Phillips #0 head screwdriver.
-
Lift up on the fur covering until the face of the Furby is exposed.
-
-
-
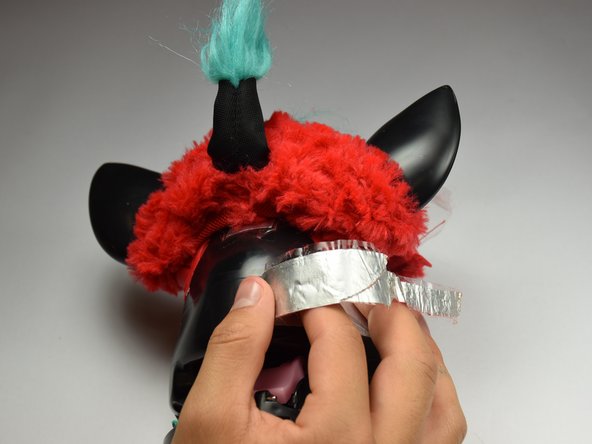
Orient the Furby on its side to where the beak is facing left and locate the edge of the aluminum tape.
-
Lift tape gently and peel back until the tape is nearly removed.
-
-
-
Locate the four 10mm screws. Two on either side of body, and two on top of back plate, around the tape.
-
Remove the 10mm screws with the Phillips#0 screwdriver.
-
-
-
Peel the tape gently, grabbing it from the bottom edge and folding the tape upward.
-
-
-
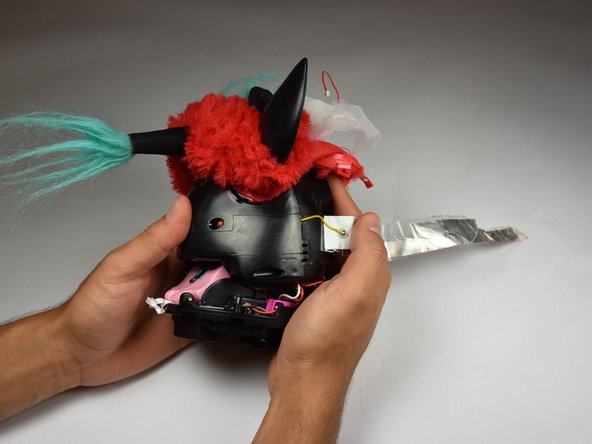
Orient the Furby face down, with the base facing away from you.
-
Locate the clips below the ears.
-
Repeat the technique used in Step 6. Create leverage using a metal prying tool to press upward into the clip, while also pulling back on the clip itself.
-
-
-
Remove the loose, plastic back panel by pulling the panel away from Furby's body.
-
-
-
Remove the 10mm Phillips #0 screw holding the circuit board in.
-
Gently lift out the circuit board.
-
-
-
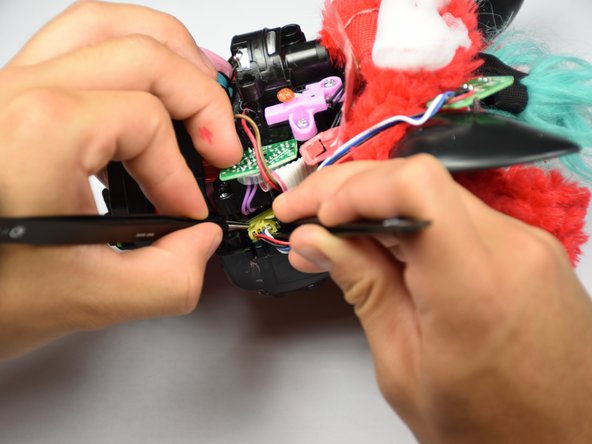
Orient the Furby with the tail pointing left and the face pointing right.
-
Use the pointed tweezers to spread open the socket, and the blunt tweezers to grip and tug out the connector.
-
Insert your replacement light sensor connector.
-
-
-
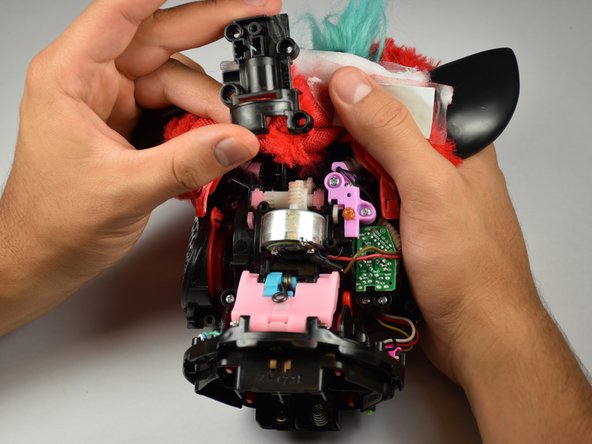
Unscrew the four screws holding the motor housing in place.
-
Remove the motor housing.
-
-
-
Orient Furby with the beak facing right.
-
Locate the red DC motor connector.
-
Gently remove the connector using blunt and pointed tweezers.
-


To reassemble your device, follow these instructions in reverse order.
To reassemble your device, follow these instructions in reverse order.
Отменить: Я не выполнил это руководство.
7 участников успешно повторили данное руководство.
Команда

Cal Poly, Team 15-5, Livingston Fall 2016 Участник Cal Poly, Team 15-5, Livingston Fall 2016
CPSU-LIVINGSTON-F16S15G5
4 членов
Автор 9 руководств
10 Комментариев
Hi. Where can I buy a replacement motor please?
Generic replacement motors are on Ebay. The one I got was RF-300CA
I could not find the exact motor.
Specs: 1.5-6 volt.
24.2mm x 12.4mm (24x12).
10 or 12mm long shaft x 2mm diameter.
.99 cents free shipping. Two weeks from China.
https://www.ebay.com/itm/RF-300CA-DC-1-5V-6V-815...
You will need to de-solder the little half-moon shaped control board off the bottom of the old motor. Crazy glue it to the bottom of the new motor. Then solder the the red wires together and black wires together. Then solder them to the board. The old motor had spikes sticking out the bottom to connect the control board. The generic replacement motors have wires instead. I searched the entire internet. I could not find the exact motor.
https://www.youtube.com/watch?v=6WWecJ_I... It’s in Spanish, but you’ll get the idea.
To get the ears off. Firmly twist and pull them…HARD.
Good luck.
And how do I disconnect the coil from the motor? Just pulling hard?
Ronkly -