Перейти к основному содержанию

Hipstreet Titan Plus Motherboard Replacement

Выберете то, что вам нужно

  1. Hipstreet Titan Plus Motherboard Replacement, Motherboard: шаг 1, изображение 1 из 2 Hipstreet Titan Plus Motherboard Replacement, Motherboard: шаг 1, изображение 2 из 2
    • Use the plastic opening tools to pry the screen from the back of the device.

  2. Hipstreet Titan Plus Motherboard Replacement: шаг 2, изображение 1 из 1
    • Use the spudger to remove the speaker from the back casing of the device.

  3. Hipstreet Titan Plus Motherboard Replacement: шаг 3, изображение 1 из 1
    • Remove the black adhesive strips from the wires using the tweezers, and set the strips aside.

  4. Hipstreet Titan Plus Motherboard Replacement: шаг 4, изображение 1 из 2 Hipstreet Titan Plus Motherboard Replacement: шаг 4, изображение 2 из 2
    • Use the spudger to release three (3) black clips connecting the components to the motherboard.

  5. Hipstreet Titan Plus Motherboard Replacement: шаг 5, изображение 1 из 2 Hipstreet Titan Plus Motherboard Replacement: шаг 5, изображение 2 из 2
    • Unscrew the motherboard using a J0 Phillips head screwdriver.

  6. Hipstreet Titan Plus Motherboard Replacement: шаг 6, изображение 1 из 2 Hipstreet Titan Plus Motherboard Replacement: шаг 6, изображение 2 из 2
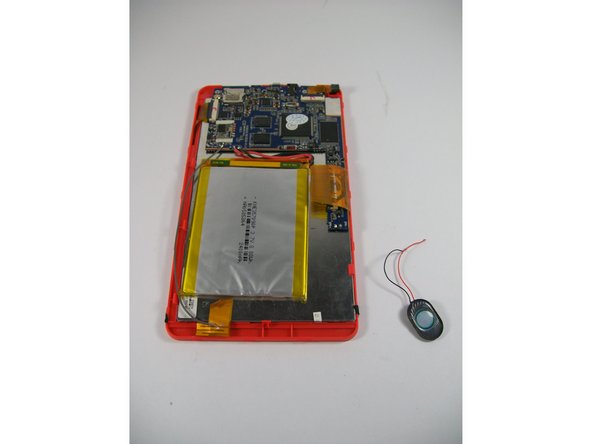
    • Use the metal spatula to remove the battery from the back of the screen.

  7. Hipstreet Titan Plus Motherboard Replacement: шаг 7, изображение 1 из 2 Hipstreet Titan Plus Motherboard Replacement: шаг 7, изображение 2 из 2
    • Use the soldering iron to heat the end of the wires connecting the speaker to the motherboard.

    • Apply heat until the wires are free.

  8. Hipstreet Titan Plus Motherboard Replacement: шаг 8, изображение 1 из 2 Hipstreet Titan Plus Motherboard Replacement: шаг 8, изображение 2 из 2
    • Using the soldering iron, apply heat to the end of the wires until they are free from the motherboard.

  9. Hipstreet Titan Plus Motherboard Replacement: шаг 9, изображение 1 из 2 Hipstreet Titan Plus Motherboard Replacement: шаг 9, изображение 2 из 2
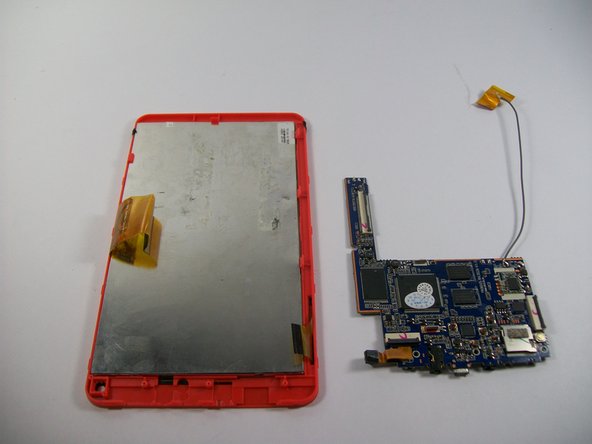
    • Now that the battery and speaker are removed, the black clips are undone, and the motherboard is unscrewed, remove the motherboard.

Заключение

To reassemble your device, follow these instructions in reverse order.

Еще один человек закончил это руководство.

Kari Cannon

Участник с: 10/30/15

500 Репутация

Автор 4 руководств

Команда

UMass Dartmouth, Team 1-1, Miles Fall 2015 Участник UMass Dartmouth, Team 1-1, Miles Fall 2015

UMASSD-MILES-F15S1G1

3 членов

Автор 10 руководств

0 Комментариев

Добавить комментарий

Просмотр статистики:

За последние 24часов: 2

За последние 7 дней: 4

За последние 30 дней: 5

За всё время: 352