Введение
After extended use, the charging port may be worn down. If the device will not power on after charging, the charging port may be defective.
Выберете то, что вам нужно
-
-
Remove the back cover of the device using a combination of both plastic opening tools.
-
Use your plastic opening tool pry open a corner of the device, then continue down the side of the device with the tool to completely open the device.
-
-
-
-
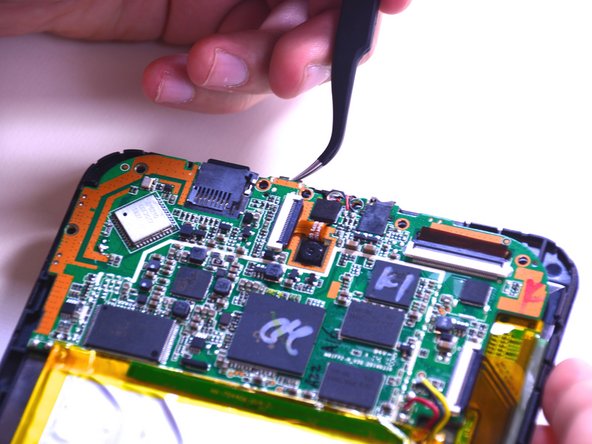
Gently lift the motherboard up to extract the charging port out with the tweezers.
-


To reassemble your device, follow these instructions in reverse order.
To reassemble your device, follow these instructions in reverse order.
Отменить: Я не выполнил это руководство.
2 участников успешно повторили данное руководство.
Команда

USF Tampa, Team 1-2, Leahy Winter 2015 Участник USF Tampa, Team 1-2, Leahy Winter 2015
USFT-LEAHY-W15S1G2
3 членов
Автор 10 руководств