Перейти к основному содержанию

Holmes HEH8031 Control Buttons Replacement

Выберете то, что вам нужно

  1. Holmes HEH8031 Control Buttons Replacement, Housing: шаг 1, изображение 1 из 1
    • Ensure the device is unplugged from the wall outlet.

  2. Holmes HEH8031 Control Buttons Replacement: шаг 2, изображение 1 из 1
    • Remove eight 12-mm Phillips #2 screws from the back cover.

  3. Holmes HEH8031 Control Buttons Replacement: шаг 3, изображение 1 из 2 Holmes HEH8031 Control Buttons Replacement: шаг 3, изображение 2 из 2
    • Turn heater over so the controls are facing up.

    • Lift the front housing away from the back of the fan and slowly fold the front housing back down to the floor.

    • Internal wires are connected to both halves of the housing. Be careful when separating the housing.

  4. Holmes HEH8031 Control Buttons Replacement, Circuit Board Removal: шаг 4, изображение 1 из 1
    • Remove four 12mm Phillips #2 screws from the circuit board.

  5. Holmes HEH8031 Control Buttons Replacement, Control Buttons: шаг 5, изображение 1 из 3 Holmes HEH8031 Control Buttons Replacement, Control Buttons: шаг 5, изображение 2 из 3 Holmes HEH8031 Control Buttons Replacement, Control Buttons: шаг 5, изображение 3 из 3
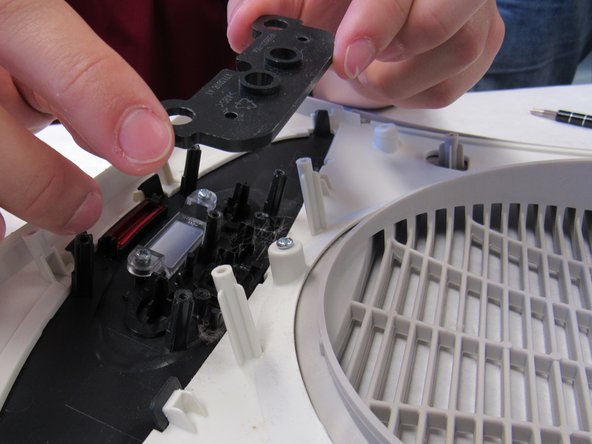
    • Remove the two Phillips #2 12mm screws from the button retainer.

    • Lift the button retainer off.

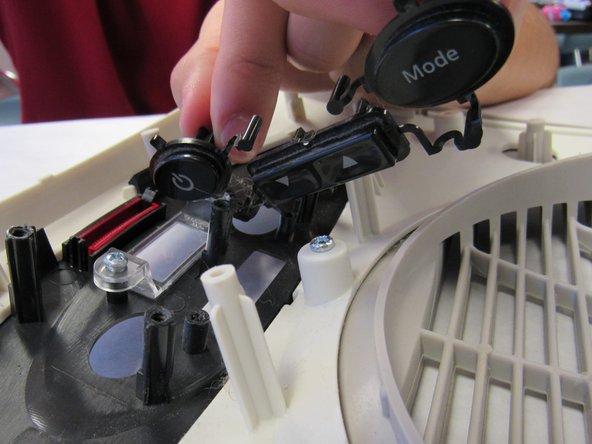
    • Remove the interconnected buttons.

    • If the buttons are broken, replace them.

    • If the buttons are sticking, clean them in warm soapy water and allow to dry.

  6. Holmes HEH8031 Control Buttons Replacement: шаг 6, изображение 1 из 3 Holmes HEH8031 Control Buttons Replacement: шаг 6, изображение 2 из 3 Holmes HEH8031 Control Buttons Replacement: шаг 6, изображение 3 из 3
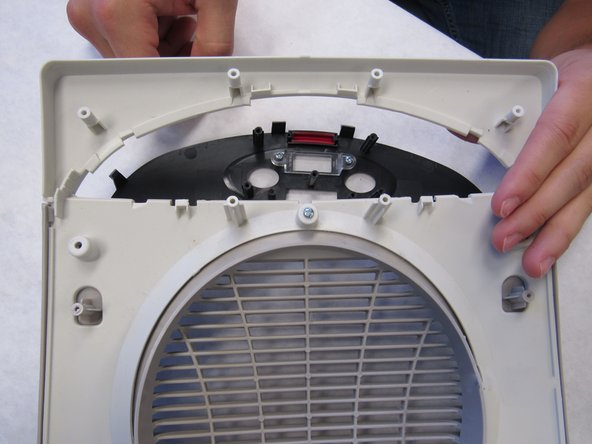
    • Using light finger pressure, carefully push the black plastic tabs off the white plastic hooks.

    • Remove the black plastic bracket out through the front of the heater housing.

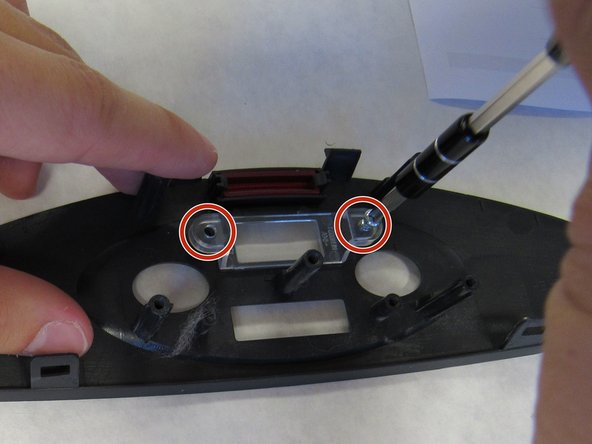
    • Remove the two Phillips #2 12mm screws and remove the clear window from the black plastic bracket.

    • If the buttons were sticking, clean the black plastic bracket in warm soapy water and allow to dry.

    • If the clear window was dirty, clean it in warm soapy water and allow to dry.

Заключение

To reassemble your device, follow these instructions in reverse order.

Еще один человек закончил это руководство.

Chris Shaffer

Участник с: 10/12/16

255 Репутация

Автор 2 руководств

Команда

IUPUI, Team 2-1, Baechle Fall 2016 Участник IUPUI, Team 2-1, Baechle Fall 2016

IUPUI-BAECHLE-F16S2G1

4 членов

Автор 16 руководств

0 Комментариев

Добавить комментарий

Просмотр статистики:

За последние 24часов: 0

За последние 7 дней: 0

За последние 30 дней: 1

За всё время: 460