Перейти к основному содержанию

Home construction tool fixing screws toaster repair (Model #1)

Выберете то, что вам нужно

  1. Home construction tool fixing screws toaster repair (Model #1), Home construction tool fixing screws toaster repair (Model #1): шаг 1, изображение 1 из 3 Home construction tool fixing screws toaster repair (Model #1), Home construction tool fixing screws toaster repair (Model #1): шаг 1, изображение 2 из 3 Home construction tool fixing screws toaster repair (Model #1), Home construction tool fixing screws toaster repair (Model #1): шаг 1, изображение 3 из 3
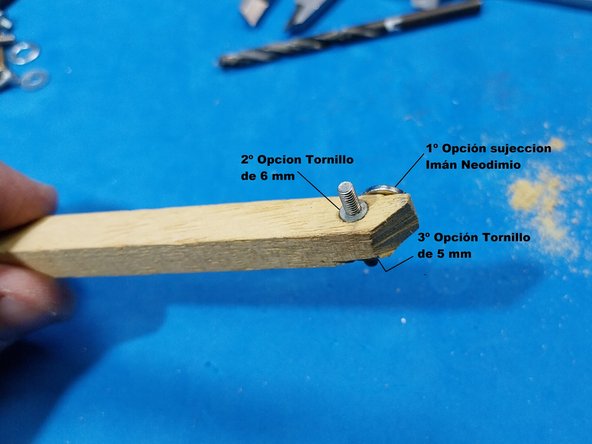
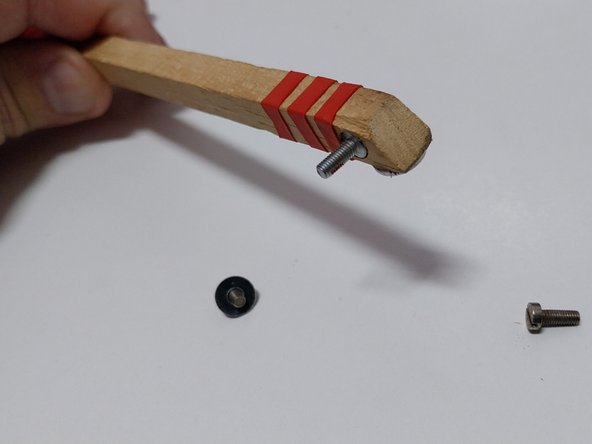
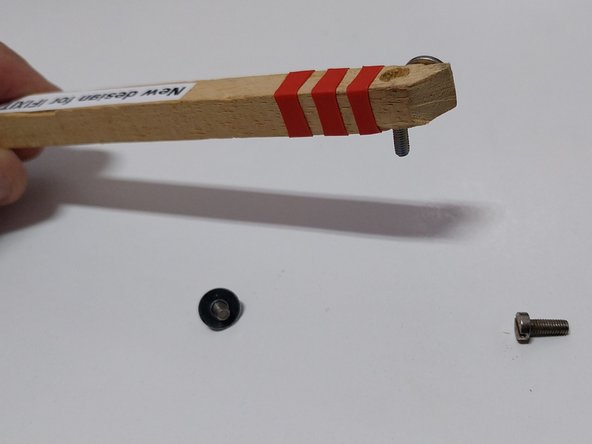
    • Homemade construction tool, for holding screws using 3 options, Neodymium Magnet, left side slot for 6 mm head screw and right side slot for 5 mm head screw.

    • Photo of materials to be used, there are more materials than those used in this design, since I have made 2 variants of the homemade screw-holding tool at the same time, in another document I show the 2nd tool. A 1x1x20 Cm wooden strip has been used, any other similar will work, Neodymium Magnet, and heat shrink tubing.

    • Neodymium magnet.

  2. Home construction tool fixing screws toaster repair (Model #1): шаг 2, изображение 1 из 3 Home construction tool fixing screws toaster repair (Model #1): шаг 2, изображение 2 из 3 Home construction tool fixing screws toaster repair (Model #1): шаг 2, изображение 3 из 3
    • Wooden strip of 1x1x20 cm, the measure of 20 cm depends on the needs of each one, other measures can be used. I used the 1x1 batten that I had that was quite adapted to the idea of ​​having 3 screw fixing points.

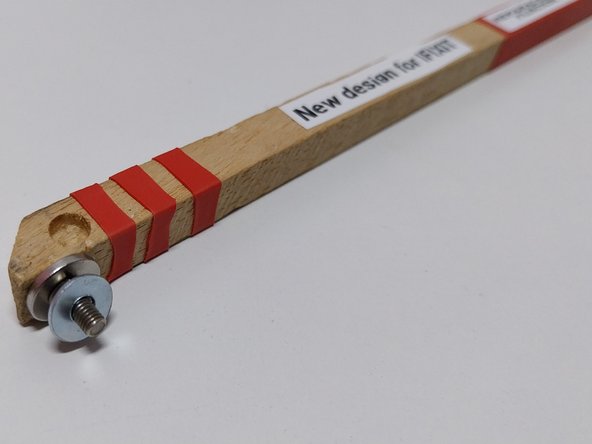
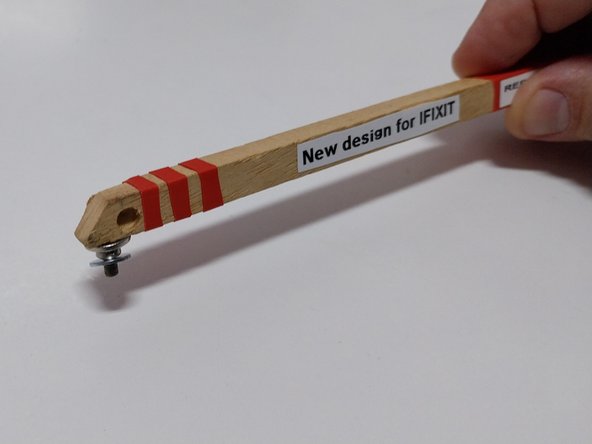
    • Cut the ribbon at 20 cm, the tip is cut at 45º to prevent it from hindering the insertion into the toaster.

  3. Home construction tool fixing screws toaster repair (Model #1): шаг 3, изображение 1 из 3 Home construction tool fixing screws toaster repair (Model #1): шаг 3, изображение 2 из 3 Home construction tool fixing screws toaster repair (Model #1): шаг 3, изображение 3 из 3
    • To fix the Neodymium magnet to the wooden strip, just 1 drop of instant-drying glue, cyanoacrylate type.

    • If we put a screw in the magnet, it can be handled and positioned in the wooden strip more easily.

  4. Home construction tool fixing screws toaster repair (Model #1): шаг 4, изображение 1 из 3 Home construction tool fixing screws toaster repair (Model #1): шаг 4, изображение 2 из 3 Home construction tool fixing screws toaster repair (Model #1): шаг 4, изображение 3 из 3
    • Views of the Neodymium magnet fixed to the wooden strip.

  5. Home construction tool fixing screws toaster repair (Model #1): шаг 5, изображение 1 из 3 Home construction tool fixing screws toaster repair (Model #1): шаг 5, изображение 2 из 3 Home construction tool fixing screws toaster repair (Model #1): шаг 5, изображение 3 из 3
    • On the 2 sides of the wooden strip, next to the magnet, I have made 2 small holes, (Depth 3 to 4 mm) of 5 mm and 6 mm on the other side, to be able to insert "fixing" two separate 5 mm head screws and 6mm.

  6. Home construction tool fixing screws toaster repair (Model #1): шаг 6, изображение 1 из 3 Home construction tool fixing screws toaster repair (Model #1): шаг 6, изображение 2 из 3 Home construction tool fixing screws toaster repair (Model #1): шаг 6, изображение 3 из 3
    • View of the 6 mm and 5 mm screws in the test positioning in the batten.

  7. Home construction tool fixing screws toaster repair (Model #1): шаг 7, изображение 1 из 2 Home construction tool fixing screws toaster repair (Model #1): шаг 7, изображение 2 из 2
    • Views of one of the 4mm deep holes

  8. Home construction tool fixing screws toaster repair (Model #1): шаг 8, изображение 1 из 3 Home construction tool fixing screws toaster repair (Model #1): шаг 8, изображение 2 из 3 Home construction tool fixing screws toaster repair (Model #1): шаг 8, изображение 3 из 3
    • This step is merely decorative, it is made with a red shrink tube to give it a decorative end and to make it easier to see when it is inserted into the toaster.

    • The heat shrink tubing shrinks and adapts to the surface where it is placed by applying hot air.

  9. Home construction tool fixing screws toaster repair (Model #1): шаг 9, изображение 1 из 1
    • Heat shrink tubing and as it is called in some countries.

  10. Home construction tool fixing screws toaster repair (Model #1): шаг 10, изображение 1 из 3 Home construction tool fixing screws toaster repair (Model #1): шаг 10, изображение 2 из 3 Home construction tool fixing screws toaster repair (Model #1): шаг 10, изображение 3 из 3
    • Views of the finished homemade tool, this is a new design of the original tool that I used, this new design is specially dedicated to the friends of IFIXIT, in another I will document the 2nd Tool that I have made, more elaborate. And I will show the 3 options.

  11. Home construction tool fixing screws toaster repair (Model #1): шаг 11, изображение 1 из 3 Home construction tool fixing screws toaster repair (Model #1): шаг 11, изображение 2 из 3 Home construction tool fixing screws toaster repair (Model #1): шаг 11, изображение 3 из 3
    • Views of the finished tool, in detail.

  12. Home construction tool fixing screws toaster repair (Model #1): шаг 12, изображение 1 из 1
    • Example of use inside a toaster.

    • In another document I will detail the construction of the 2nd homemade Tool to hold screws and facilitate the task of repairing a toaster with the broken Nicrom thread.

Финишная черта

Особая благодарность этим переводчикам:

es en

100%

Эти переводчики помогают нам починить мир! Хотите внести свой вклад?
Начните переводить ›

Carlos López (España - Spain)

Участник с: 07/01/15

51 359 Репутация

Автор 145 руководств

Команда

Master Techs Участник Master Techs

Community

322 членов

Автор 2 536 руководств

0 Комментариев

Добавить комментарий

Просмотр статистики:

За последние 24часов: 0

За последние 7 дней: 2

За последние 30 дней: 10

За всё время: 100