Введение
The motor is the most important part of the vacuum as without it, the vacuum cannot create suction. This is a walkthrough on how to replace the motor.
Выберете то, что вам нужно
-
-
Next, remove the hose from the connector, near the top of the vacuum's rear. This can be achieved by twisting and then pulling down.
-
-
-
Use a Phillips #1 screwdriver to remove the two screws on the part holding the hose to the back of the vacuum.
-
-
-
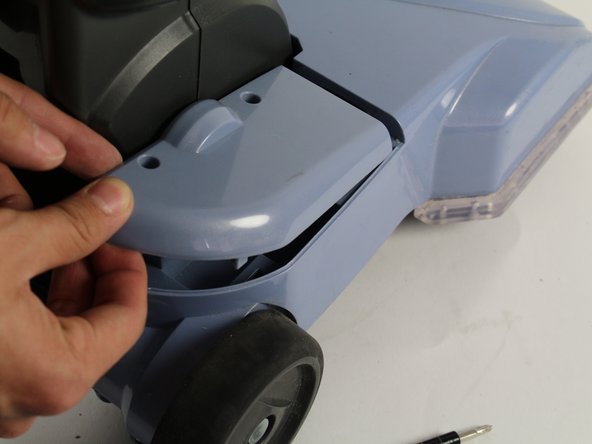
Use a Phillips #1 screwdriver to remove the two screws that secure the hose-release tab.
-
-
-
-
Use a Phillips #1 screwdriver to remove the two screws on the top of the vacuum holding the tab on the left of the vacuum.
-
-
-
Use a Phillips #1 screwdriver to remove the two screws on the top of the vacuum head holding down the tab on the right.
-
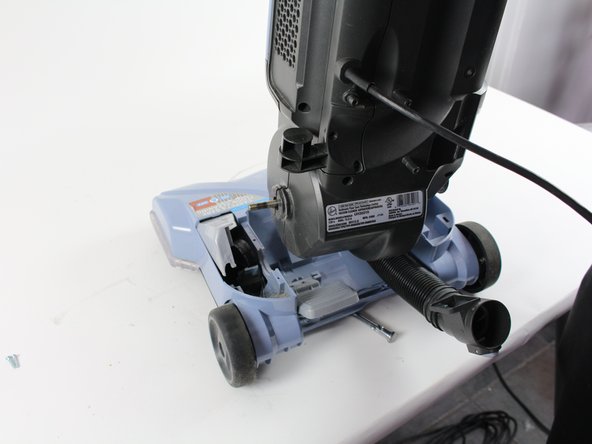
To remove the tab, slide backwards and then pull up. There is a tab holding the piece down so use force if necessary.
-
-
-
Slide the belt off of the metal rod on the left of the vacuum shaft. Pull the vacuum up and it should easily separate into two pieces.
-
-
-
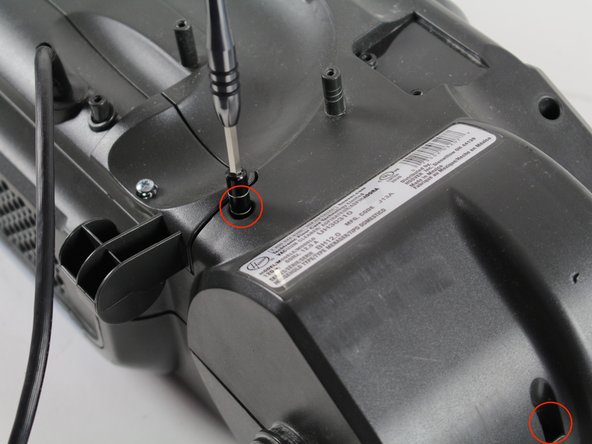
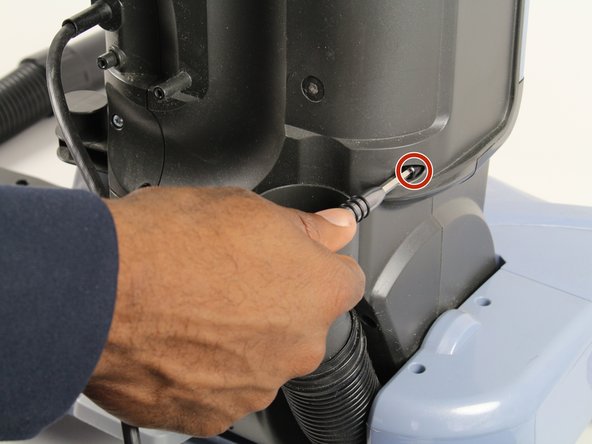
Use a Phillips #1 screwdriver to remove the 6 screws on the back and bottom of the vacuum shaft.
-


To reassemble your device, follow these instructions in reverse order.
To reassemble your device, follow these instructions in reverse order.
Отменить: Я не выполнил это руководство.
2 участников успешно повторили данное руководство.
Команда

Cal Poly, Team S12-G4, Banghart Winter 2018 Участник Cal Poly, Team S12-G4, Banghart Winter 2018
CPSU-BANGHART-W18S12G4
5 членов
Автор 9 руководств