Перейти к основному содержанию

Hoover Windtunnel Air Steerable Upright Motor Assembly Replacement

Выберете то, что вам нужно

  1. Hoover Windtunnel Air Steerable Upright Motor Assembly  Replacement, HEPA Filter: шаг 1, изображение 1 из 2 Hoover Windtunnel Air Steerable Upright Motor Assembly  Replacement, HEPA Filter: шаг 1, изображение 2 из 2
    • Put the cleaner into the upright position, turn the power off, and unplug the power cord.

  2. Hoover Windtunnel Air Steerable Upright Motor Assembly  Replacement: шаг 2, изображение 1 из 3 Hoover Windtunnel Air Steerable Upright Motor Assembly  Replacement: шаг 2, изображение 2 из 3 Hoover Windtunnel Air Steerable Upright Motor Assembly  Replacement: шаг 2, изображение 3 из 3
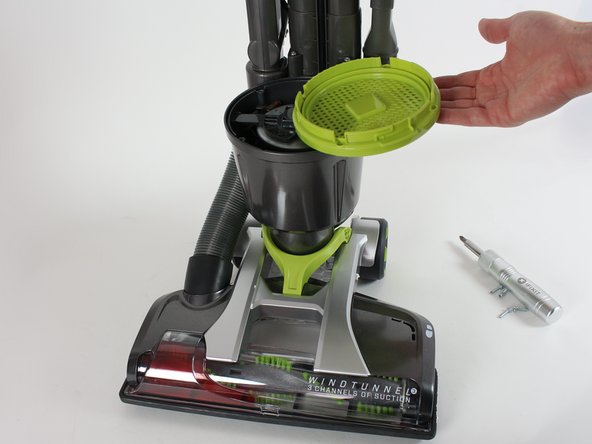
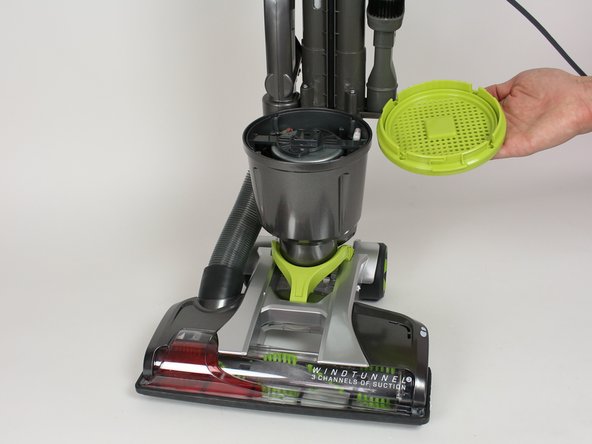
    • Remove the dirt cup from the cleaner.

    • The HEPA filter is located under the dirt cup and under where it says HEPA.

    • Twist the top counterclockwise to unlock the cap.

  3. Hoover Windtunnel Air Steerable Upright Motor Assembly  Replacement: шаг 3, изображение 1 из 2 Hoover Windtunnel Air Steerable Upright Motor Assembly  Replacement: шаг 3, изображение 2 из 2
    • Lift the HEPA filter out.

    • Tap the filter against the inside of a trashcan to knock out the dirt and debris or replace as necessary.

    • Do not wash the HEPA Filter.

  4. Hoover Windtunnel Air Steerable Upright Motor Assembly  Replacement, Motor Assembly: шаг 4, изображение 1 из 3 Hoover Windtunnel Air Steerable Upright Motor Assembly  Replacement, Motor Assembly: шаг 4, изображение 2 из 3 Hoover Windtunnel Air Steerable Upright Motor Assembly  Replacement, Motor Assembly: шаг 4, изображение 3 из 3
    • Remove the 4 retaining screws and remove the filter tray.

    • Screw lengths are approximately 3/4".

  5. Hoover Windtunnel Air Steerable Upright Motor Assembly  Replacement: шаг 5, изображение 1 из 1
    • Pull the motor housing vertically to dislodge the motor.

  6. Hoover Windtunnel Air Steerable Upright Motor Assembly  Replacement: шаг 6, изображение 1 из 3 Hoover Windtunnel Air Steerable Upright Motor Assembly  Replacement: шаг 6, изображение 2 из 3 Hoover Windtunnel Air Steerable Upright Motor Assembly  Replacement: шаг 6, изображение 3 из 3
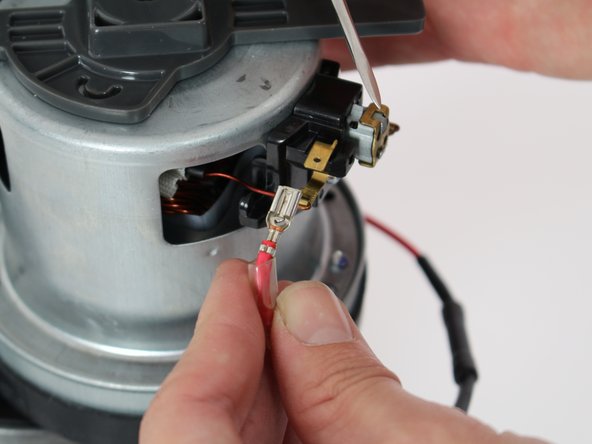
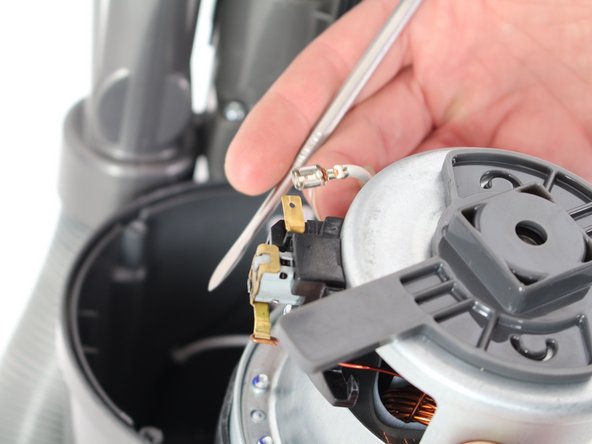
    • Use a plastic spudger or opening tool to press on the small circle and wiggle clips free.

Заключение

To reassemble your device, follow these instructions in reverse order.

2 участников успешно повторили данное руководство.

steven hoover

Участник с: 09/26/17

257 Репутация

Автор 2 руководств

Команда

Cal Poly, Team S7-G2, Banghart Fall 2017 Участник Cal Poly, Team S7-G2, Banghart Fall 2017

CPSU-BANGHART-F17S7G2

5 членов

Автор 14 руководств

0 Комментариев

Добавить комментарий

Просмотр статистики:

За последние 24часов: 2

За последние 7 дней: 14

За последние 30 дней: 50

За всё время: 3,849