Введение
This guide will walk you through the process of replacing a malfunctioning motherboard in a Hott T725-8G.
Выберете то, что вам нужно
-
-
Carefully remove the black electrical tape connecting the motherboard to the ribbon wire.
-
-
-
-
Squeeze both sides of the protector over the ribbon wire to release it.
-
Use the tweezers to gently remove the ribbon wire from the holder.
-
Repeat steps for all three ribbon wires shown.
-
-
-
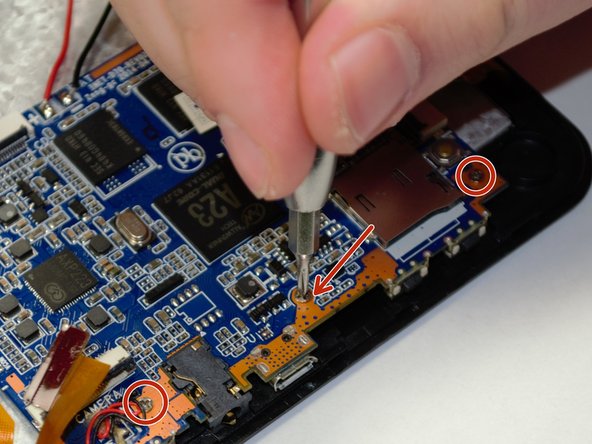
Use the #000 Phillips screw driver to remove all three 2.2mm screws attached to the mother board.
-


You are now able to remove the motherboard.
To reassemble your device, follow these instructions in reverse order.
You are now able to remove the motherboard.
To reassemble your device, follow these instructions in reverse order.
Отменить: Я не выполнил это руководство.
Еще один человек закончил это руководство.
Команда

UMass Dartmouth, Team 6-2, Martin Fall 2016 Участник UMass Dartmouth, Team 6-2, Martin Fall 2016
UMASSD-MARTIN-F16S6G2
3 членов
Автор 11 руководств